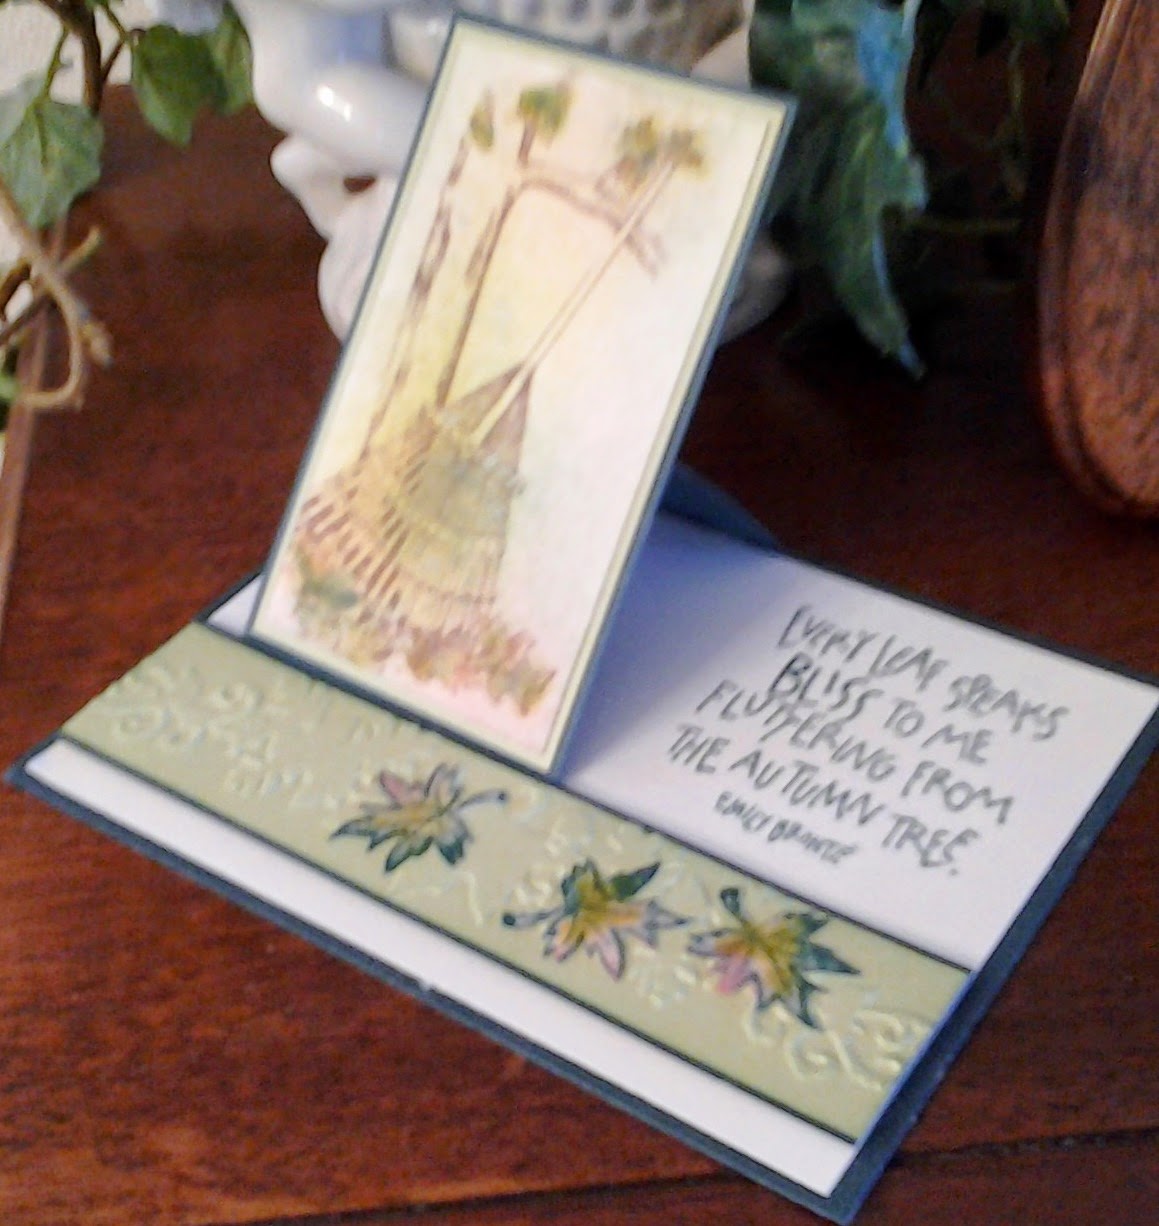
Friday, September 26, 2014

Every Leaf Speaks Bliss to Me . . .


. . . awe, yes, such a beautiful poem by Emile Bronte.  And a perfect sentiment for this card, which by the way, is my first time making a One Flap Easel card.  I used the stippling technique to color the image and the cut out leaves.  Stippling is done by using a thick stiff bristle paint (or stencil) brush, tapping directly onto the ink pad, then tapping it onto the card stock.  Very easy to do and it's a fun technique so I hope you'll give it a try.

1. Card Base:
       4-1/4" x 5-1/2" Dark Green CS
       4" x 5-1/4" Olive Green CS
                      
2. Flap:    
       2-3/8" x 4-1/2" scored at 1/2"
and 2 1/2",  Dark Green CS
       2-1/4" x 3-7/8" Olive Green CS
       2-3/8” x 4-1/8” Dark Green CS
       2-1/8" x 3-3/4" Cream CS

3. Stamp the rake design (Serendipity Stamps) on Cream card stock in Memories Chestnut dye ink.  Color using stipple brushes and inkpads:  Fresco Sicilian Spice, Distress Pine Needles, and Distress Crushed Olive.  Layer onto the Olive Green card stock, then layer onto the smaller, un-scored Dark Green panel.

4. Stamp the sentiment Every Leaf Speaks Bliss to Me from Inkadinkado onto the right side of the Cream card stock using Distress Pine Needles ink.  Make sure that there is enough room for your flap. Place adhesive on the back of the 1/2" Dark Green tab and attach it to the back of the Cream piece.  Layer the stamped assembly onto the Dark Green strip, be sure to apply adhesive only to the portion below the score line.

5. Embossed Panel:  
            1-1/4” x 5-1/4” Dark Green CS
            1-1/8” x 5- ¼ “ Olive Green CS

6.  Emboss Olive Green strip with Leaf Garland from the Sizzix Thankful Background  Borders set.  Layer and center it onto the Dark Green strip and then attach it 1/4” from the bottom of the Cream panel.

7.  On a Cream scrap, stamp with the small leaf from the Hero Arts Real Leaves stamp set three times using Distress Pine Needles inkpad.  Color the leaves by stippling from the three ink pads- Fresco Sicilian Spice, Distress Pine Needles, and Distress Olive; cut out; distress the edges with Distress Pine Needles; glue onto the embossed panel.  And there you have it!  I love doing all that stippling and it provides a really great background.


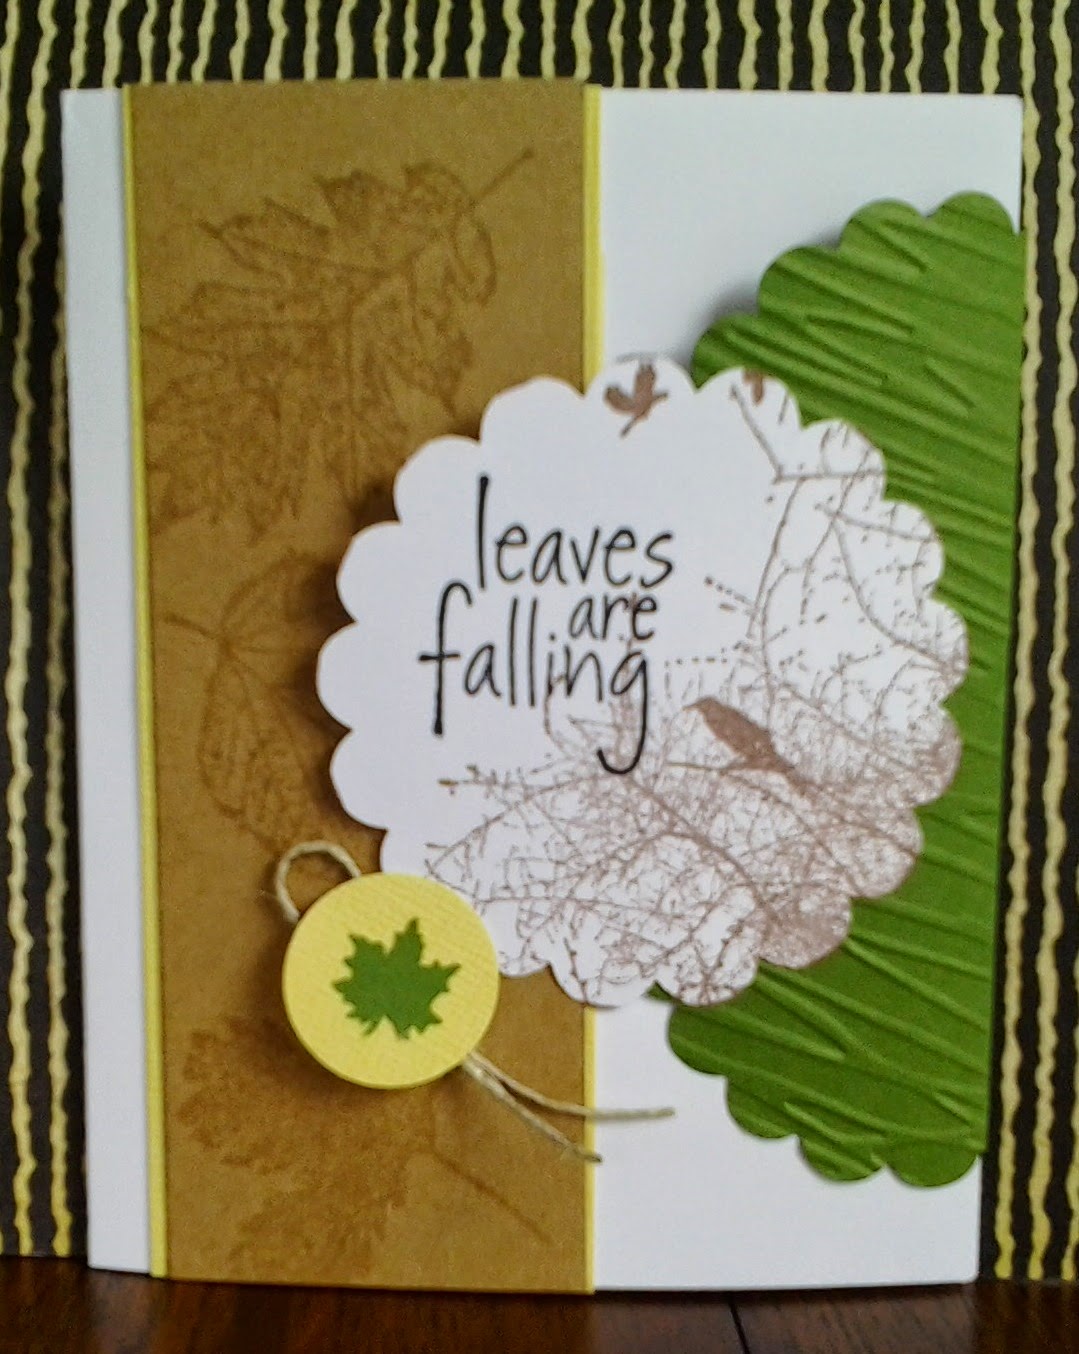
Here, we have another fall card - a Circle Framelit Closure Card

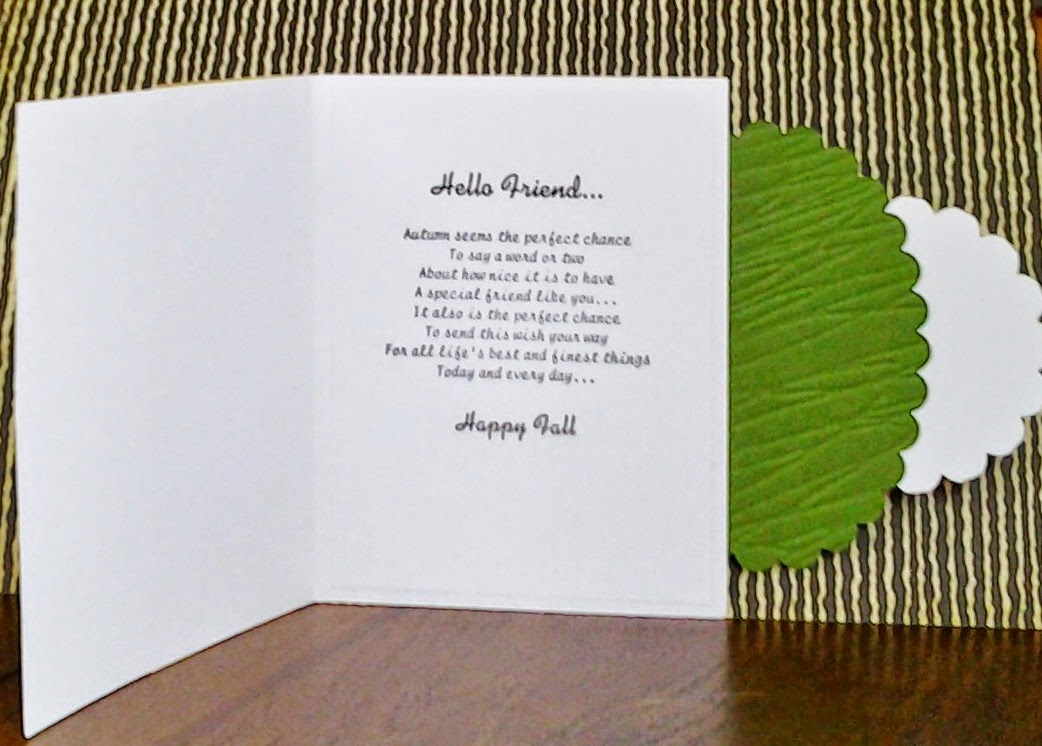
I made this card by watching it done on YouTube.  There are several things that I did differently: (1) used leaf stamps and Versa Mark ink to stamp on the brown panel, which is layered onto a yellow panel, (2) embossed the scalloped oval diagonally with the Branches embossing folder; and (3)  used a small punched leaf for the closure holder instead of a brad.  The card closes from the left, but it also has a flap on the right that folds over the closed card.  The little leaf layered onto a the yellow circle holds the flap in place.  Rather than trying to explain it here, I think you'll get a better idea of how it works if you watch the video - and I don't do videos - yet.  This link will take you to the video: https://www.youtube.com/watch?    v=Px5L63LdPIA


Halloween is not my "thing" but still it's a special day to me because my youngest sister was born on Halloween and also my niece.  So when I saw the Tim Holtz Alterations die called Halloween Shadows,  I really wanted to use it for birthday cards but also for my card class.  On Pinterest I saw a card that had a haunted house in the middle of a pumpkin and decided that idea would be a perfect way to use the Halloween Shadows die.  Part of the die strip has a Trick & Treat sentiment design, so that is what is used for the inside of the card for my class.  For the birthday cards, I'll use birthday sentiments instead. Spellbinders Nestabilities Classic Ovals Small are the dies I used to make the pumpkin.  The pumpkin stem was made by using a small flower pot punch, turned it upside down, and then glued in place.  Perfect!  The leaf was cut with a Cuttlebug die set called Leaves, but any leaf die or punch will work.  
  
Also for my card class, I decided to do a Halloween Flip-its card.  The die is by Sizzix and called Card, Circle Flip-its #2.  The first pic is the front of the card and the second pic is the inside.  Decorative elements are a few sequins and some orange and white twine for the bow on the inside.  I was so surprised to find out how easily this die set works.  I am now hooked on it!  Here is a YouTube link so you can see how to use the die with your Big Shot:  https://www.youtube.com/watch?v=sUdikwhBDqk

 
Well that's it for my September card class.  I hope you've seen something you'd like to try.  It's been fun sharing with you.  Thanks for stopping by and check back soon for some more ideas.
May your creative juices keep flowing and may your days be blessed.
Annie


Monday, September 22, 2014

Fall Has Come Upon Us!

How beautifully summer has turned into fall.  I am thankful that I live in a place that shows the splendor of all four seasons.  Our Creator paints a new picture every day and I'm always excited to jump out of bed in the morning just to see His newest work of art.  Really!  I climb out of bed and the first thing I do is pull back the curtain and look outside.  Psalm 118:24 (NKJV) tells us,

"This is the day the Lord has made;
We will rejoice and be glad in it."

A changing season also means that it is time to change my church library display.  I've been busily working up a design and die cutting leaves with my Big Shot.  Truly, the Lord has blessed me by calling me to be our church librarian because I get to do three things that are a passion with me:  I love reading books, I love being creative, and I love making available materials that will help others grow in their spiritual life and for good wholesome entertainment. 


As I mentioned above, all the leaves were die cut.  I found a picture of a basket on the internet, enlarged and printed it, cut it out, and glued it on the poster sideways so the leaves would look like they are falling from the basket.  Several years ago I made the scarecrow.  Joann's had material with a scarecrow pattern, so all I had to do was cut out the pieces, sew them together, stuff, and embellish.  Mr. Scarecrow has been in many displays over the years.  The straw bale came from Joann's too, at a good price - only $1.  The sunflowers and the vines came from the Dollar Store.  Being creative can also be a lesson in good stewardship.  I think the display is colorful and cheerful and I hope it puts a smile on the face of viewers.

I pray you are experiencing the blessings of the fall season.  Enjoy!
Annie

Monday, September 15, 2014

The Last Summer Flowers

Good morning paper crafters,

Summer is sliding into fall and we are having a beautiful Indian Summer here in Wenatchee.  Before I turn my card making toward the next season, here are a couple of flower cards to say goodbye to summer.  This color combination has been around for a long time, but I just never get tired of it.  Isn't it amazing that brown can be so bright and cheerful!
 
This card is a top fold.
 
And this one is a side fold.

 
The flowers were made with punches from Stampin' Up:  Blossom, Pansy, Petite Petals, and the Blossom Petals Builder was used for the leaves.  The final touch was to add some jewels to make the flower centers pop.  The ribbon and the paper is also from Stampin' Up.

Thank you for stopping by.  May a wonderful blessing touch you today.
Ann


Monday, September 1, 2014

Murder at the Mikado by Julianna Deering


 Since I love a good old-fashioned murder mystery, I really enjoyed reading this story.  It was well written, taking lots of twists and turns, with dark secrets being revealed throughout the investigation.  Except for the three main characters, practically everyone else was a possible suspect.  Julianna Deering was an unknown author to me until my reading of Murder at the Mikado.  I’m glad she was brought to my attention and I plan to read more of her murder mysteries.

The story takes place in the 1930’s in a small English town and at the country estate of  Drew Farthering.  Whenever there is a mystery to be solved, Drew somehow ends up in the middle of the investigation.  This time Drew becomes involved at the request from the beautiful wife of one of his employees.  To make matters worse, the wife turns out to be a former girlfriend and this does not sit well with Drew’s fiancĂ©e.  The wife is the first suspect in the murder of a celebrated actor with whom she had had an affair.  I say the first suspect because as the investigation progresses, four or five others are rooted out as possible suspects and they all have a motive for murder.  Just when Drew thinks he might be close to discovering the truth, the story takes another turn and he is hard put to find any solid facts.  

Both the main characters are Christians with good moral character.  The story is without profanity and sexuality – just a good, clean “who done it” murder mystery.  I recommend it to all mystery lovers and plan to donate the book to my church library.

Bethany House Publishers provided this book to me for free in exchange for an honest review.