Showing posts with label Distress Ink. Show all posts

Sunday, September 12, 2021

Welcoming Woods Birthday Card


Annie’s Ink-Lings


What a beautiful fall day we're having today.  Such a nice blessing after a whole day of rainfall yesterday.  Today's card fits right in with the current season.  I saw this design on Pinterest by Piccadilly Stamping.  It is so beautiful that I wanted to pass it on to you.


Just a couple of things to note. The stamp set has a stamp for the trees and one for the ground. I used my Misti to get the right placement. The second thing to remember is to stamp the sentiment before you emboss the layering panel. I included that caution in my directions, but wanted to bring special attention to this detail. Have fun!

Measurements
Card Base 8.5” x 5.5”
Layering Panel 4” x 5.25”
White Panel 4” x 4.5” (After coloring and stamping, cut down to 3” x 3.5”.)
Brown Panel 3.25” x 3.75”

Supplies
Stampin’ Up Welcoming Woods Stamp Set
Stampin’ Up Tasteful Textile Embossing Folder
Distress Inks, with blending tools for each color
     Mustard Seed Stormy Sky
     Wild Honey Rustic Wilderness
     Peacock Blue Gathered Twigs
 Momento Black Dye Ink
Two Black Jewels
Foam Tape, Pencil & Ruler

Directions
1. Before embossing, on the layering panel, somewhat about one-half inch from the bottom, with black ink, stamp Happy Birthday in the lower right corner, leaving room for the jewels.
     a. Emboss with Tasteful Textiles.
     b. Adhere to card base.

2. On the white panel, make a tic mark about ½ inch from the top and the bottom on it. When blending your rows of color, they should be focused on the areas between the tic marks.

3. Sponge on the dye inks in the following order, starting in the middle of the panel; also remember, in a circular motion, to sponge off some ink before applying to card stock.
     a. middle of card – Mustard Seed
     b. below that – Wild Honey
     c. below that – Rustic Wilderness
     d. now start above where the Mustard Seed is – Peacock Blue
     e. above that – Stormy Sky

4. Stamp the trees leaves with black ink and the earth line with Gathered Twiggs.

5. Trim the panel to 3” x 3.5”, adhere to brown panel. Using foam tape, adhere brown panel assembly to card base.

6. Attach a black jewel at each end of the sentiment.

Thank you for coming to
Annie's Inklings today!


Friday, September 13, 2019

Daisy Mini-Card

Annie’s Ink-Lings


Here it is with September almost half gone and my daisies are still blooming their little hearts out.  It’s like a touch of spring still lingering in the flower beds.  Looking at them this morning inspired me to make one more card with a slightly springy touch.  Quick, simple, and cheerful!  Someone's going to get this for their birthday.


Supplies
Green Card Base:  8 x 4 inches
DP Panel:  3 ¾ x 3 ¾ inches – Cut 2
DP Panel:  3 ½ x 3 ½ inches
White Inside Panel:  3 x 3 inches
Scrap of Cream Card Stock

Tools
Stampin’ Up ½ Inch Punch
Stampin’ Up Sprig Punch – Punch 2
Stampin’ Up Daisy Punch – Punch 2
Stampin’ Up Daisy Delight Stamp Set – Stamp 2
Stampin’ Up Count Your Blessings Stamp
Hero Arts Happy Birthday Stamp
Paper Studio Adhesive Gems
Fantastix Coloring Brush or Sponge
Foam Tape

Directions
Stamp two Daisies on the cream card stock using Carved Pumpkin. Lightly color the Daisies with a Fantastix Coloring Brush using the Dried Marigold, or you can use a sponge.  Punch them out using the daisy punch.  Slightly mold the petals of both daisies.  Use mounting tape to adhere them together.  Glue the assembled daisy to the card, centering on the card.  Punch 2 leaf sprigs from the green card stock, mold them a bit, and glue under the daisy.  Also with the green card stock, punch a ½ circle and glue it to the center of the daisies.  Add a jewel in the center green circle for the finishing touch for the front of the card.

For the inside of the card, attach one of the 3 ¾ x 3 ¾ inch DP squares.  Stamp the sentiment on the white square and then adhere it to the DP square.

Thanks for stopping by.  Wishes for a special blessing this week.

Annie


Monday, September 2, 2019

Leaves are Falling

Annie’s Ink-Lings


I'm not ready for fall, but summer is slowly fading away.  However, I would not want to be without fall because it has such beauty in the changing colors.  Raking leaves – ugh!  My treasured memory of raking leaves was watching my son joyfully jumping into the piles of them.  More work for mom but it was so much fun.  He even wanted me to cover him up with leaves!  We always had oodles of fun.  These are some of the memories that came to me as I was making this card today.  That’s probably why this stamp is one my favorites . . . it takes me back to my son’s childhood.  Happily I had found the perfect sentiment to go  with this stamp.  This is what it says inside:  “Take time to jump in the leaves.”  Perfect in my mind, anyway.

If you want quick and easy, then this is the card for you.  I used only two colors of Distress Ink for the background, stamping the applicator off before lightly applying the ink.  The image and sentiment were stamped with black ink.  I lightly colored the leaves and the frame of the rake with PrismaColor pencils.  Next, I rounded the corners of the top two panels before assembling the panels to the card base.  I thought the strategically placed sequins made a nice finishing touch.  What do you think?


Card Base 81/2 x 51/2 inches
DP Panel 5 3/8 x 4 1/8 inches
Red Panel 5 x 3 ¾ inches
Cream Panel 4 7/8 x 3 5/8 inches
Tim Holtz Distress Ink Applicator (or sponges)
Distress Ink Pads:  Barn Door and Wild Honey
PrismaColor Pencils:  Limepeel, Peach, Green Ochre, and Process Red
Red Sequins
Glue, Tape Runner
Corner Rounder

Stamps:   Serendipity Stamps – Rake G298
                  Stampabilities – Leaves are Falling C1142
                  Impression Obsession:  Jump in the Leaves A5654


Thanks for stopping by.

Blessing,
Annie


Monday, August 26, 2019

Peaceful Country Scene


Annie’s Ink-Lings


Being out for a drive in the county can be so peaceful.  While riding along, with the white clouds floating in a beautiful azure blue sky, a contented feeling envelops me.  Gazing out the car window, I see rustic, left- behind reminders of a past country life.  I wonder who lived here, what happened to cause them to leave, where are they now?  Perhaps the chicken wire is a part of all that remains of a broken down chicken coop,  Was the broken wagon wheel cast aside after being replaced with a new one?  What once was a wheat field now has only scattered clusters of wild wheat.  These musings inspired me to create this card.  Does it affect you in any particular way?


I really love the Bokeh Dots stamp.  Before the stamp was created, I made that background technique using a Thumb Dauber and white dye ink.  Now I can have a beautiful background in just a minute or two.  I used my Misti so that I could restamp to get the desired saturation of color.  What you see is the actual size of the Bokeh Dots stamp.

Supplies
Stampin' Up Stamp Sets:  County Road, Wetlands, Bokeh Dots
Stampin' Up Chicken Wire Elements
Stampin' Up For You Sentiment
Dew Drops
Distress Inks:  Broken China, Walnut Stain

Measurements
Brown Card Base 5 1/2 x 8 1/2 inches
Blue Panel 4 1/8 x 5 3/8 inches
Designer Paper  4 x 5 1/4 inches

Wishing you a great day with a special blessing,
Annie

Saturday, February 3, 2018

Path to the Beach

Happy good afternoon,

Recently I've really enjoyed making backgrounds with Distress Inks and sponges.  There's just no end to the color combinations and everyone of them has had a delightful result.  Even when you think, "Oh no, I'm not going to like this," after you do some stamping and embellishments, you find that it is not so bad after all.  The card I'm sharing is one I entered in the Impression Obsession February Challenge using two of their stamps that I just purchased.  The "Path to the Beach" stamp is now a favorite!  I have a lot of ideas for designing with it.  This photo only shows two-thirds of the stamp.  On the other third there is water and a sailboat.  This is a real multi-design stamp.


Supplies:

Stamps from Impression Obsession:  Path to the Beach #H1877, Happiest of Birthdays Ever! #B20058
Tim Holtz Distress Inks:  Mustard Seed, Salty Ocean, Tumbled Glass, Dusty Concord, Bundles Sage, and Walnut Stain.
Sponges
PrismaColor Pencils:  Deco Yellow, Parma Violet, Apple Green, Sandbar Brown, and Sienna Brown.
Half Round Acrylic Crystals

I hope you enjoyed learning about this card today.

Blessings,
Annie

Friday, February 2, 2018

Water Drops Technique

Hello everyone,

I just discovered and learned a new technique and I am really excited to share it with you.  I bought the Water Effects 1 stamp set from Designs by Ryn and then followed her tutorial on using them, found here.  Ryn's tutorial is very well done and very easy to follow.  In her video she used watercolor paper and Dylusions Spray Ink.  Since I didn't have any spray ink on hand, I decided to go with Tim Holtz Distress Ink Pads.  But I still want to try with Dylusions Spray Ink as soon as I can decide what colors to order.  Also, I just used regular, sturdy white card stock.  Here are a few of my card designs:


One can easily become addicted to this technique because it is so easy, with stunning results.  The rain drops appear transparent with a 3-D look - they just jump off the card!  I encourage you to check out Ryn's tutorial and give it try.  

Blessings,
Annie

Saturday, December 9, 2017

Long Ago on a Starry Night . . .

Hello and Christmas greetings,

Not that I'm crazy about snow, but it seems like we should have a little bit at least on Christmas day, so I would be okay with that.  Then melt, please.  Looking out the window I see dark cloudy skies and a cold-looking landscape that has gone to sleep for the winter.  However, inside it's a different story - warm and cozy, and making Christmas cards while listening to Christmas music, decorations, and drinking hot cocoa.  So delightful!  And that is how I feel about the card I'm sharing today.  I love the blues of the several layers and it has such a peaceful scene.  I can't help but think of that special birth long ago on a starry night.


Materials:

Spellbinders Nestabilities Decorative Elements 4
Die-namics Stitch Mini Scallop
Cottage Cutz Holiday Floral Spray
Stamp from Tim Holtz Collection HL-M2-052
Tim Holtz Distress Ink Pad Walnut Stain
Tim Holtz Distress Ink Pad Pine Needles
Tim Holtz Distress Ink Pad Salty Ocean
PrismaColor Pencils
Green Jewel
Star Punch
Aleene's True Snow

Hope you are enjoying your days of decorating and shopping . . . and stamping, of course.
Blessings,
Annie

Tuesday, June 6, 2017

Banner Strip Card

Hello everyone,

Being a bit overcast ouside today led me to make some cheerful time inside.  So - card making is the name of the game.  I really like this Banner Strip card because when you lift the little banner strips, there is a secret message behind.  I also added a white card stock layer to the back where I could stamp a regular message, add a note, and sign my name.  Let me know what you think!


Here are some directions for you.  Hopefully they are easy to follow:

Recipe:
Green card stock panel 4 ½” x 5 ¾”
Orange card stock panel 4 ¼” x 5 ½”
Pattern paper panel 4 x 5 ¼”
Orange card stock banner 4 ½” x 1”
White card stock banner 3 ½” x 7/8”

Additional Materials:
Sizzix/Hero Arts Stamp & Die Cut Set – Floral #657776
3 Small Sentiment Stamps
Martha Stewart Leaf Sprig Punch
¾” Square Punch
Paper Cutter
Tape Runner
Glue Bottle and Glue Pen
Small Ruler and Pencil
Jewels
Extra Green CS for Leaves
Extra White CS for Stamping
Big Shot
Distress Ink Pads – Tattered Rose, Barn Door, Fired Brick
Black Ink Pad

Directions:
1.         Attach PP to orange panel.  Set aside.
2.         With the orange banner strips, score at ½” on one end of each and fold.
3.         Make a notch on the other end by lining the punch at an angle to form a notch.  Punch the other two plus the 3 white banner strips.
4.         At approximately ½” from the left side, stamp a different sentiment on each of the white banners using a black inkpad.
5.         On the assembled panel on the right side, make a tick mark 3/8” down from the top of the PP and another tick mark 3/8” up from the bottom of the PP.
6.         Glue the orange banners one at each tick mark and the third centered between the other two.
7.         On the inside of the orange banners, glue the white sentiment banners about 1/8” from the fold.
8.         Punch 7 leaves from the green CS.
9.         Using the large and small flower stamps, stamp one set on white paper using each of the 3 inkpads.
10.       Die cut with the Big Shot.  Lightly curl up the petals.
11.       Working on the left side of the card with the banners laying flat in place, put glue on only the bottom ¾” of a small flower and glue it to the PP.  The ¼” top of the flower should overlap the first banner at the bottom of the banner.  This will hold the banner closed.
12.       Put glue on the center portion of a large flower, between the second and third banners, and glue it to the PP, leaving the top and bottom petals loose.  This will hold those banners in place.
13.       Glue the remainder of the flowers and the leaves as shown in the sample.

14.       Attach the jewels to the center of the flowers.

Until next time.
Blessings,
Annie

Wednesday, April 12, 2017

A Dahlia and More

This birthday card is the perfect combination for my friend
who loves Dahlias and music.
 
Using the Dahlia stamp from Stampin' Up's "Regarding Dahlias" set, I stamped on a light melon-colored card stock using clear embossing ink and heat embossed with white embossing powder.  The Dahlia was stamped two times, and then colored with Copic markers:  E13, R22, YR04, and RV52.  I cut out one complete Dahlia and then just cut out the center portion of the second Dahlia and mounted with mounting tape.  Next, tiny pearls were added to the center of the Dahlia.   

The leaf is from a Hero Arts set called "More Real Leaves."  I stamped the leaves with Distress Ink Evergreen Bough, then I lightly sponged them with the same color ink and also Distress Pine Needles. After I cut out the leaves I darkened the edges with the Pine Needles ink, and then finished off by slightly curling up the leaf tips. It's a nice way to add some depth to the leaves.

To make the background panel, I printed sheet music from Pinterest, used a distressing tool on the edges, and then embossed with the Tim Holtz Woodgrain embossing folder.
Pine Needles ink was used on the distressed edges of the panel and lightly sponged over the Woodgrain embossing.

The card base is white, 5 1/2 x 4 1/4.  The panel is 4 3/4 x 3 3/4.  You can find the music clip art on Pinterest here. 

This was a really fun card to make and I'm really loving this stamp set!  Thanks for stopping by.
Annie

Wednesday, February 25, 2015

Bokeh Technique - 3 Ways


I've totally fallen in love with the Bokeh Technique.  It's popping up everywhere so I had to join the fun.  First of all, a definition.  Bokeh  BOH-kay — also sometimes pronounced as BOH-kÉ™.  The term comes from the Japanese word boke, which means "blur" or "haze."

These backgrounds can be done with dye, pigment, and distress inks, and also watercolor.  I've made 3 cards doing the Bokeh background in 3 different ways.  Now let's get started!

Make a Template
Punch 4 different size circles from any kind of transparency sheet.  Approximately 1 3/4" circle, 1 1/4", 1", and ½".

Leaf  Card - Bokeh Background with Distress Inks
1.  With sponges layer and blend ink over the white panel with Distress Inks:  Dried Marigold, Spiced Marmelade, and Pine Needles.
2.   With the white ink, start with the largest circle on your template and work down in size, going from lighter to darker shade of white, using a sponge dauber to randomly pounce/rub the ink in the circle.  Lay it aside for a bit.  
2.  From the larger white panel, die cut the biggest leaf die from the package of Large Leaves #2 (Cheerylynn Designs).
3.  Attach the leaf panel over the Bokeh background, layer onto green panel, & mount on card base at the upper left.
4.  Embellish with 3 Dew Drops vertically on the lower right side of the mounted panels.
5.  Stamp sentiment at bottom right and on the inside.


Bokeh Background – Pink & White
1.  Emboss small cream panel with QuicKutz Retro Diamonds embossing folder.
2.  Start the Bokeh background applying white pigment or dye ink using the circles template.
3.  Nest, make a few circles using Memories Baby Pink dye ink and then a few more circles using Memories Blush dye ink (or whatever you have that is similar).
4.   Layer Bokeh panel onto the light pink panel, and then onto the card base.
5.  Glue on the Bluebells die cut (Spellbinders Die D-Lites Blue Bells and Lily of the Valley).
6.  Finish with a pink bow.


Birds Card - this one is a very simple style of Bokeh.


1.  Make Bokeh background using only white pigment or dye ink.
2.  Wrap twine around background panel and tie double knot.
3.  Trim branch die cut (Memory Box Grand Oak Tree to fit and glue on.4.  Glue 2 red birds (CheeryLynn Designs Birds of Earth and Sky) onto the branch and 1 red bird to inside of card.
5.  Stamp and punch sentiment; layer the 3 label punches and glue at twine knot.
6.  Attach panel to card base using dimensional tape.

Well that's it!  Hope you find these instructions helpful.  Let me know if you have a question.

Blessings,
Annie


Friday, September 26, 2014

Every Leaf Speaks Bliss to Me . . .


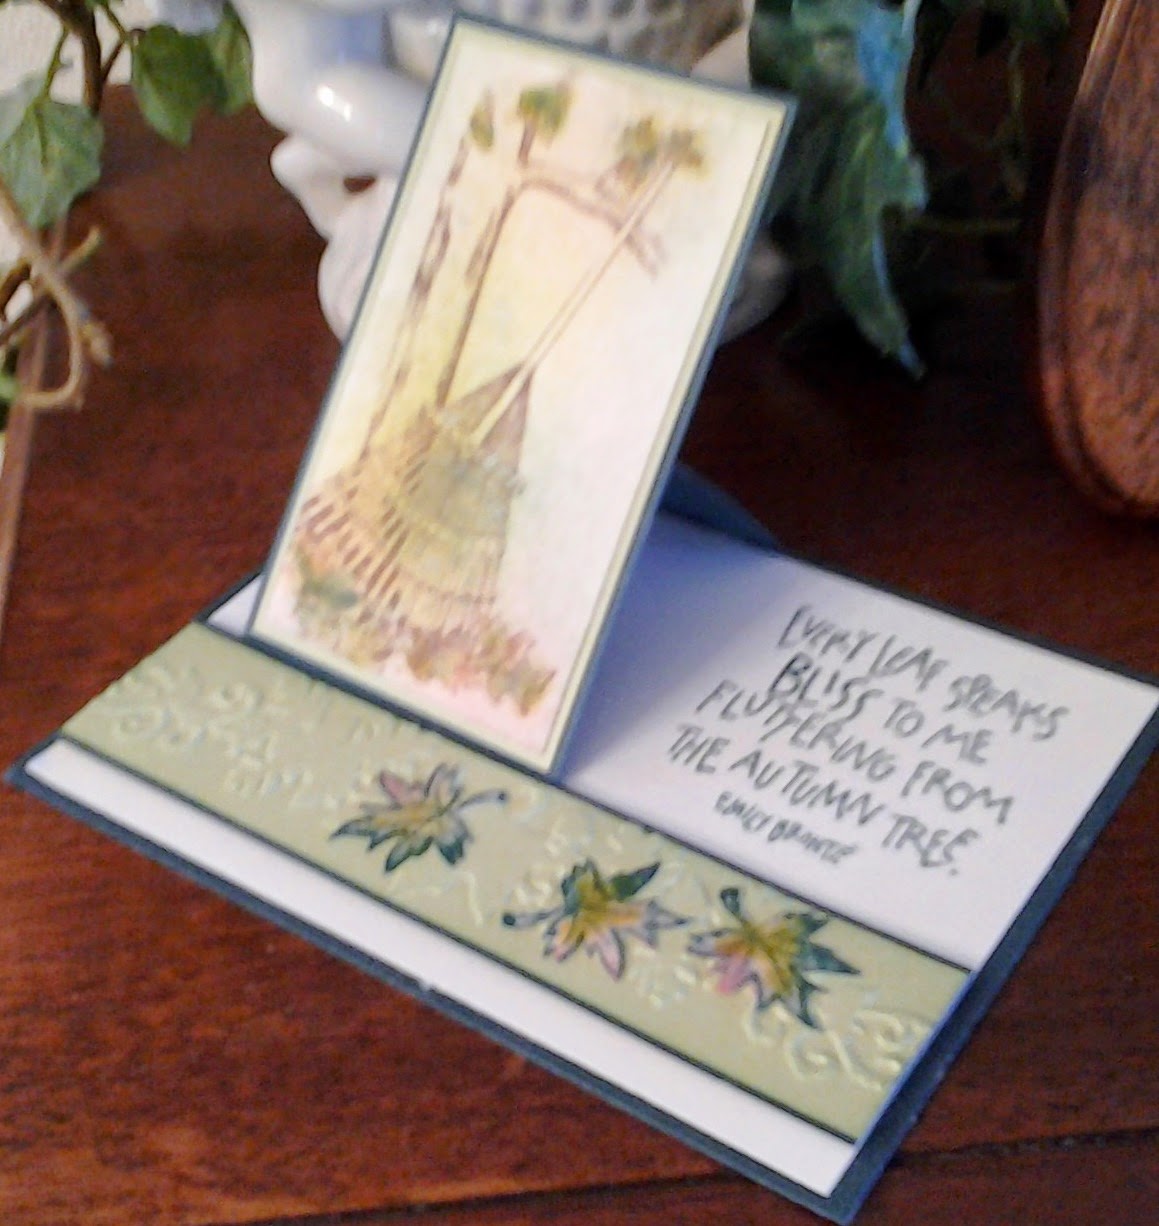
. . . awe, yes, such a beautiful poem by Emile Bronte.  And a perfect sentiment for this card, which by the way, is my first time making a One Flap Easel card.  I used the stippling technique to color the image and the cut out leaves.  Stippling is done by using a thick stiff bristle paint (or stencil) brush, tapping directly onto the ink pad, then tapping it onto the card stock.  Very easy to do and it's a fun technique so I hope you'll give it a try.

1. Card Base:
       4-1/4" x 5-1/2" Dark Green CS
       4" x 5-1/4" Olive Green CS
                      
2. Flap:    
       2-3/8" x 4-1/2" scored at 1/2"
and 2 1/2",  Dark Green CS
       2-1/4" x 3-7/8" Olive Green CS
       2-3/8” x 4-1/8” Dark Green CS
       2-1/8" x 3-3/4" Cream CS

3. Stamp the rake design (Serendipity Stamps) on Cream card stock in Memories Chestnut dye ink.  Color using stipple brushes and inkpads:  Fresco Sicilian Spice, Distress Pine Needles, and Distress Crushed Olive.  Layer onto the Olive Green card stock, then layer onto the smaller, un-scored Dark Green panel.

4. Stamp the sentiment Every Leaf Speaks Bliss to Me from Inkadinkado onto the right side of the Cream card stock using Distress Pine Needles ink.  Make sure that there is enough room for your flap. Place adhesive on the back of the 1/2" Dark Green tab and attach it to the back of the Cream piece.  Layer the stamped assembly onto the Dark Green strip, be sure to apply adhesive only to the portion below the score line.

5. Embossed Panel:  
            1-1/4” x 5-1/4” Dark Green CS
            1-1/8” x 5- ¼ “ Olive Green CS

6.  Emboss Olive Green strip with Leaf Garland from the Sizzix Thankful Background  Borders set.  Layer and center it onto the Dark Green strip and then attach it 1/4” from the bottom of the Cream panel.

7.  On a Cream scrap, stamp with the small leaf from the Hero Arts Real Leaves stamp set three times using Distress Pine Needles inkpad.  Color the leaves by stippling from the three ink pads- Fresco Sicilian Spice, Distress Pine Needles, and Distress Olive; cut out; distress the edges with Distress Pine Needles; glue onto the embossed panel.  And there you have it!  I love doing all that stippling and it provides a really great background.


Here, we have another fall card - a Circle Framelit Closure Card

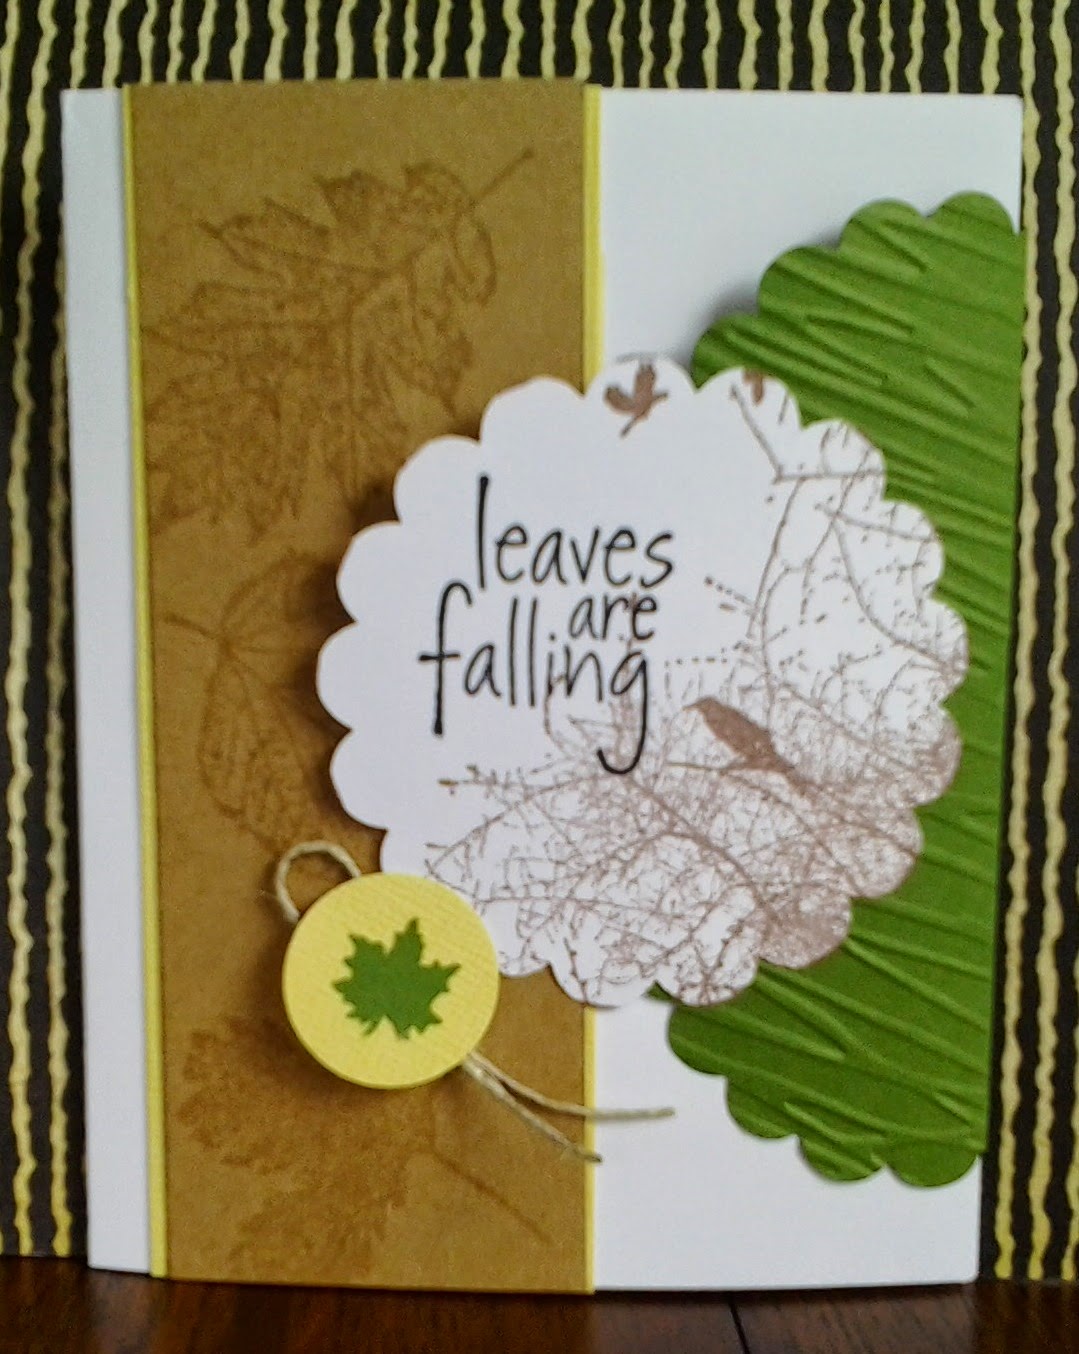
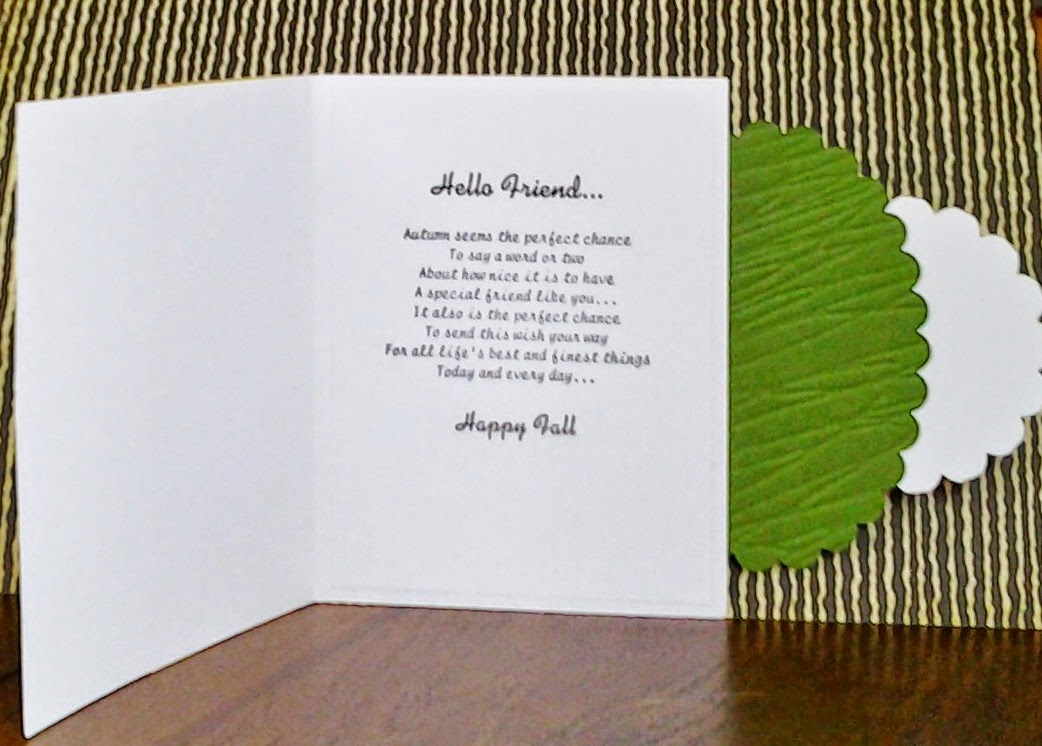
I made this card by watching it done on YouTube.  There are several things that I did differently: (1) used leaf stamps and Versa Mark ink to stamp on the brown panel, which is layered onto a yellow panel, (2) embossed the scalloped oval diagonally with the Branches embossing folder; and (3)  used a small punched leaf for the closure holder instead of a brad.  The card closes from the left, but it also has a flap on the right that folds over the closed card.  The little leaf layered onto a the yellow circle holds the flap in place.  Rather than trying to explain it here, I think you'll get a better idea of how it works if you watch the video - and I don't do videos - yet.  This link will take you to the video: https://www.youtube.com/watch?    v=Px5L63LdPIA


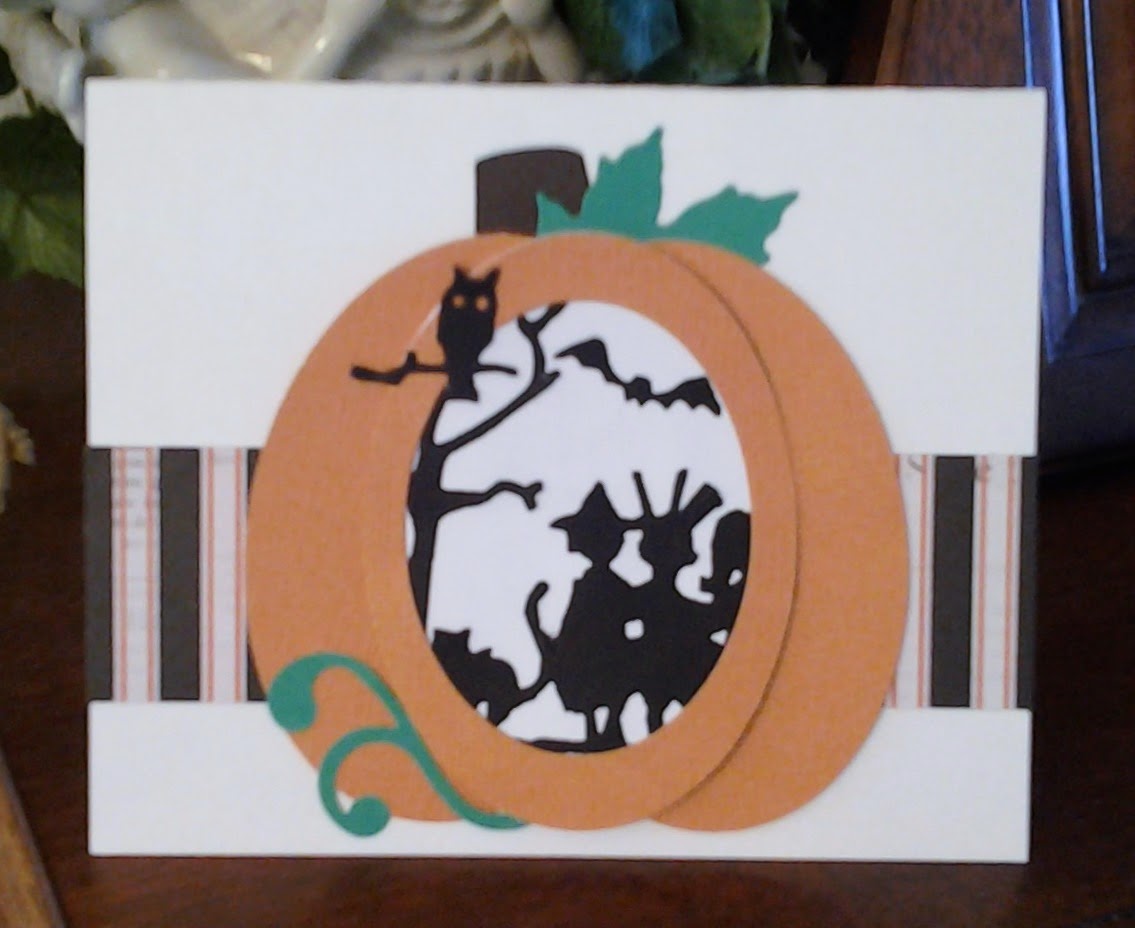
Halloween is not my "thing" but still it's a special day to me because my youngest sister was born on Halloween and also my niece.  So when I saw the Tim Holtz Alterations die called Halloween Shadows,  I really wanted to use it for birthday cards but also for my card class.  On Pinterest I saw a card that had a haunted house in the middle of a pumpkin and decided that idea would be a perfect way to use the Halloween Shadows die.  Part of the die strip has a Trick & Treat sentiment design, so that is what is used for the inside of the card for my class.  For the birthday cards, I'll use birthday sentiments instead. Spellbinders Nestabilities Classic Ovals Small are the dies I used to make the pumpkin.  The pumpkin stem was made by using a small flower pot punch, turned it upside down, and then glued in place.  Perfect!  The leaf was cut with a Cuttlebug die set called Leaves, but any leaf die or punch will work.  
  
Also for my card class, I decided to do a Halloween Flip-its card.  The die is by Sizzix and called Card, Circle Flip-its #2.  The first pic is the front of the card and the second pic is the inside.  Decorative elements are a few sequins and some orange and white twine for the bow on the inside.  I was so surprised to find out how easily this die set works.  I am now hooked on it!  Here is a YouTube link so you can see how to use the die with your Big Shot:  https://www.youtube.com/watch?v=sUdikwhBDqk

 
Well that's it for my September card class.  I hope you've seen something you'd like to try.  It's been fun sharing with you.  Thanks for stopping by and check back soon for some more ideas.
May your creative juices keep flowing and may your days be blessed.
Annie