Showing posts with label Dry Embossing. Show all posts

Friday, September 4, 2020

Sunflower Joy Accordian Fold Card


Annie’s Ink-Lings


As a card maker, I have oodles of flower stamps.  On occasion, I take the time to see what I can find out regarding the meaning of the flower I chose to use.  The sunflower quite surprised me!  So, wanting to share it with you, here is what I learned:    
             
The sunflower puts itself in position to directly receive the
sun's gaze. It symbolizes faith and adoration for ALL that is.
Because of this, the sunflower is often regarded as a very
spiritual flower. They are, therefore, a symbol of true faith and
loyalty to something that is much bigger and brighter than
themselves.

 I find it amazing that the face of the sunflower slowly moves itself so that it is always facing the sun.  Another wonder of creation!

Okay, by now you have probably realized that the bright yellow sunflower is the focus of today’s card.  This card was truly a joy to make. 

The base of the card is a single white panel, overlaid with an embossed panel.  The accordion fold is made from a smaller white panel and adhered to the center of the card base.  Measurements and scoring directions are listed below.  I used the Dotted Swiss embossing folder on the yellow dotted designer paper on the first panel to give it a 3D effect.


Cut a belly band strip from brown card stock and score.  Wrap it around the card with the ends meeting in front and adhere them together - make sure it's not too tight, not too loose!


The sunflower attached to the belly band was made by two-step stamping.  On a scrap of white card stock, I first stamped the largest sunflower image with Squeezed Lemonade, then over-stamped with the smaller sunflower image using Mustard Seed.  To make it better coordinate with the designer paper, I die cut a sparkly brown flower center from the designer paper and glued it to the center of the sunflower.

Cutting and Scoring
White Card Stock Base 4-1/4 x 5-1/2 inch
Yellow Panel for Embossing 4 x 5-1/4 inch
Accordion Fold Panel 4 1/4" x 11", score at 1-1/2, 3″, 5-1/2″, 8″ 
Cut pieces of designer paper 1-1/4" x 4" for top fold; 2-1/4" x 4" (2) for center
     folds; 1/2" x 4" for the inside edge and adhere to accordion.
Belly Band 1-1/2 x 9 1-2 inches, score at 1-1/2 and 5-7/8 inches.

Supplies
Stampin’ Up Painted Harvest Stamp Set
Rubbernecker Stamps Blooms in the Heart 642-09
My Sentiments Exactly Sunflower Stamp B11F
Spellbinders Foundational Tags S4-755
Stampin’ Up Leaf Punch from Painted Harvest Bundle
Cuttlebug Swiss Dots Embossing Folder
Stampin’ Up Old World 3D Embossing Folder
Distress Ink Pads Squeezed Lemonade and Mustard Seed
Lifestyle Crafts Nesting Circles Dies L-CC001

Blessings, and until the next time, remember to hug the ones you love, none of us are promised tomorrow!

Annie


Tuesday, June 10, 2014

Embossing on Patterned Paper


Hello again!
Are you ready to try something different?  Let me share with you some of the fun things that have been going on around here.
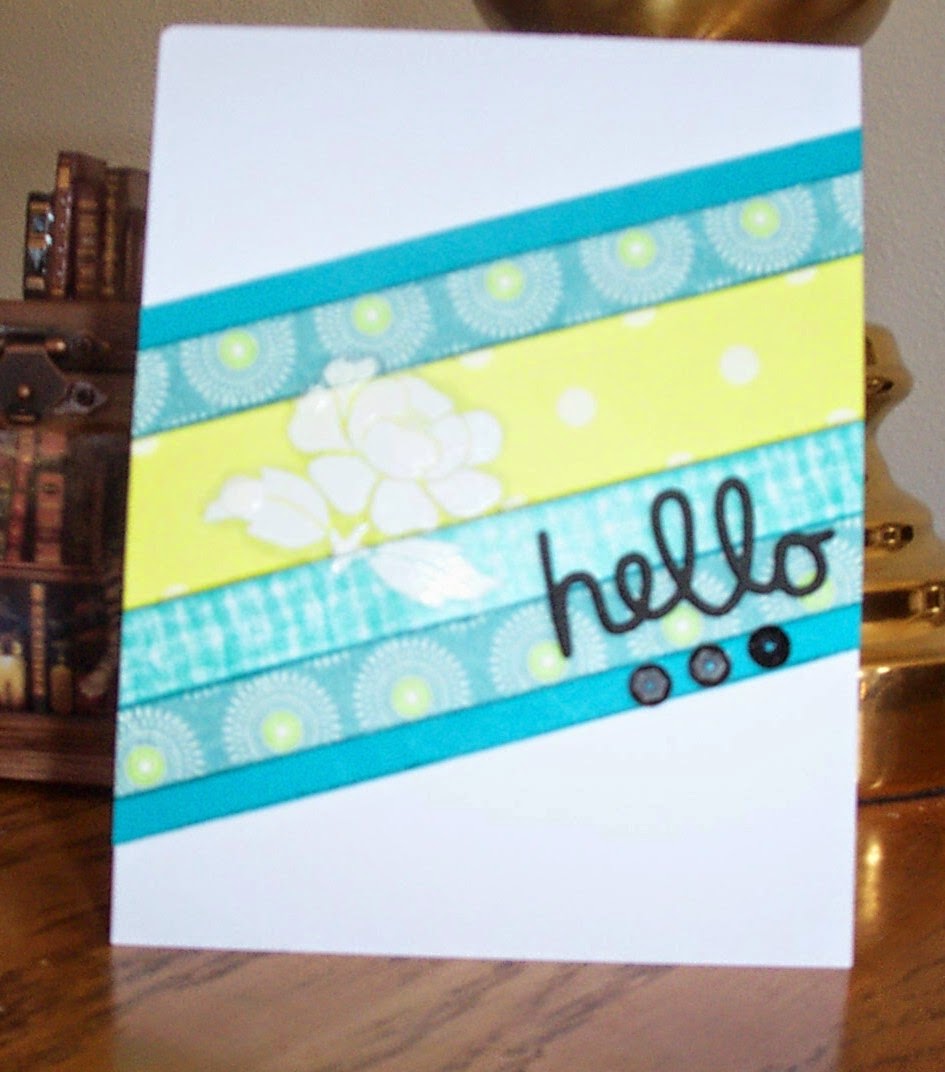
During card making with some of my friends this afternoon, the card pictured is one of the cards we made.  I cased the basic idea from Jennifer McQuire, but made a few changes in the layout.  Three tips that I learned from Jennifer are:  (1) to distress both edges of each strip; (2) emboss an image on patterned card stock; and (3) to outline the embossed image with a grey Copic marker which made the white image stand out a bit more.

While browsing at Craft Warehouse last week, I discovered foam sheets with a self-adhesive backing.  How cool is that!  I die cut the "hello" from a black sheet of it.  Just loved the result!  Now it's my new favorite thing.  The foam cuts very nicely and provided a nice dimensional word.  Now it's your turn and all the information you need is included below.  Have fun!

Finished Card Size:  4 ¼ x 5 ½ top folded.


Cut:   white card stock for card - 11 x 4 ¼
          small piece of white card stock - 5 ½ x 3
          2 solid color strips – 5 ½ x ¼
          1 patterned card stock - 5 ½ x ½
          2 strips -  use different patterned card stock for each one- 5½ x ½
          1 strip with pattern different from first 2 – 5 ½ x 1

All strips should be of coordinating colors.

 Die Cut:  the word “Hello” from black self-adhesive foam sheet.  Alternatively, you can use regular black card stock and glue the word onto the card.  (Technique Tuesday die)

1.              Score and fold your card, and set aside.

2.              Use distress ink on the sides of all strips.  For the colors of the card stock that I chose, I used Tim Holtz Peacock Feathers and Shabby Shutters.

3.               Now we will work on the strip of white card stock.  Use adhesive along all sides and then several times on the body of the strip.

4.              Begin layering the strips according to the card sample or make your own design.

5.              Be sure to snuggle them up tight against one another.

6.              Using adhesive, diagonally layer the striped piece to the card

7.              Trim the excess off both sides of the card.

8.              The next step is to emboss the flower stamp over the patterned strips.

9.              Be sure to use an Embossing Buddy first in order to keep excess embossing powder from sticking to the card stock.

10.          After embossing with white embossing powder, use a tiny brush to remove any powder that may be left on the piece.

11.          To make the white flower stand out a little more, lightly trace around it using a grey Copic marker.  I used #N1, neutral grey.

12.          Last step – peel the backing off the word and stick onto the striped piece, then glue 3 black sequins under the word. (Doodlebug Designs sequins pack)