Showing posts with label Spellbinders. Show all posts

Friday, August 30, 2019

Happy Bird-Day Bird Feeder Shaker Card


Annie’s Ink-Lings


Today I have a fun interactive shaker card.  I cased it from a video by Michelle's Craft Corner and really enjoyed putting it together.  I seldom make shaker cards, thinking that they are just too bothersome.  But since I discovered foam strips, all the bothersomeness (is that a word?) disappeared.  Plus, I was captivated by the idea of using actual bird seed.


Below are the measurements and supplies that I used, which are different from Michelle's video.

Measurements
Card Base 5 1/2 x 8 1/2 inches
First Panel Layer 4 1/8 x 5 3/8 inches
Second Panel Layer 4 x 5 1/4 inches
Back Panel for the Bird Feeder 3 1/4 x 3 1/4 inches
Window Sheet 3 x 3 inches

Supplies
Paper Trimmer                            Paper Crimper
FUSSY Cut Scissors                    Ruler
Regular Scotch Tape                  Bone Folder
Tape Runner                                Package of Birdseed for Small Birds 
Foam Tape Strips or Regular Foam Tape cut in long strips
Score Tape 1/8 inch
Score Tape 1/2 inch
Twine - about 4 inches
Ranger Enamel Accents Glacier White
Stampin' Up:   Free as a Bird Stamp Set; Happy Bird-Day Stamp; Stitched Nestled Labels Dies 
Circle Die from Spellbinders Shapeabilities ie D-Lites Medallion Two or any 1 3/8" Circle Die
Black Sharpie Ultra Fine Point Permanent Marker
Copic Sketch Markers:  N1, Y13, Y17, YG17

Stamping, Coloring, and Cutting
1.         Stamp the flower 3 times, bird, and leaf branch once each using a black Memento Ink pad.
2.         Color the bird with N1 Natural Grey and Y13 Lemon Yellow.  Add a couple of touches of
Y17 Golden Yellow.  Also, use the Y17 Golden Yellow for the beak, legs, and feet.  Color the leaves with YG17 Grass Green.
3.         Fussy cut all the colored images and set aside.  Stamp the sentiment on the circle of green card stock.

Die Cuts and Window Preparation
4.         Using the 3 inch Stitched Nested Labels Die, cut two from the green card stock.  Cut one from the top card panel (the DP card stock), placing the die about ½ inch from the top of the panel and centered.
5.         Cut one of the DP die cut in half length ways.  Run one of the halves through the paper crimper.  With the other half, trim off a 1/4 inch strip.  This is the perch at the bottom of the bird feeder.
6.         With the second green die cut, at one end cut straight across from corner to corner.  This is the bottom of  the bird feeder.
7.         On the backside of the DP panel, adhere the window sheet using 1/8 inch Score Tape.  Next, line around the cut out following the stitched line using the foam tape strips.  Make sure they are snuggled tightly together and pressed securely to the panel.
8.         Fill the window with 1 ½ teaspoons of birdseed or to your liking.  Remove any large pieces that might stick up above the edge of the window.  The birdseed must lay really flat.
9.         Remove the backing from the foam tape strips and attached the 3 ¼ square panel over the window.
10.       Add ¼ inch Score Tape around the panel covering the window.  Add foam tape to the exposed areas of the rest of the large panel.  Do not remove backing at this time.

Finishing the Front Panel of the Card
11.       Fold the piece of twine in half taping one end on the front panel at the top of the die cut opening.  Fold the ends over the top if the panel and tape down.
12.       Adhere the crimped roof piece in place with Score Tape.  Glue the bottom of the feeder in place and then glue the perch over it.  I used a black Sharpie extra fine point marker and ruler to draw the lines on them.
13.       Assemble all of the panels onto the card base.
14.       Adhere all the images and sentiment.  Put a dot of the Enamel Accents in the center of each flower.

     
Wishing you a happy time of card making!

Blessings,
Annie


Monday, December 11, 2017

Staircase Christmas Card

A happy good morning to you! The card I'm sharing with you today may look challenging, but actually the only thing challenging about it is all the die cutting.  I cut out enough pieces for 10 cards for one of my card classes.  I have to admit that that was a lot of die cutting and I was very happy to get done.  But once done, the assembly goes easily and quickly, especially if you follow my step-by-step directions.  I think the directions are easy to follow, but if you have any questions please don't hesitate to contact me.


Finished card size 4 ½” x 6 ¼”

1.         Top fold a 4 ½” x 12 ½ “ red card base.
2.         For inside of card, cut a 4” x 5 ½” piece of white card stock and attach. 
3.         From white CS die cut the largest die from Spellbinders Card Creator Heirloom Legacy 
            (S6-010).  Attach it to the card front.
4.         From red CS die cut the small center die from the same set.  Trim off the piece along one end
            to make it straight.  This will be the bottom when attached to the wall.  Lay aside for now.
5.         From black CS cut a 4 1/8” x 4 15/16” piece.  Attach it to the front of the card over the white
            die piece.
6.         Die cut the Memory Box Classic Staircase (98665) from a piece of white CS which 
            measures 3” x 4 ¾”.  Attach to card front on the left-hand side over the black.
7.         From green CS die cut the Impression Obsession Cut Out Christmas Tree die 
            (DIE111-U).  Trace just the Christmas Tree part on red CS.  Trim the red tree inside the 
            tracing line and attach to back of green tree.  Also, die cut just the flourish part of the tree, 
            trim off the bit of the tree trunk, and glue inside the card at the bottom of the white mat.
8.         To decorate the banister, die cut at least 5 sprigs from green CS using Memory Box Small 
            Garden Sprig (931) and glue banister.
9.         I also die cut the Memory Box Mini Holly Leaves (98658) two times to use as filler on the
            banister.
10.       Punch 5 to 7 small stars from red CS and add to sprigs on the banister.
11.       Punch one larger star for the top of the Christmas Tree and glue in place.  Add Wink of 
            Stella to the Christmas tree star (GL.Clear 999).
12.       For the wall hanging, stamp a very small sentiment on white CS, punch it out with a 1” 
            scalloped oval punch, glue it to the red die cut element, attach a tiny green brad to the top, and
            then glue it to the wall. 

I hope the card inspires you.  Thanks for stopping by.

Blessings,
Annie


Friday, September 1, 2017

Card Candy for Christmas

Hi Stampers,

Well, I was able to resist Christmas in July, but here on the first day of September, due to a swap challenge, I had to jump into a Christmas theme.  This is my first attempt at making multiples of Card Candy.  Lots of die cutting, Copic marker coloring, and jewels.  I used Lockhart Inchie Art stamps and stamped the images on 1 x 1 inch white matboard.  Also used a Stampin' Up label punch and two Spellbinders dies - Shapeabilities Frosty Forms and Nestabilities Fleur De Lis Squares.  The project was lots of fun even though it took most of my morning.


That's it for today, friends.  Enjoy the Labor Day weekend but please be alert and stay safe if you are traveling.

Blessings,
Annie

Tuesday, November 1, 2016

Remember These - Glass Slide Mailers?

Class time is coming around next week so I'm busy getting card ideas and kits together.  A while back I found a couple of packages of glass slide mailer folders that I had stashed away.  What a surprise - had forgotten that I even had them.  I used to do a lot of altered art but had really gotten away from it.  So I thought why not put these to use in a card - but what do I do, how do I go about it!  I didn't find much of anything to give me inspiration, actually nothing at all, so this is a totally "winging it" card.  And using Graphic 45 paper is always awesome!


 The red base card opens so you can add a Christmas sentiment inside.  Hope you like it.

Blessings,
Annie

Glass Slide Mailer Card

1.  Fold the card base and round the corners; lay aside.

2.  Emboss the green card stock with Elegant Dots; attach to card base; lay aside.

3.  Slide mailer – color all edges with the black marker.  On the inside color the center of the slider so that the cardboard won’t show after you attach the decorative paper; set aside.

4.  From the green dots paper, cut one panel to fit inside the glass slide pocket; glue or tape in place.

5.  With the red plaid paper, cut three panels – 1 ½ x 3 ¾ inches.

6.  With one of the red plaid paper panels, cut out the center of it using the smallest die from the A2 Matting Basics A.  Attach this panel over the glass slide pocket.

7.  Attach the other two panels to front and on the left inside the slide mailer.  You may need to trim a bit.

 8.  Cut out three ephemera from the G45 paper.  Tape or glue one to the front, one to the left inside, and mount one in the pocket on the right.

9.  Using Glossy Essentials to attach the slide mailer to the center of the embossed paper and the red Dew Drops to each of the four corners of the embossed panel.

 Supplies:
Black permanent ink marker (slanted tip)
One rubber glove (for use with the black marker)
Mounting Tape
Pencil
Scissors
Glue bottle or pen
Glossy Accents
Double-stick tape or tape runner
Corner rounder punch
Paper trimmer
Four red Dew Drops (or similar item)
One slider mailer
Two designs of complementary decorative paper (I used G45 Christmas paper – small red plaid and green dots)
A quarter sheet of green card stock
8 ½ x 5 ½ inches red card stock for card base, folded
Stampin’ Up embossing folder – Elegant Dots
Spellbinders Dies – Resplendent Rectangles; and A2 Matting Basics A

Saturday, February 13, 2016

A Special Valentine Card

Hello again, friends!

I had a special request from my pastor to make a valentine card for his wife.  Of course, I said yes, but, me oh my, could I do justice for the occasion.  I wanted to make something that was feminine and a bit elegant. Thankfully, once I got started it all fell into place.  I was happy with the result, Pastor was happy, and hopefully Pastor's wife will be, too.


Here is what I used:  background panel - Sizzix Textured Impressions Dots & Flowers Set;
layered motif:  Spellbinders Shapeabilities Lacy Doily Motifs; hearts:  Spellbinders Nestabilities Classic Hearts.

Happy Valentine's Day to you all!
Annie

Monday, January 11, 2016

Fold-Back Flap Card

Good morning, blogging friends,
It is no surprise I have had hearts on my mind recently.  All the stores have their Valentine's Day displays up and hearts are everywhere.  But I was thinking hearts I don't want to just use my heart supplies for one event during the year.  Why not work them into any kind of occasion card? So with this in mind, this card was created:


It's a very quick and simple card.  Below are a few instructions to get you started.

Fold Back Flaps Card

5 ½ x 4 ¼ card base ( 8 ½ x 5 ½ )
5 ¼ x 4 Doublesided DP panel, BoBunny A Gift of Love
2 ½ x 2 ½ piece of Brown card stock
Spellbinders Nestibilities Classic Hearts S4-136
2 sizes of Cherry Blossom Punch or any flower punch (small and medium)
Brown Brad
Memories Baby Pink Ink Pad
Distress Walnut Stain Ink Pad
Sentiment from Impression Obsession, C8560 Loving Heart

On the DP panel on the right side edge, measure 2 5/8" down from the top.
Measure again 2 5/8" down from the top, only this time place the dot 2” to the left of the first dot.
Cut the paper between the 2 dots; that would be 2 inches from the right side.
Score from each of the right side corners to the center dot and then fold back the triangle flaps.
Lightly distress the edges of the pink flowers with the Memories Baby Pink Ink Pad.  Round up/mold the petals.
Using a brown brad to hold them together, assemble the 2 flower pieces, the brown heart, and the DP panel together.
Adhere the DP panel to the card base.

Stamp a sentiment in the opening between the flaps.

Hope you like the card and want to make one.  Blessings,
Annie

Saturday, May 9, 2015

Tulip Window Cards

The tulips in my flower gardens are still blooming, but I can see the end coming.  Working outside has kept me from card making, but it has inspired me to make some tulip cards. Especially since I have a new tulip embossing folder that I haven't yet used!  Finally, I had some time to play.  Here are three very fun cards, two using a technique that is new to me.


1.  Fold an 8 1/2" x 5 1/2" white card base in half.
2.  Cut a white panel measuring 5 3/8" x 4 1/8".  Emboss it with the tulip window embossing folder.
3.  Die cut 5 tulips from green card stock and 5 tulips from red card stock.  Match up the green and
     red tulips.
4.  Trim off about half of the green tulip blossoms and trim the stem off of each red tulip.  Glue the
      red tulip blossoms onto the green ones.
5.  On the backside of the embossed panel, in the window opening, layer as follows:
        a. grass die cut
        b. a green 1/2" x 2 1/4" strip (see card for placement; about
            1/8" shows above the bottom of the window)
        c. the tulips and leaves 
6.  Adhere the embossed panel to the card front.
7.  Die cut the watering can from polka dot paper and attach to the lower right bottom of card.
8.  Stamp a small sentiment on red card stock and punch out with 5/8" round punch.  Glue to center of watering can.
9.  Punch 2 small butterflies; place one with the tulips in the window and the other one on inside of card, lower left side.

Stamps:  Stampin' Up:  Fabulous Phrases
Dies:      Impression Obsession:  Grass 06-I, Stems & Leaves 150-D, Tulip Set 147-A, and Watering Can 155-A
              Spellbinders:  Small Deckled Rectangles
Embossing Folder:  Crafts-Too:  Tulip Window

This is the second card using the same Tulip Window embossing folder:


My idea for this card came from this tutorial, however I changed things up a bit by embossing the card and by making a smaller window for the pop-out butterfly:  http://flowerbug.typepad.com/my_weblog/2015/03/pop-out-window-butterfly-basics-card-video.html.  The white folded panel is 3 1/2" x 6", scored at 2" and 4".


These tulips were made by punching the wing of the Stampin' Up Bird Builder punch.  It is one of my favorite punches because so many things can be made with it. The layered panel and the circle were embossed using the Cuttlebug Swiss Dots EF.  All pieces were edge distressed using Rusty Hinge and Dusty Concord Distress Ink pads.

I hope you found the cards to your liking.  I would love some feedback. Thanks for stopping by and may your day be blessed.
Annie


Wednesday, February 25, 2015

Bokeh Technique - 3 Ways


I've totally fallen in love with the Bokeh Technique.  It's popping up everywhere so I had to join the fun.  First of all, a definition.  Bokeh  BOH-kay — also sometimes pronounced as BOH-kÉ™.  The term comes from the Japanese word boke, which means "blur" or "haze."

These backgrounds can be done with dye, pigment, and distress inks, and also watercolor.  I've made 3 cards doing the Bokeh background in 3 different ways.  Now let's get started!

Make a Template
Punch 4 different size circles from any kind of transparency sheet.  Approximately 1 3/4" circle, 1 1/4", 1", and ½".

Leaf  Card - Bokeh Background with Distress Inks
1.  With sponges layer and blend ink over the white panel with Distress Inks:  Dried Marigold, Spiced Marmelade, and Pine Needles.
2.   With the white ink, start with the largest circle on your template and work down in size, going from lighter to darker shade of white, using a sponge dauber to randomly pounce/rub the ink in the circle.  Lay it aside for a bit.  
2.  From the larger white panel, die cut the biggest leaf die from the package of Large Leaves #2 (Cheerylynn Designs).
3.  Attach the leaf panel over the Bokeh background, layer onto green panel, & mount on card base at the upper left.
4.  Embellish with 3 Dew Drops vertically on the lower right side of the mounted panels.
5.  Stamp sentiment at bottom right and on the inside.


Bokeh Background – Pink & White
1.  Emboss small cream panel with QuicKutz Retro Diamonds embossing folder.
2.  Start the Bokeh background applying white pigment or dye ink using the circles template.
3.  Nest, make a few circles using Memories Baby Pink dye ink and then a few more circles using Memories Blush dye ink (or whatever you have that is similar).
4.   Layer Bokeh panel onto the light pink panel, and then onto the card base.
5.  Glue on the Bluebells die cut (Spellbinders Die D-Lites Blue Bells and Lily of the Valley).
6.  Finish with a pink bow.


Birds Card - this one is a very simple style of Bokeh.


1.  Make Bokeh background using only white pigment or dye ink.
2.  Wrap twine around background panel and tie double knot.
3.  Trim branch die cut (Memory Box Grand Oak Tree)  to fit and glue on.4.  Glue 2 red birds (CheeryLynn Designs Birds of Earth and Sky) onto the branch and 1 red bird to inside of card.
5.  Stamp and punch sentiment; layer the 3 label punches and glue at twine knot.
6.  Attach panel to card base using dimensional tape.

Well that's it!  Hope you find these instructions helpful.  Let me know if you have a question.

Blessings,
Annie


Friday, November 14, 2014

The Reason for Christmas - Worship the King

Brrrr, it's cold outside!  What's a better time to stay cozy and warm inside and carry on with card making. I especially love making nativity Christmas cards and this die from Die-Namites is just perfect because I wanted only Baby Jesus, Joseph, and Mary in the scene.  The palm trees are so cool.  Looking at them brings back memories of when I visited Israel a few years ago.  They grow in many areas there.
The front of the card is a white panel embossed with the Cuttlebug Three Kings folder.  I like the idea of having the Wisemen on the front of the card because they are searching for the Savior.  Open the card and surprise - there He is!  LOL!  Are you  getting the idea that I like to tell a story with some of my cards.  Well, after all, I'm our church librarian - reading is wonderful and helps the mind be creative and imaginative!   Ok, back to the card.  Here's a picture of the card front.  The embossing doesn't show up very good in the pic, and it's really much prettier in person.
Directions
1.  Outside card base – fold in half
2.  Decorative paper panel – fold in half and put DS tape to only the sides of the decorative panel.  Adhere the sides to the inside of the card base, trying to get the center folds to fit as closely as possible.  Be sure to leave the center loose.  Lay it aside.
3.  Inside card base – score at 3½,  5½, and 7½ - Fold the card base so that you have one mountain fold, two valley folds.
4.  Die cut in the center of the panel.
5.  Score manger scene from the right side of the star and between the manger and Mary.
6.  Adhere the bottom only of the manger scene behind the die cut frame.
7.  Put DS tape all around both end panels of the inside card base.
8.  Adhere to the outside card base.
9.  Stamp the inside sentiment on a white panel, round the corners, and adhere to the right inside panel of the card.
10.  Front of card – round corners of the white embossed panel and the light teal panel.
11.  Layer them and then adhere them to the card front.
12. Use finger dauber to add a bit of ink to hi-light the embossed image.
13.  Round the corners of the small white piece and the dark teal piece. Stamp sentiment onto the white, layer it onto teal, and then mount it to the left bottom of the card.
Supplies
Card Base 11 x 4¼  (2 pieces) teal card stock
Light teal panel 5¼ x4
White front panel 5 1/8 x 3 7/8 (emboss on this one)
Outside sentiment panel:  teal 2 x 7/8 and white 1 7/8 x ¾
Inside sentiment panel 2¾ x 1¾
Decorative Paper background panel 5¼ x 4¼
Cuttlebug Embossing folder - Three King
Die-namites die - Nativity Scene
Spellbinders Nestabilities - Labels One
Thanks for stopping by today.
Blessings,
Annie


Friday, September 26, 2014

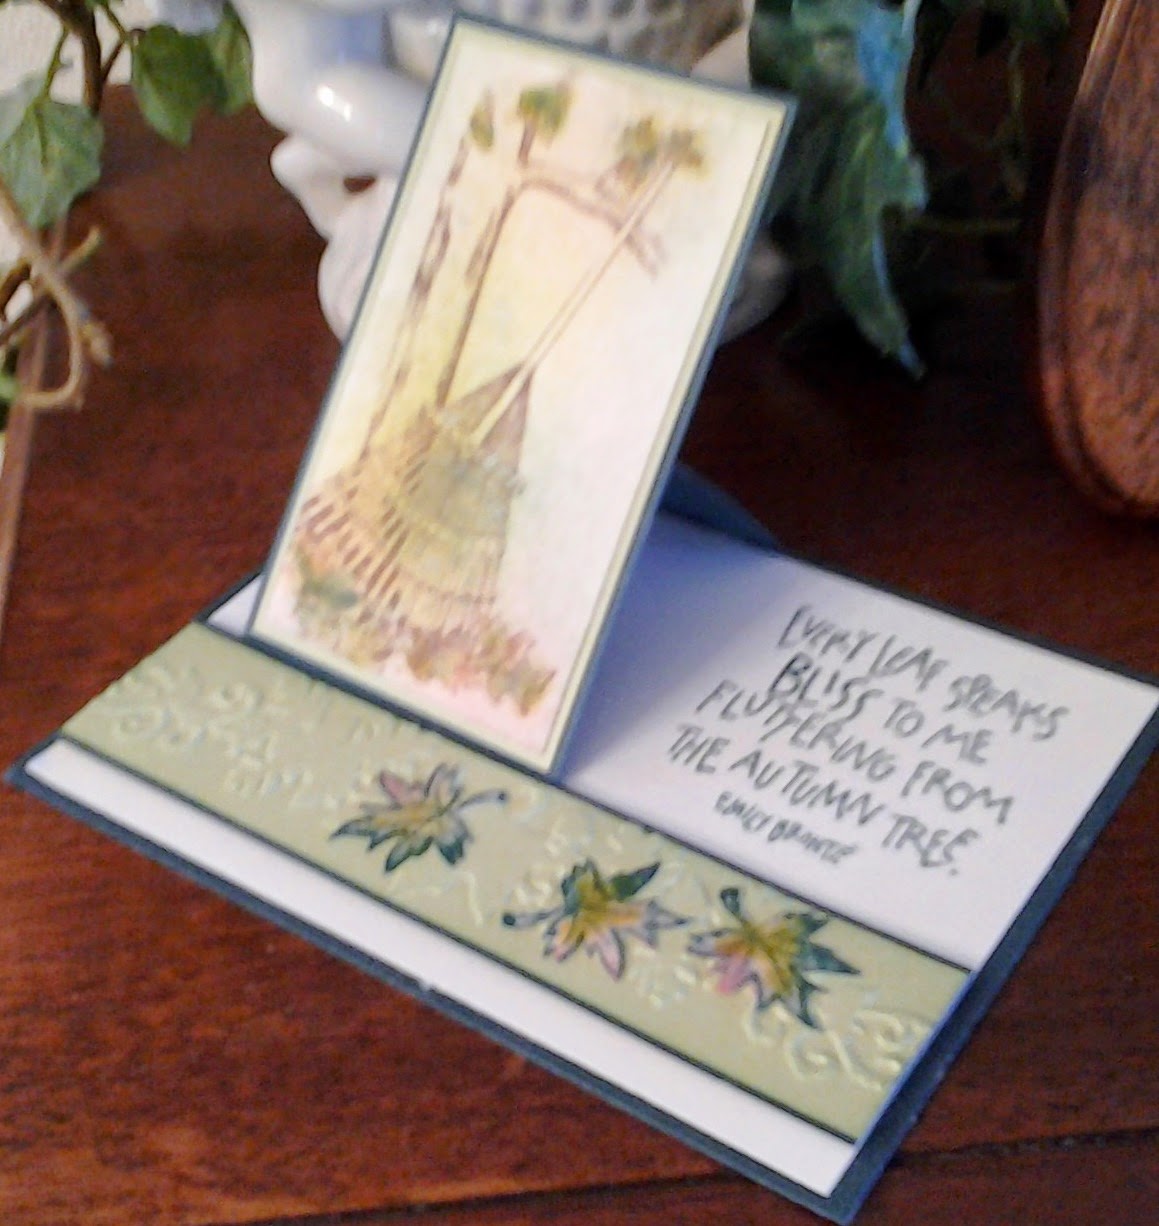
Every Leaf Speaks Bliss to Me . . .


. . . awe, yes, such a beautiful poem by Emile Bronte.  And a perfect sentiment for this card, which by the way, is my first time making a One Flap Easel card.  I used the stippling technique to color the image and the cut out leaves.  Stippling is done by using a thick stiff bristle paint (or stencil) brush, tapping directly onto the ink pad, then tapping it onto the card stock.  Very easy to do and it's a fun technique so I hope you'll give it a try.

1. Card Base:
       4-1/4" x 5-1/2" Dark Green CS
       4" x 5-1/4" Olive Green CS
                      
2. Flap:    
       2-3/8" x 4-1/2" scored at 1/2"
and 2 1/2",  Dark Green CS
       2-1/4" x 3-7/8" Olive Green CS
       2-3/8” x 4-1/8” Dark Green CS
       2-1/8" x 3-3/4" Cream CS

3. Stamp the rake design (Serendipity Stamps) on Cream card stock in Memories Chestnut dye ink.  Color using stipple brushes and inkpads:  Fresco Sicilian Spice, Distress Pine Needles, and Distress Crushed Olive.  Layer onto the Olive Green card stock, then layer onto the smaller, un-scored Dark Green panel.

4. Stamp the sentiment Every Leaf Speaks Bliss to Me from Inkadinkado onto the right side of the Cream card stock using Distress Pine Needles ink.  Make sure that there is enough room for your flap. Place adhesive on the back of the 1/2" Dark Green tab and attach it to the back of the Cream piece.  Layer the stamped assembly onto the Dark Green strip, be sure to apply adhesive only to the portion below the score line.

5. Embossed Panel:  
            1-1/4” x 5-1/4” Dark Green CS
            1-1/8” x 5- ¼ “ Olive Green CS

6.  Emboss Olive Green strip with Leaf Garland from the Sizzix Thankful Background  Borders set.  Layer and center it onto the Dark Green strip and then attach it 1/4” from the bottom of the Cream panel.

7.  On a Cream scrap, stamp with the small leaf from the Hero Arts Real Leaves stamp set three times using Distress Pine Needles inkpad.  Color the leaves by stippling from the three ink pads- Fresco Sicilian Spice, Distress Pine Needles, and Distress Olive; cut out; distress the edges with Distress Pine Needles; glue onto the embossed panel.  And there you have it!  I love doing all that stippling and it provides a really great background.


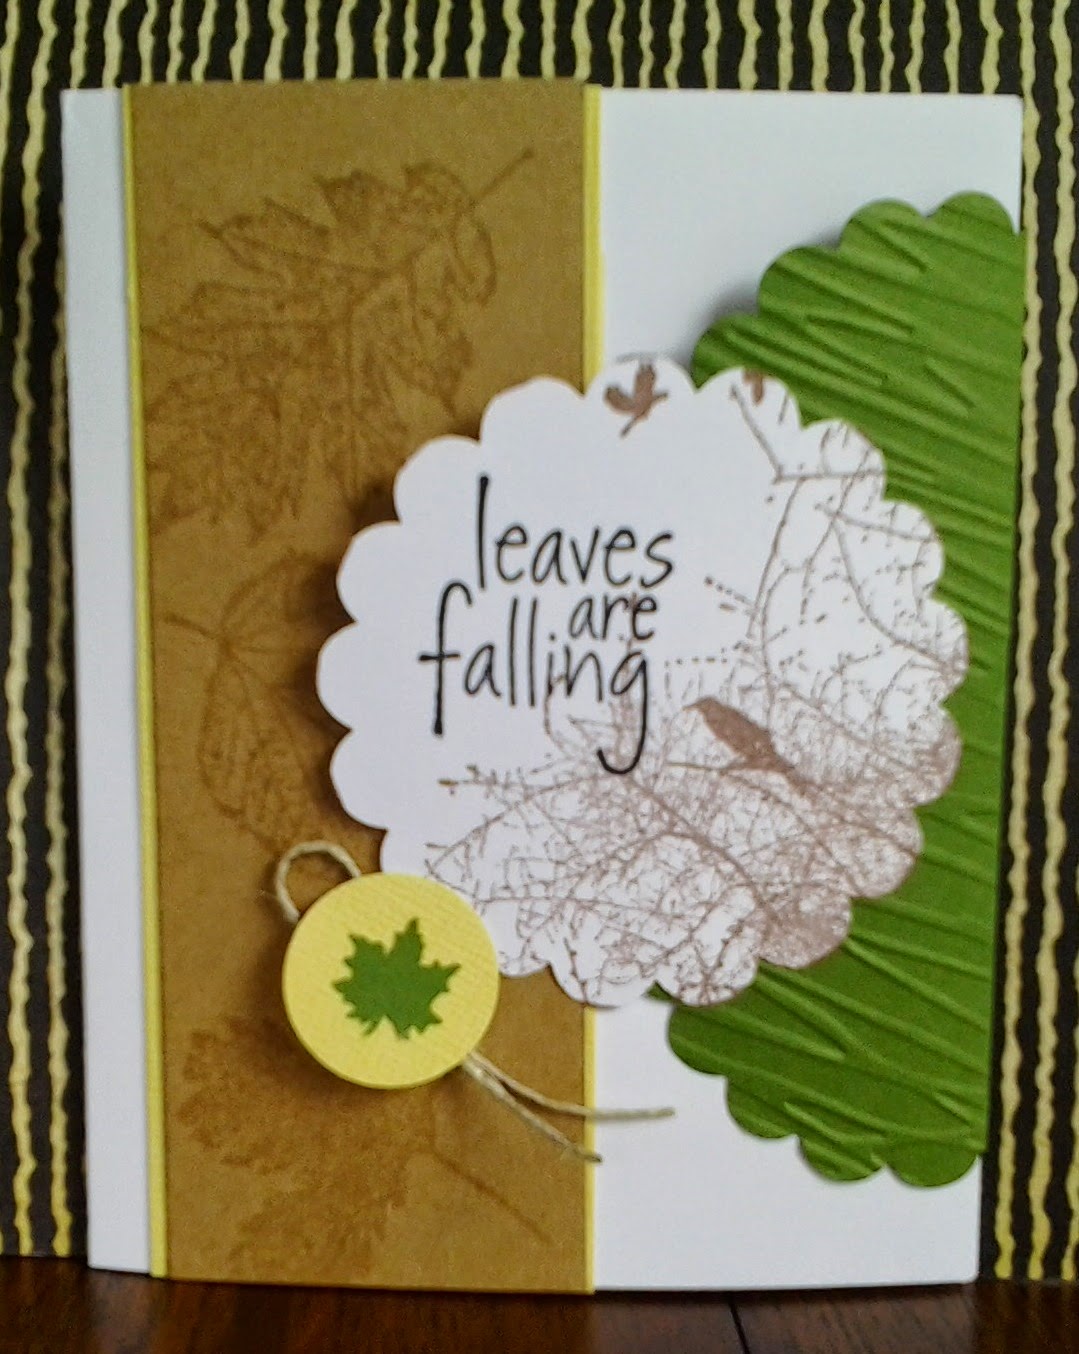
Here, we have another fall card - a Circle Framelit Closure Card. 

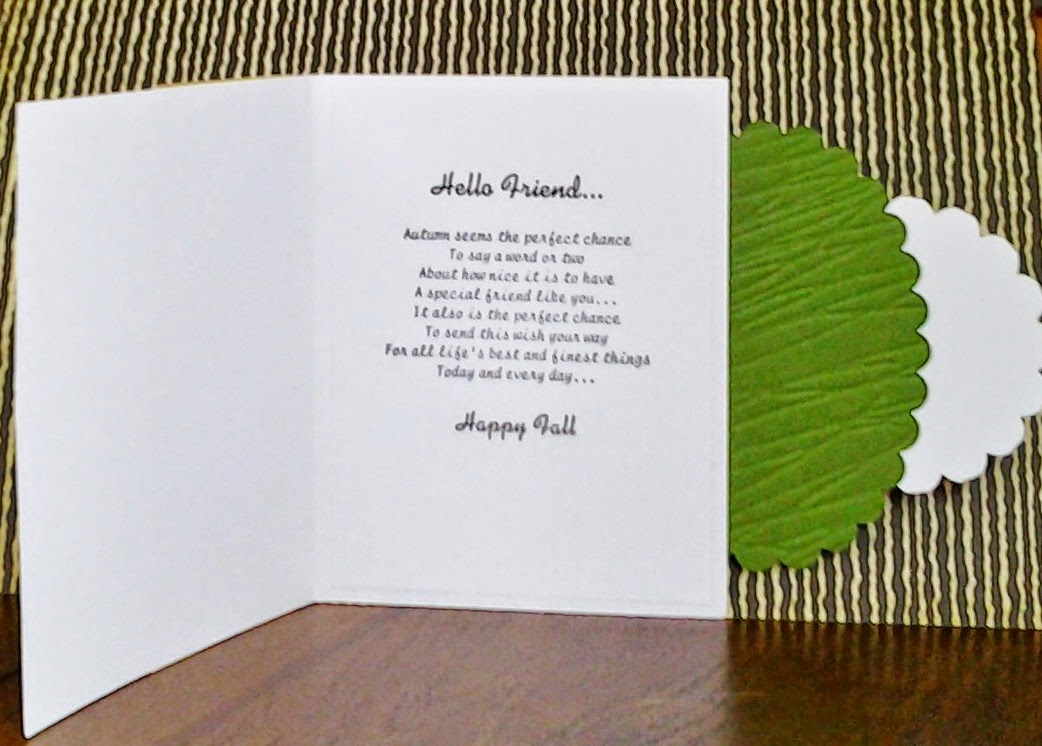
I made this card by watching it done on YouTube.  There are several things that I did differently: (1) used leaf stamps and Versa Mark ink to stamp on the brown panel, which is layered onto a yellow panel, (2) embossed the scalloped oval diagonally with the Branches embossing folder; and (3)  used a small punched leaf for the closure holder instead of a brad.  The card closes from the left, but it also has a flap on the right that folds over the closed card.  The little leaf layered onto a the yellow circle holds the flap in place.  Rather than trying to explain it here, I think you'll get a better idea of how it works if you watch the video - and I don't do videos - yet.  This link will take you to the video: https://www.youtube.com/watch?    v=Px5L63LdPIA


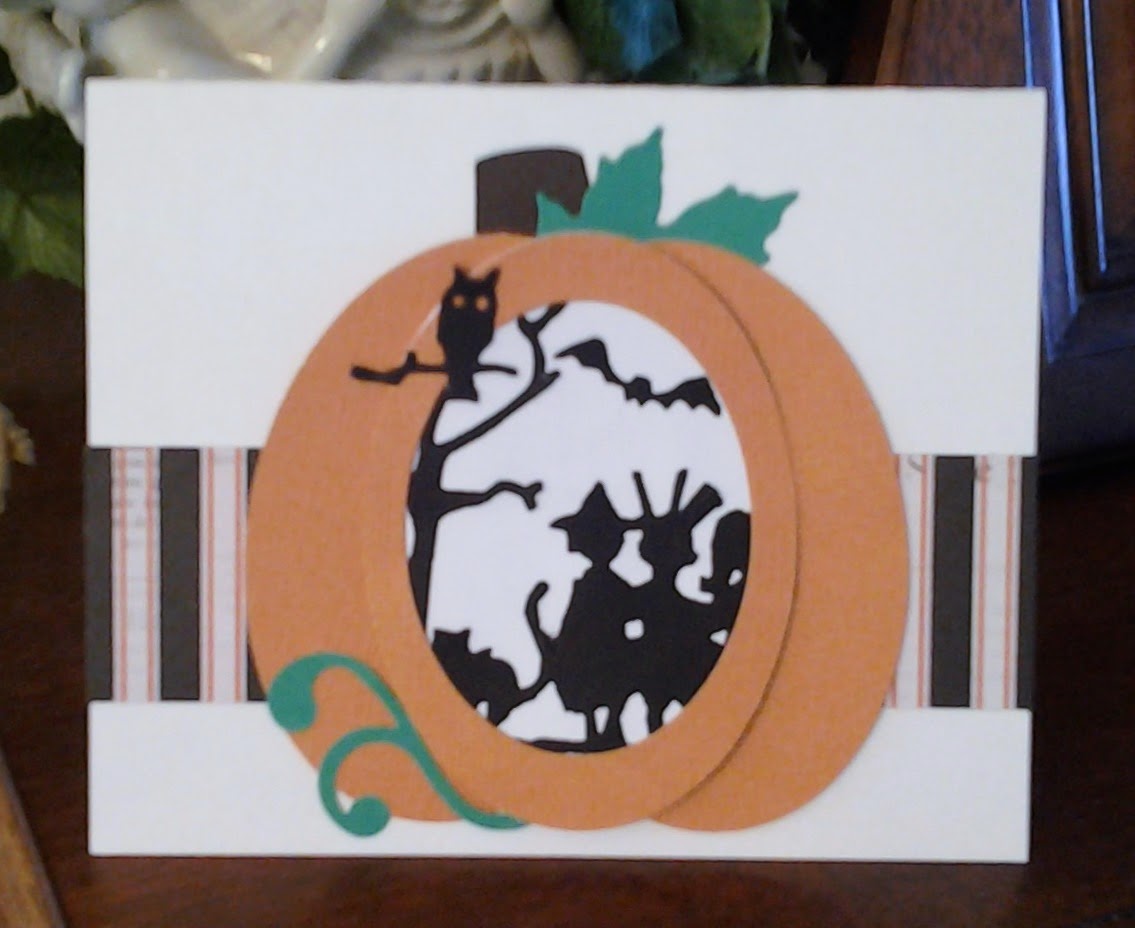
Halloween is not my "thing" but still it's a special day to me because my youngest sister was born on Halloween and also my niece.  So when I saw the Tim Holtz Alterations die called Halloween Shadows,  I really wanted to use it for birthday cards but also for my card class.  On Pinterest I saw a card that had a haunted house in the middle of a pumpkin and decided that idea would be a perfect way to use the Halloween Shadows die.  Part of the die strip has a Trick & Treat sentiment design, so that is what is used for the inside of the card for my class.  For the birthday cards, I'll use birthday sentiments instead. Spellbinders Nestabilities Classic Ovals Small are the dies I used to make the pumpkin.  The pumpkin stem was made by using a small flower pot punch, turned it upside down, and then glued in place.  Perfect!  The leaf was cut with a Cuttlebug die set called Leaves, but any leaf die or punch will work.  
  
Also for my card class, I decided to do a Halloween Flip-its card.  The die is by Sizzix and called Card, Circle Flip-its #2.  The first pic is the front of the card and the second pic is the inside.  Decorative elements are a few sequins and some orange and white twine for the bow on the inside.  I was so surprised to find out how easily this die set works.  I am now hooked on it!  Here is a YouTube link so you can see how to use the die with your Big Shot:  https://www.youtube.com/watch?v=sUdikwhBDqk

 
Well that's it for my September card class.  I hope you've seen something you'd like to try.  It's been fun sharing with you.  Thanks for stopping by and check back soon for some more ideas.
May your creative juices keep flowing and may your days be blessed.
Annie


Monday, June 16, 2014

Sending a Hug in Blue, Green, & Purple


After spending a "pleasant" morning with my dental hygienist, it seemed a good idea to relax in front of my computer and do another post to the blog.  Actually, it's always pleasant to visit Lona.  She's a delightful woman and I love her entertaining chit chat.  I believe she even understands my guttural responses. 

So here is what I have for you today.  I saw a card very similar to this one made by Michelle Woerner.  The cheerful and bright colors captivated me and I knew I just had to make one.  There were only a few card details, so I decided to write up some directions for future reference and now I'll share those with you so you can make the card, too.
 Directions
1.  Top fold an 11” x 5 ½” piece of card stock.
2.    Cut a 2”x6” strip of patterned paper.  Attach at an angle.  Trim sides.
3.    On the die cut label, use a dots stencil to sponge ink on it, starting in the upper left   corner, gradually fading the color as you move down.
4.    Stamp sentiment on the right side of the label about 1/3 of the way down from the top.
5.    Edge the label with a Wink of Stella clear glimmer brush.
6.    Lay label aside to dry.
7.    Curl ends of petals, then layer the lighter shade flower onto the darker shade flower.
8.    Next, layer the two smaller flowers onto the large flower, brush smallest flower with Wink of Stella clear glimmer brush, and finish off with a pearl in the center.
9.    Using a 10” piece of ribbon, tie a small bow.
10.Using a 15” piece of twine, tie a large bow.
     Final Assembly
1.    Attach the label slightly off center towards the right and glue the ribbon bow on the right side of the label.
2.     On the left side of the label, glue the twine bow in place with the flower on top.
3.     Glue on the leaves and the flourish.
Tools:
Punch:  EK Success Swirl Flourish Punch
Dies:  Cheery Lynn Designs Large Leaves #2
              Spellbinders Nestabilities Labels Two
                  Tim Holtz Alterations Tattered Florals  


Friday, November 9, 2012

A Christmas Card Making Party!

Last Saturday I had the pleasure of hosting a Christmas card making party at my home for some of my church family gals.  Amid laughter, eating, talking, laughter, eating (get the picture?), we did manage to make a few cards.  What a fun memory-making time we had!  I wish I had a recording to play for you – you’d have to join the laughter just from listening to it.  Anyway . . . here are the 3 card designs we made.  I did the embossing and die cutting ahead of time with my Cuttlebug.  I really like the new Spellbinder Christmas dies.  How did we ever get along without this invention???
Spellbinders Frosty Forms & Spellbinders Labels 18

Spellbinders Lacey Circles


Spellbinders Layered Poinsettia & Cuttlebug EF Disressed Stripes

While shopping for cardstock, I made a great find in the Christmas Stories double sided paper line – Christmas Bingo cards – 12 to a sheet.  Immediately I thought this would make a great ice-breaker game for my party.  I could hardly wait until I got home so I could get started.  After cutting out the Bingo cards I glued them onto a rectangle of heavy weight Christmas paper and added a small embellishment at the top.  Next I went to my stash and pulled out some kids’ white letter tiles, glued a red CS square inside, used stickers to make the Bingo numbers, then covered the inside with Diamond Glaze by Judi-kins, giving them a nice clear, glossy finish.  Next, in that same “stash” I had a white box (like a pencil box or a cigar box) that I had purchased about 6 years ago and now, finally, found something to do with it, so out it came to be decorated which was accomplished by using some wonderful, beautiful Graphic 45 Christmas paper from the "Christmas Past Collection."  The finishing touch to the box was adding the name of the game on the lid using brown wooden letters and a button in each corner.  And finally I rounded up a bunch of small colored buttons (with lots of red and green) and put them in a clear plastic container to use as the game pieces.  Oh, the name of the game you ask, “Button Bingo” of course.  Oh, well, maybe not the greatest choice, but it was all I could spell with the number of wooded letters I had on hand. J  Here are a few pictures to give you an idea of how it turned out.  We had lots of fun with it – too bad we only had time for one game.


 In case I don’t have time to post again before Thanksgiving, please know that I’m thankful for each one of you and pray that our Heavenly Father abundantly blesses your family gatherings on Thanksgiving Day.

Annie

Wednesday, February 29, 2012

February Challenge - Use 3 or More New Supplies

It's a good thing there is an extra day this month or I wouldn't have gotten this posted on the blog in time.  The cards were finished a couple of weeks ago but just no time to post.  I was able to use 9 new products this month -- whoo hoo!  The first card was done using a crayon resist technique.  I really love the die from the Fleur De Lis Pendants set from Spellbinders.    Inside, the sentiment says:
"The chair to sit in while thinking about art."


The sentiment for this card is
"Get comfy, rest and get better."

There isn't a card sample to go with the "Love" stamp shown above.  I forgot to take a picture before I sent out the card.  Oops!

Well, two months down, and ten to go and I'm lovin' it.  Can't wait to see what will be used in March.  So until next time, "May the God of hope fill you with all joy and peace in believing."  Rom.15:13
Annie