Showing posts with label Copic Sketch Markers. Show all posts

Monday, September 14, 2020

Violets for You Card


Annie’s Ink-Lings


Hello and thank you for checking out my blog post today.  

While straightening up my studio, I came across a bin where I keep odds and ends of left over card parts, extra stamped off images, and such.  First thing I discovered was this image and that's how I came up with the A4 card I'm sharing today.  I had forgotten all about having this extra image.

This is an older stamp from Penny Black and may not be available anymore.  However, any violets stamp would work.  I used 4 shades of Copic Markers to color the flowers, two shades of green for the leaves, then a darker shade of green for the curly vines.  The rounded corners of the flower panel are really showcased on the dark purple panel.  I cut some 1/4 inch strips from the same color card stock as the second layering panel and glued them diagonally to the bottom right side of the card.  After stamping the For You sentiment, I added three sequins to add some embellishment interest.  It was really quick and simple, and I'm pleased with the result.  Looking forward to seeing what else is in that bin!

What treasures have you put away and forgotten about?  Happy Browsing!

Blessings,
Annie


Saturday, August 22, 2020

Bird Crazy Humor - Don't Ask Me!


Annie’s Ink-Lings


Hello there,

We all like a bit of humor in our lives.  Even more so now, with our physical distancing resulting in loneliness, sometimes depression, or just feeling sad and not knowing what to do with ourselves.  The idea came to me that perhaps I should add a new category to my card making - humor.  Yes, that's right, humor.  Maybe I could give those around me something to smile about, cause a chuckle or two, maybe even a laugh.  This is my first card in this new category.

For the individual words, I looked for stamps in my stash that had the words and style that I wanted to us.  Then stamped them on white card stock and cut them to size.  This is a great way to make a perfect phrase.


I love how the bird's eyes appear to be looking up at someone with the expression that says, "Don't ask me . . ." and then his follow up on the inside.

Did this cause a smile on your face?


The "twiggy" little branches actually are the off cuts from a wreath die.  These little bits and pieces are often just what you need for a project.  I always save them.
 

Take a look at the pebbles.  Here's a tip on how to make your pebbles exactly match a color in your card.  I just used a circle hand punch to punch 3 little circles from the yellow card stock, glued them into place, then covered them with a pebble.  So easy and so coordinated!  

Here's my product list:
Tim Holtz Bird Talk stamps & dies
Honey Bee Stitched Diamonds Dies
Off cuts from Cottage Cutz Build-a-Grpevine-Wreath
For the body:  Copic Markers B41 and B32
For the beak, legs & feet:  Copic Mark Y17
For the eyes:  Ranger Black Enamel Accents
Pebbles
For the inside sentiment:  computer generated
For the phrase:  individually stamped words from a variety of 
    sentiments stamps

It was so good to have you stop in today.  Come back soon to see my next humorous card.

Blessings,
Annie


Friday, July 3, 2020

Poppy Power


Annie’s Ink-Lings


Hello and happy Independence Day!

Although presently we are living in a time of restrictions, I am very thankful that I am able to get outside and work in my flower beds and just enjoy the beauty that I see there.  As one or two kinds of flower blooms gently fade away, there are others who are revealing their glory.

For the most part, the Poppy blooming season is over.  Every morning, with great expectation, I would rush to a window overlooking the back yard to see how many more had burst into bloom.  Can’t help it friends, I just really get excited when any of my flowers bloom.

These are the thoughts that led me to making the two cards I’m sharing today.  Actually, these Hero Arts Poppy stamps are ones that have been around for a long time, but I never tire of using them.  


The first card base is 8 ½ x 6 inches. The background of this card was created by using the Hero Arts stamp set called Poetic Petals, LL582.  With the Hero Arts Engraved Flower, CG141, I stamped on an off-white piece of card stock and then I colored the Poppy with Copic Markers:  RV55, RV06, RV25, R39, Y08, B39, YG03, followed by fussy cutting.  I die cut two leaves from the Spellbinders Shapeabilities, Assorted Leaves S4-076 and one fern leaf using a Sizzix punch.  A six inch piece of lace was adhered across the bottom of the card using Score Tape.


This card base is 8 ½ x 5 ½ inches.  The first layer is 3 ½ x 5 3/8 inches; second layer 3 ½ x 4 ¾ inches.  The lace is 4 ¼ inches.  The Poppy was colored with the same Copic Markers listed above and I used the same die and punch for the leaves.  The sentiment is from Stampin’ Up Avant-Garden.

Thank you for letting me share with you.

Blessings,
Annie

Thursday, December 19, 2019

Oh My Whiskers Birthday Card


Annie’s Ink-Lings


Hi there, Stampers,

I have a friend that loves cats as much as I do, if that's possible.  Her birthday is coming up in a few days and this is the card I made for her.


Well, I think it is adorable but, of course, I love cats.  The white die cut background is called "Summer Border" from Memory Box.  The stamp set is from Honey Bee Stamps "Oh My Whiskers and Purfect Sentiments."  I stamped the images on white card stock and colored them with Copic Markers.  The color numbers are listed below.  After coloring, I fussy cut the images and glued them in place.  I think it's cute how the little butterfly is just out of reach of the the tiny kitten's paw.  Hope you enjoyed today's card.

Stamps and Copic Markers Used:
Honey Bee Stamps:  Oh My Whiskers and Perfect Sentiments
Copic Markers:  Greens YG17 & YG45
                            Yellow Y13
                             Pinks RV13, RV52, R11
                             Greys N1 & BV23
                             Blue B41
                             White E41

Blessings,
Annie


Friday, August 30, 2019

Happy Bird-Day Bird Feeder Shaker Card


Annie’s Ink-Lings


Today I have a fun interactive shaker card.  I cased it from a video by Michelle's Craft Corner and really enjoyed putting it together.  I seldom make shaker cards, thinking that they are just too bothersome.  But since I discovered foam strips, all the bothersomeness (is that a word?) disappeared.  Plus, I was captivated by the idea of using actual bird seed.


Below are the measurements and supplies that I used, which are different from Michelle's video.

Measurements
Card Base 5 1/2 x 8 1/2 inches
First Panel Layer 4 1/8 x 5 3/8 inches
Second Panel Layer 4 x 5 1/4 inches
Back Panel for the Bird Feeder 3 1/4 x 3 1/4 inches
Window Sheet 3 x 3 inches

Supplies
Paper Trimmer                            Paper Crimper
FUSSY Cut Scissors                    Ruler
Regular Scotch Tape                  Bone Folder
Tape Runner                                Package of Birdseed for Small Birds 
Foam Tape Strips or Regular Foam Tape cut in long strips
Score Tape 1/8 inch
Score Tape 1/2 inch
Twine - about 4 inches
Ranger Enamel Accents Glacier White
Stampin' Up:   Free as a Bird Stamp Set; Happy Bird-Day Stamp; Stitched Nestled Labels Dies 
Circle Die from Spellbinders Shapeabilities ie D-Lites Medallion Two or any 1 3/8" Circle Die
Black Sharpie Ultra Fine Point Permanent Marker
Copic Sketch Markers:  N1, Y13, Y17, YG17

Stamping, Coloring, and Cutting
1.         Stamp the flower 3 times, bird, and leaf branch once each using a black Memento Ink pad.
2.         Color the bird with N1 Natural Grey and Y13 Lemon Yellow.  Add a couple of touches of
Y17 Golden Yellow.  Also, use the Y17 Golden Yellow for the beak, legs, and feet.  Color the leaves with YG17 Grass Green.
3.         Fussy cut all the colored images and set aside.  Stamp the sentiment on the circle of green card stock.

Die Cuts and Window Preparation
4.         Using the 3 inch Stitched Nested Labels Die, cut two from the green card stock.  Cut one from the top card panel (the DP card stock), placing the die about ½ inch from the top of the panel and centered.
5.         Cut one of the DP die cut in half length ways.  Run one of the halves through the paper crimper.  With the other half, trim off a 1/4 inch strip.  This is the perch at the bottom of the bird feeder.
6.         With the second green die cut, at one end cut straight across from corner to corner.  This is the bottom of  the bird feeder.
7.         On the backside of the DP panel, adhere the window sheet using 1/8 inch Score Tape.  Next, line around the cut out following the stitched line using the foam tape strips.  Make sure they are snuggled tightly together and pressed securely to the panel.
8.         Fill the window with 1 ½ teaspoons of birdseed or to your liking.  Remove any large pieces that might stick up above the edge of the window.  The birdseed must lay really flat.
9.         Remove the backing from the foam tape strips and attached the 3 ¼ square panel over the window.
10.       Add ¼ inch Score Tape around the panel covering the window.  Add foam tape to the exposed areas of the rest of the large panel.  Do not remove backing at this time.

Finishing the Front Panel of the Card
11.       Fold the piece of twine in half taping one end on the front panel at the top of the die cut opening.  Fold the ends over the top if the panel and tape down.
12.       Adhere the crimped roof piece in place with Score Tape.  Glue the bottom of the feeder in place and then glue the perch over it.  I used a black Sharpie extra fine point marker and ruler to draw the lines on them.
13.       Assemble all of the panels onto the card base.
14.       Adhere all the images and sentiment.  Put a dot of the Enamel Accents in the center of each flower.

     
Wishing you a happy time of card making!

Blessings,
Annie


Friday, July 26, 2019

Pink Poppy Thanks


Annie’s Ink-Lings


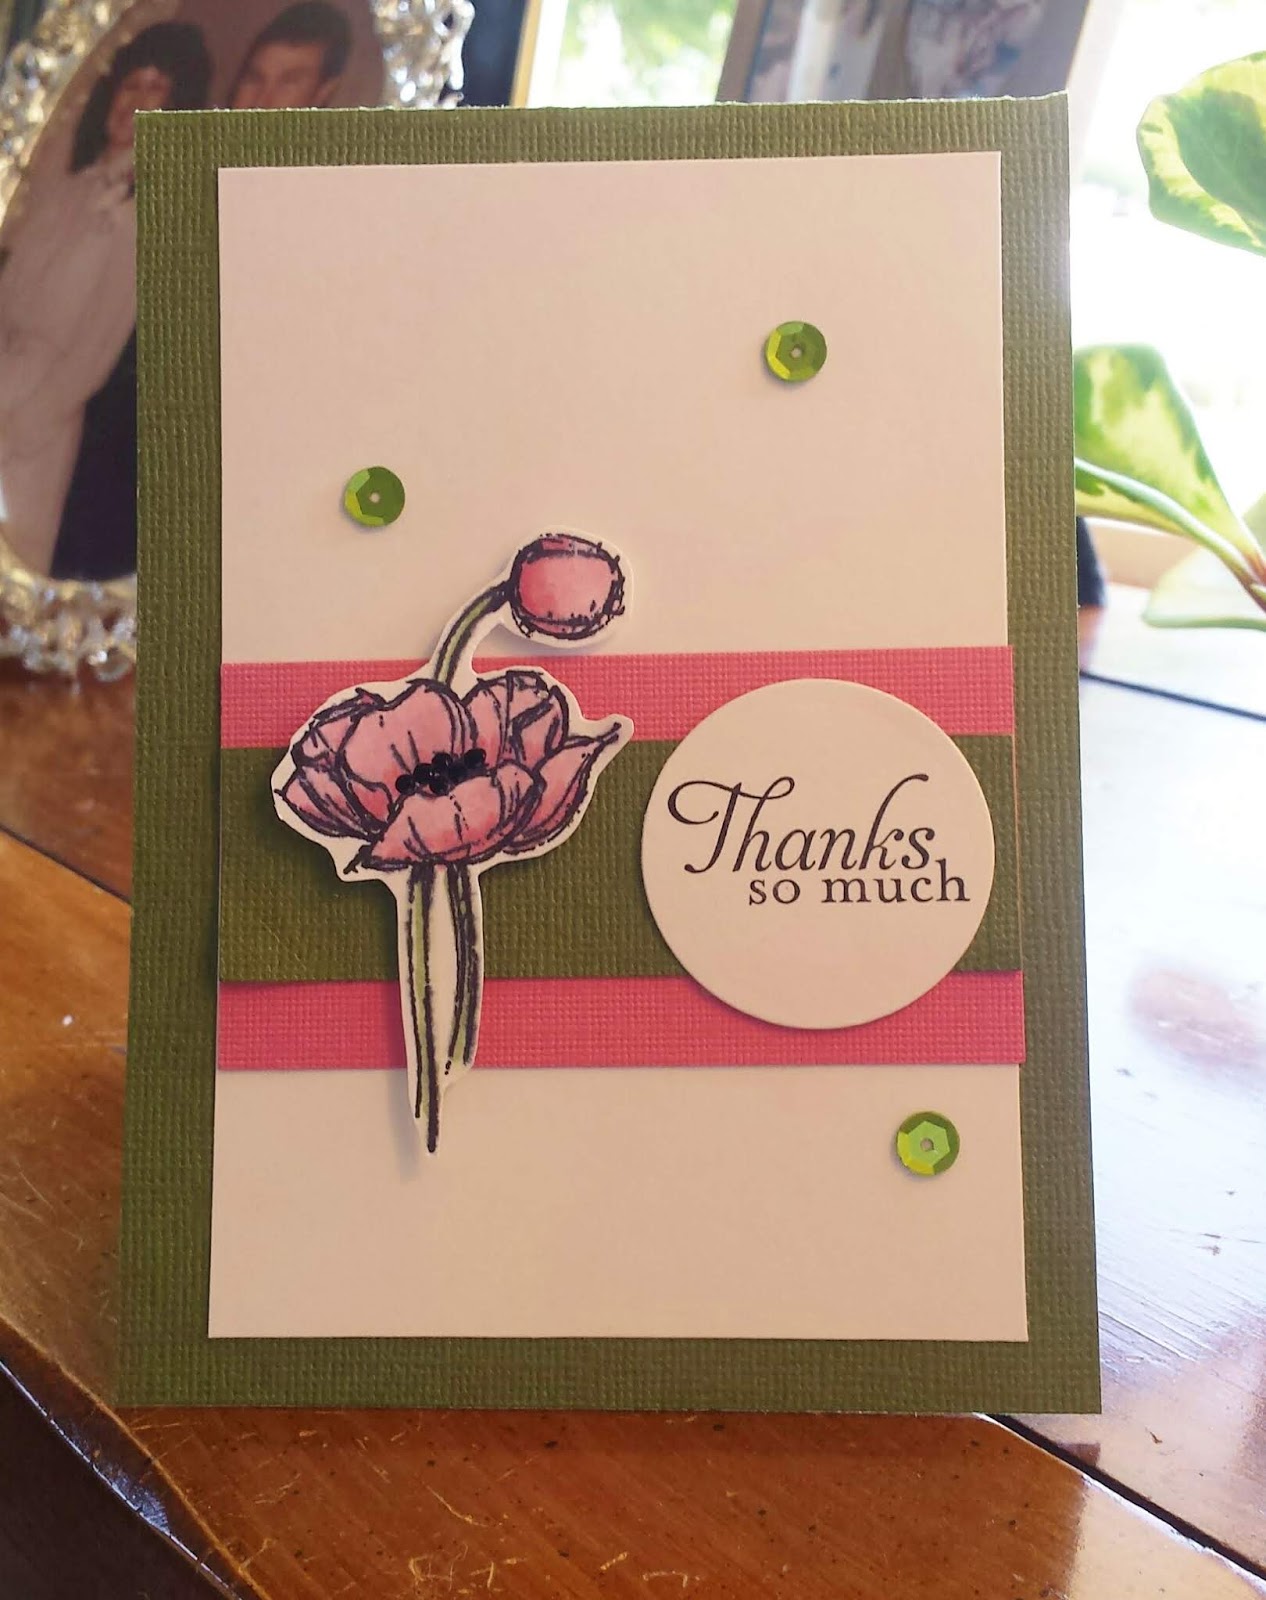
I don't know what it is about poppies, but for some reason when I look at them they give me a "happy heart" boost.  Truly, it is really hard for me to resist purchasing another poppy stamp.  I have a friend who feels the same way about irises.  This sweet poppy is from the Simply Sketched stamp set from Stampin' Up.  After stamping the poppies on white card stock using a Ranger Archieval Ink pad, I heat set the ink to avoid any smearing of the black ink.  I used Copic Sketch Markers to color the poppies and finished the one off by putting small dots of black Enamel Accents in the center.  I fussy cut the image and adhered it to the card with foam tape for the 3-D effect that I like.  A few matching sequins in a somewhat triangular pattern perfectly tied everything together.


Measurements
Top-folding Card Base  11 x 4 inches
White Panel  5 x 3 3/8 inches
Pink Panel 3 3/8 x 1 3/4 inches
Green Panel 3 3/8 x 1 inch

Supplies
Simply Sketched stamp set from Stampin' Up
Ranger Archieval Ink Pad
Copic Sketch Markers #R81 Rose Pink, R85 Rose Red, and G94 Grayish Olive
Ranger Enamel Accents - Black Tie

This is an amazingly quick and easy card.  I'm planning on making one or two more of this style but using different flower stamps.  Thank you for letting me share with you today.

Blessings,
Annie


Friday, March 11, 2016

Another Fun Class

Hello stampers and paper crafters,

At my class last week, I took us back to stamping images for our cards - just taking a little break from the die cuts except for the little bird, and also used embossing powder.  It was really fun to stamp and cut out, and actually be involved with making the images for our cards.  I'm not giving up die cuts by any means, but stamping was a creative boost that I needed.  Here are the three cards that we made.

This card is actually four layered panels on the card base - starting with the top panel it is a white panel, striped paned, white panel again, and polka dot panel.  I think it would make a great masculine card.  The die cut bird was mounted over the stamped leaf branch.

For this card I downloaded a music background from Pinterest.  You can find it on my Pinterest board:  Ann Lancaster - Clip Art.  I stamped the Dahlia two times on pale salmon card stock and embossed with white embossing powder.  They were colored with Copic Chrome Orange #YR04 and shaded with a bit of Light Suntan #E13.  I cut out the center petals of the second image and mounted it over the whole dahlia piece.  The leaves were also stamped and cut out - stamped with Distress Pine Needles and sponged with Distress Evergreen Bough.  The music panel was embossed with a wood grain embossing folder and edged with Evergreen Bough.

On this card I used handmade paper for the background panel.  On the brown rectangle panel I used Scrapbook Adhesives E-Z Runner White, placing three strips of the tape and covering with glitter.  It holds the glitter wonderfully and you don't even have to press the glitter down - just sprinkle on and shake off.  To make the jewels match the olive green layered panel, I used a circle hand punch, attached the punch outs in place, and then attached the jewels over them.  This is a great way to make jewels match your color scheme.

Well, I hope you picked up a few handy tips for your card making.  Have a great time creating!

Blessings,
Annie

Friday, August 14, 2015

Artsy Rainbow

Hello friends,

Don't you just love rainbows!  Every time I see one I am awed by its beauty and reminded of God's promise, "I set my rainbow in the cloud, and it shall be for the sign of the covenant between Me and the earth."  (Genesis 9:13) 

So . . . when I had an opportunity to join a rainbow swap, I jumped right in.  I didn't have an actual rainbow stamp but would have to be creative.  A fun idea came to mind and I started looking through my artsy stamps.  When I came to this stamp by Judi-Kins, I could hardly wait to get started.  Here you can see the finished card:


It was really fun to do something out of the norm and stretch my imagination.  The image was colored with Copic Sketch markers, which I just love to use. 

Stamps:
Judi-Kins 2907G
Paula Best 988-A called Rainbow Soul.

Blessings to you and watch for those rainbows!
Annie