Showing posts with label Autumn. Show all posts

Wednesday, October 27, 2021

Autumn Blessings


Annie’s Ink-Lings


Hi there friends,

 I feel so blessed to live in an area where there are four distinct seasons.  Each one has its own beauty, displaying all shades of yellow, red, orange. and green.  What I decided to do today was to make a card using colors that usually aren't considered autumn colors - blue and yellow.  I'm quite pleased with the result.  See what you think.


The Cuttlebug Forest Branches embossing folder made a wonderful accompaniment for the Stampin' Up leaves border die from the set called Wonderful Floral Dies.  I used the Sizzix Dotted Squares die for the label.  Two sizes of flower petals layered together beautifully adorns the label.


I was really happy to find the striped decorative paper that exactly matched the colors I wanted to use.  

I was also happy to be able to use this sentiment stamp again.  There's just something about it that makes me smile.

Here's how you can make this card.

Card Measurements

Blue card base: 8-1/2" x 5-1/2, Score at 4-1/4"
Yellow card mat: 3" x 5 3/8", for Embossing
Yellow card mat for sentiment: 2-1/2” x 5-3/8”
Blue card for die cutting: 2-1/2” x 2-1/2”
Designer Paper: 1-1/8" x 5-3/8"
Scrap card: Navy Blue card stock for tiny leaves

Materials
Stampin’ Up Wonderful Floral Die
Cuttlebug Forest Branches Embossing Folder
Sizzix Dotted Squares Die
Small Leaves Punch
Dies R Us sentiment stamp for inside of card
Blue and Pale Yellow Rhinestones
Black Dye Ink

Directions
1. Fold card base in half. On the card base trim off 1" on the front panel.

2. Adhere the strip of DSP to the inside of the card, leaving a small border on the 3 edges.

3. Stamp the inside sentiment and attach.

4. Die cut the leaves die from blue card stock.

5. Emboss the Yellow card stock with the embossing folder. Adhere the leaves die cut to back of the yellow embossed panel, trim off the excess.

6. Adhere this panel to the front of the blue card base, being sure to align so that there is a blue border all around.

7. Stamp Autumn Blessing on the blue die cut and attach at an angle on the card front.

8.      Punch four Navy Blue stems with leaves; attach two on the top right of the sentiment panel.  Attach the other two on the inside of the card on the bottom left.

9.      Adhere one large and one small yellow flower together with a blue rhinestone in the center at the bottom left.

10.    Add three light yellow rhinestones, placing them in somewhat of a triangle on the front of the card.


Thank you for coming to
Annie's Inklings today!


Friday, October 11, 2019

Woodland and Quail Birthday Card

Annie’s Ink-Lings


Just got this birthday card finished for my husband, whose birthday is October 12.  We both love watching the Quail in our yard, so I'm sure he's going to love it.  The Stampin' Up Rooted in Nature Stamp Set and Stampin' Up Woodlands Textured Embossing Folder were just perfect to create the design I had in my head.  Can hardly wait to try my next design idea.


All the images were stamped on white card stock.  The Quail, the cross-section tree trunk, and two of the leaves were stamped with the Tuscan Earth, then slightly over stamped with Amaretto Truffle, using my Misti.  Fuzzy cut the images after stamping.  I used 3-D tape to mount the cross-section tree truck.  I typed and printed the sentiment with my computer.

Supplies
Stampin' Up Rooted in Nature Stamp Set
Stampin' Up Woodlands Textured Embossing Folder
PSX Quail #2358
Fresco Ink Pads:  Tuscan Earth, Olive Green, and Amaretto Truffle

Measurements
White Card Base 9 x 6 inches
Brown Panel 6 1/8 x 4 1/4
Embossed Panel 6 x 4 inches

Blessings to you on this beautiful fall day.
Annie


Monday, September 2, 2019

Leaves are Falling

Annie’s Ink-Lings


I'm not ready for fall, but summer is slowly fading away.  However, I would not want to be without fall because it has such beauty in the changing colors.  Raking leaves – ugh!  My treasured memory of raking leaves was watching my son joyfully jumping into the piles of them.  More work for mom but it was so much fun.  He even wanted me to cover him up with leaves!  We always had oodles of fun.  These are some of the memories that came to me as I was making this card today.  That’s probably why this stamp is one my favorites . . . it takes me back to my son’s childhood.  Happily I had found the perfect sentiment to go  with this stamp.  This is what it says inside:  “Take time to jump in the leaves.”  Perfect in my mind, anyway.

If you want quick and easy, then this is the card for you.  I used only two colors of Distress Ink for the background, stamping the applicator off before lightly applying the ink.  The image and sentiment were stamped with black ink.  I lightly colored the leaves and the frame of the rake with PrismaColor pencils.  Next, I rounded the corners of the top two panels before assembling the panels to the card base.  I thought the strategically placed sequins made a nice finishing touch.  What do you think?


Card Base 81/2 x 51/2 inches
DP Panel 5 3/8 x 4 1/8 inches
Red Panel 5 x 3 ¾ inches
Cream Panel 4 7/8 x 3 5/8 inches
Tim Holtz Distress Ink Applicator (or sponges)
Distress Ink Pads:  Barn Door and Wild Honey
PrismaColor Pencils:  Limepeel, Peach, Green Ochre, and Process Red
Red Sequins
Glue, Tape Runner
Corner Rounder

Stamps:   Serendipity Stamps – Rake G298
                  Stampabilities – Leaves are Falling C1142
                  Impression Obsession:  Jump in the Leaves A5654


Thanks for stopping by.

Blessing,
Annie


Monday, October 15, 2018

Fall Fancy Fold - Standing Box Card


Annie’s Ink-Lings


Hello everyone,

I've been wanting to make this fancy fold card for a long time.  This morning I decided today is the day!  I was surprised at how quickly it came together once I had decided on colors, designer paper, etc.  It's a fun and quick little card that takes hardly any supplies.  Actually, if you keep your scraps like I do, it would be a great card for using them up.  If you give it a try, send me a picture of your creation.  Would love to see it.

Measurements


  • Blue Card Base: 4 x 11″ 
  • On 11″ side score @ 1/2, 2, 4, 5-1/2 

  • Green Layers: 3-3/4 x 5-1/4″ (you need 2 of these, one for the back of the card)
  • Designer Paper Layer: 3-1/2 x 5″ (you need 2 of these, one for the back of the card)

  • Green Front Panel: 2-3/4 x 5-1/2″ scored @ 1/2, 2″ on long side
  • Blue Layer: 2-1/2 x 3-1/4″ 
  • Designer Paper Layer: 2-1/4 x 3″
  • White Layer:   1-3/4 x 2"
  • Green Strips:  1/4 x 4" (you need 2 of these)
I used Copic markers to color the pumpkin.  Let me know if you have questions.

Blessings,
Annie

Thursday, October 11, 2018

Fall-Themed Thanksgiving Card


Annie’s Ink-Lings


Hi friends,

Back again with the third and last fall themed card, but with the sentiment of "Give Thanks."  My idea is to use it as a Thanksgiving greeting card.  For some unknown reason, I've been drawn to wreaths lately, so once again a wreath die was used for the focal point of the card.  I really like how the wreath shows up on the background image.  It was made using the Stampin' Up Hardwood stamp with Walnut Stain Distress Ink on red card stock.  The gold foil berries and the red foil bow give just the right amount of shine to the card.  I hope you like it, too.


1.  Stamp red panel with Walnut Stain Distress Ink and dry with heat gun.
2.  Trim panel to 4” x 5 ¼”.
3.  At the bottom of the panel on the right, stamp the “Give Thanks” sentiment and adhere the panel to card base.
4.  Trim the dark brown acorn so there is only the top portion left.  With the light brown acorn trim off the stem.  Glue the 2 pieces together.
5.  Glue wreath to center of red panel and arrange the elements as follows:  pine branch, fern pieces, gold berries, acorn, and bow.

Card Stock
White Card Base 8 ½ x 5 ½ inches
Red Panel 5 ¼ x 4 inches
Tan, Brown, Dark Brown, and Two Shades of Green
Red and Gold Foil Card Stock

Stamps
Stampin’ Up Hardwood
Impression Obsession Give Thanks (Count Your Blessings Set)

Dies
Cheery Lynn Designs Acorn (Large Leaves #2 set)
Impression Obsession Pine Branch DIE021-N
Memory Box Winterberry Sprig
Stampin’ Up Swirly Scribbles
Tim Holtz Alterations Funky Festive

Ink
Tim Holtz Distress Ink Walnut Stain

Thanks for stopping by again today.
Blessings,
Annie

Tuesday, October 9, 2018

Fall Stitched Alphabet Card


Annie’s Ink-Lings


Hi there card makers, 

Here's the second card from my fall card class.  When I saw the stitched alphabet die, I knew right off it was a must have.  I just love it and look forward to using it over and over for all occasions.  The background paper is from Hobby Lobby.  It caught my eye because of the great color combination.  If you are looking for a quick and easy fall card, then this one is for you.  It can be made in about 15 to 20 minutes even though it looks like it might take longer.  I was thrilled when I found that I had twine in the perfect matching colors.  So read on, and then get started!


Measurements:
Card Base:      5 ½” x 8 ½”
White Panel:   4 1/8” x 5 3/8”
DP Panel:        4” x 5 ¼”
Card Stock:     Four coordinating shades of fall colors for wreath, leaves, and letters
Twine:             Two colors – 12” each – for a bow

Dies
Cottage Cutz Stitched Alphabet #CC-398

Cottage Cutz Build-a-Grapevine Wreath #CCE-064

Assemble:
1.  Adhere the white panel to the card base, followed by the DP panel.
2.  Using 3-D tape, adhere the fall letters to the bottom of the card.
3.  Adhere the wreath centering it between the top of the DP panel and the wreath.
4.  Mold the Leaves and glue to the top of the wreath.
5.  Tie a bow with the two pieces of twine and glue to the top of the wreath.
6.  Glue two tiny acorns on the inside of the card at bottom left.

Stay tuned - the third card is coming up on Thursday.\

Blessings,
Annie


Saturday, October 6, 2018

Mocha Cup Happy Fall Card


Annie’s Ink-Lings


Hello Stampers,

Today's card features my favorite drink - a hot mocha!  I'm thinking I just might have one after I finish this post.  Oh, and a red, white, and blue scone would be delicious to go with it.  If you haven't yet had one of these scones, you don't know what you're missing - raspberries, blue berries, and white chocolate chips - yummy!  Well, back to the subject at hand.  This is a fun little card for fall, but it could easily be used as a fall-themed birthday card, too.  A great idea since I need two birthday cards for October and both people are latte drinkers.  So here's the card - enjoy!


1.  With Walnut Stain Distress Ink stamp mocha cup on brown CS and cut out.  Also stamp
            “happy fall” on light green CS, punch out using SU Classic Label punch.  Cut off the point on
            the left side of the label and punch a 1/8” hole.

2.  String twine through the hole, wrap it around the cup at the top and tie a bow on the right side of 
            the cup.  Glue the twine in place and put a dab of glue on the twine knot.

3.  On the back side of the small decorative piece of CS trace the sleeve template.  Run it through the
            crimping tool then adhere it to the cup.

4.  Adhere the flowers and leaf stems to the cup, and set aside.

5.  Adhere the green panel to the card base and then add the 2 decorative strips at the bottom of the card.  And finally mount the cup onto the card and add sequins.

Card Base:      5 ½” x 8 ½”
Panel:              4” x 5 ¼”
2 DP Strips:    ½” x 4”
Ink:                  Tim Holtz Walnut Distress
 Stamps:           Hero Arts Cup of Coffee K5332; Memory Box Happy Fall B946
Punches:          Stampin' Up Classic Label Punch and a small leafy stem punch

Thanks for visiting my blog today.
Blessings,
Annie

Saturday, October 14, 2017

Pop-Up Leaves Birthday Card


Hello Card Makers,

Today's post features a card that I taught in my class earlier this week. There's a nice surprise for the recipient when the card is opened as the leaves pop up and kind of float across the card. I made several using different sentiments along the fall/autumn theme. It is one of those cards that look likes it took a long time, but is really easy to make.

Wishing you a great week of card making.
Blessings,
Annie

Directions
1.         Score and fold the leaves in half lengthways.  With the three leaves, glue together only by the very tips making a string of leaves.  Set aside to dry.

2.         Adhere the two triangles to the base card, thus making a background.


3.         Stamp the sentiment on the inside of the card in the upper right portion of the card.  Set aside to dry.

4.         Stamp the “Autumn” word onto the small cream rectangle.  Layer onto the lighter green, then onto the dark green. 

5.         Wrap the layered panels with the green twine two times and tie in a knot at the top.  Adhere to the card front.

5.         Glue 3 small punched leaves along the diagonal line made by the two decorative pieces of card stock.

6.         Adhere the string of leaves to the inside with a really strong medium, making sure that the leaves will easily fold together.  Spacing will be determined by how much give there is in your leaf string.  The left leaf tip will probably be about 1 ¾” from the crease; the same for the right leave tip.  Glue the right tip first and close the leaf string; add glue to the left leaf tip and close card.  Hold closed until leaves are secure.

 Supplies
8 ½” x 5 ½” cream card stock, folded
5 1/4" x 4" - Cut two using coordinating scrapbook paper.  Cut each one in half diagonally.  You will have enough for two cards.

13 inches of green twine
3 medium die cut leaves

3 small punched leaves

Wednesday, September 16, 2015

Stepping it Up with Fall Cards

As much as I hate to admit it, Indian Summer is here, and autumn is creeping in.  Don't get me wrong, I love the seasons and I'm thankful to be living in an area that definitely has pronounced seasons.  It's just that I'm not yet ready for a change - just need a little more summer time.  By my own hand, I was forced into making a fall card because I joined a fall foliage swap.  You can see two of my creations here:


I sent the brown card for the swap.

Using an Impression Obsession die set, I cut the leaves from patterned paper matching the card base.  It's really a very simple design, but I love the effect of the patterned leaves.  I challenge you to just randomly pull some patterned paper from your stash, choose some coordinating card stock, and make one yourself.  Please leave a link where I can go admire it.

Blessings,
Annie

Friday, September 26, 2014

Every Leaf Speaks Bliss to Me . . .


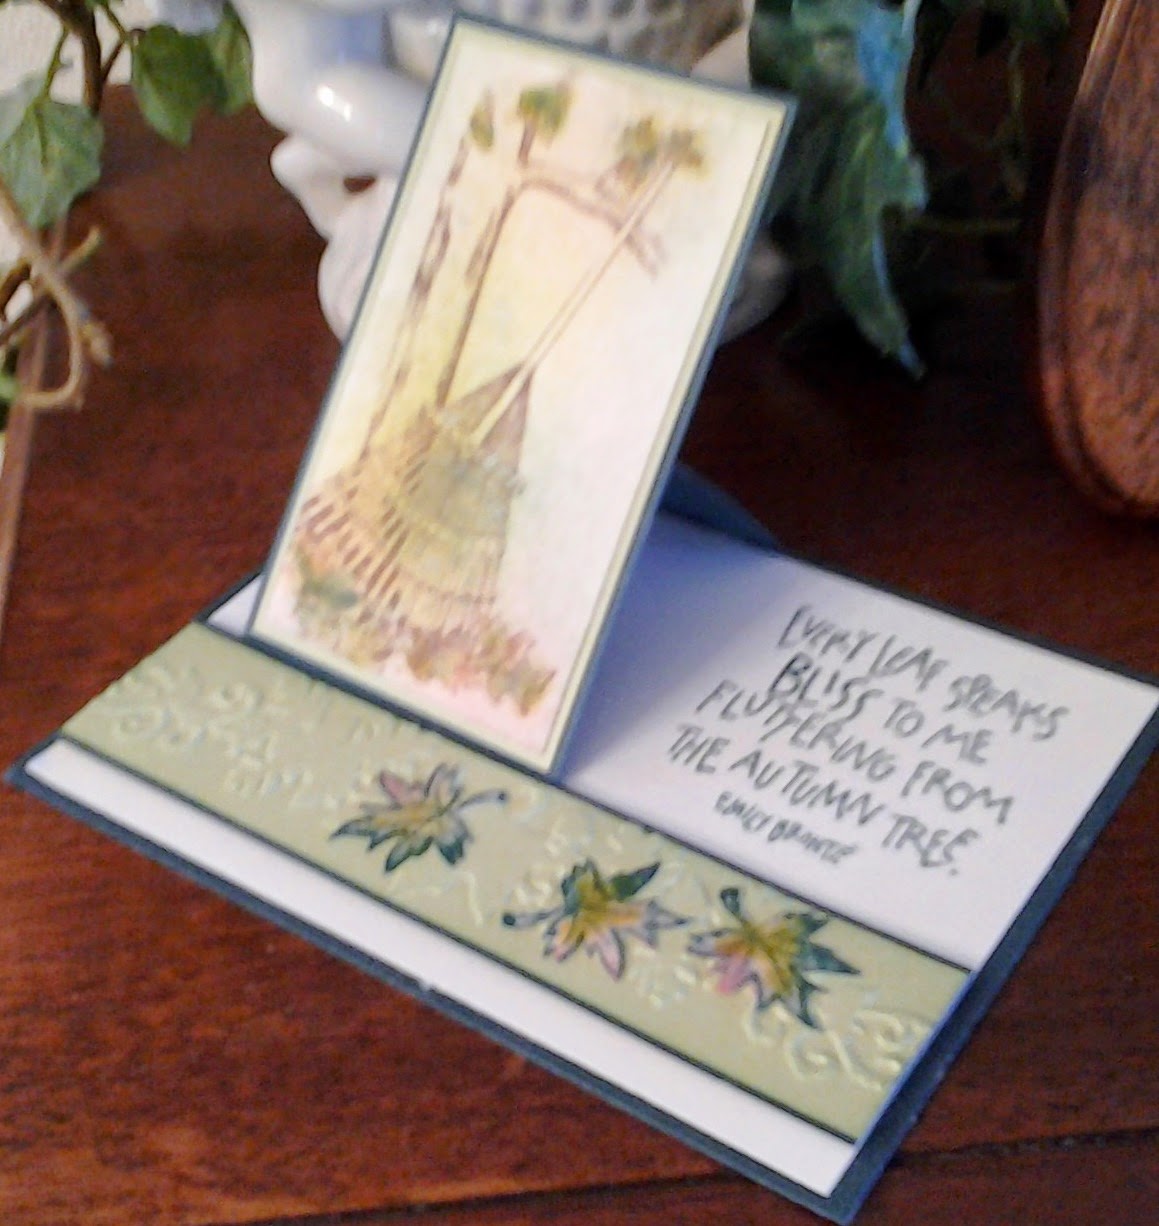
. . . awe, yes, such a beautiful poem by Emile Bronte.  And a perfect sentiment for this card, which by the way, is my first time making a One Flap Easel card.  I used the stippling technique to color the image and the cut out leaves.  Stippling is done by using a thick stiff bristle paint (or stencil) brush, tapping directly onto the ink pad, then tapping it onto the card stock.  Very easy to do and it's a fun technique so I hope you'll give it a try.

1. Card Base:
       4-1/4" x 5-1/2" Dark Green CS
       4" x 5-1/4" Olive Green CS
                      
2. Flap:    
       2-3/8" x 4-1/2" scored at 1/2"
and 2 1/2",  Dark Green CS
       2-1/4" x 3-7/8" Olive Green CS
       2-3/8” x 4-1/8” Dark Green CS
       2-1/8" x 3-3/4" Cream CS

3. Stamp the rake design (Serendipity Stamps) on Cream card stock in Memories Chestnut dye ink.  Color using stipple brushes and inkpads:  Fresco Sicilian Spice, Distress Pine Needles, and Distress Crushed Olive.  Layer onto the Olive Green card stock, then layer onto the smaller, un-scored Dark Green panel.

4. Stamp the sentiment Every Leaf Speaks Bliss to Me from Inkadinkado onto the right side of the Cream card stock using Distress Pine Needles ink.  Make sure that there is enough room for your flap. Place adhesive on the back of the 1/2" Dark Green tab and attach it to the back of the Cream piece.  Layer the stamped assembly onto the Dark Green strip, be sure to apply adhesive only to the portion below the score line.

5. Embossed Panel:  
            1-1/4” x 5-1/4” Dark Green CS
            1-1/8” x 5- ¼ “ Olive Green CS

6.  Emboss Olive Green strip with Leaf Garland from the Sizzix Thankful Background  Borders set.  Layer and center it onto the Dark Green strip and then attach it 1/4” from the bottom of the Cream panel.

7.  On a Cream scrap, stamp with the small leaf from the Hero Arts Real Leaves stamp set three times using Distress Pine Needles inkpad.  Color the leaves by stippling from the three ink pads- Fresco Sicilian Spice, Distress Pine Needles, and Distress Olive; cut out; distress the edges with Distress Pine Needles; glue onto the embossed panel.  And there you have it!  I love doing all that stippling and it provides a really great background.


Here, we have another fall card - a Circle Framelit Closure Card

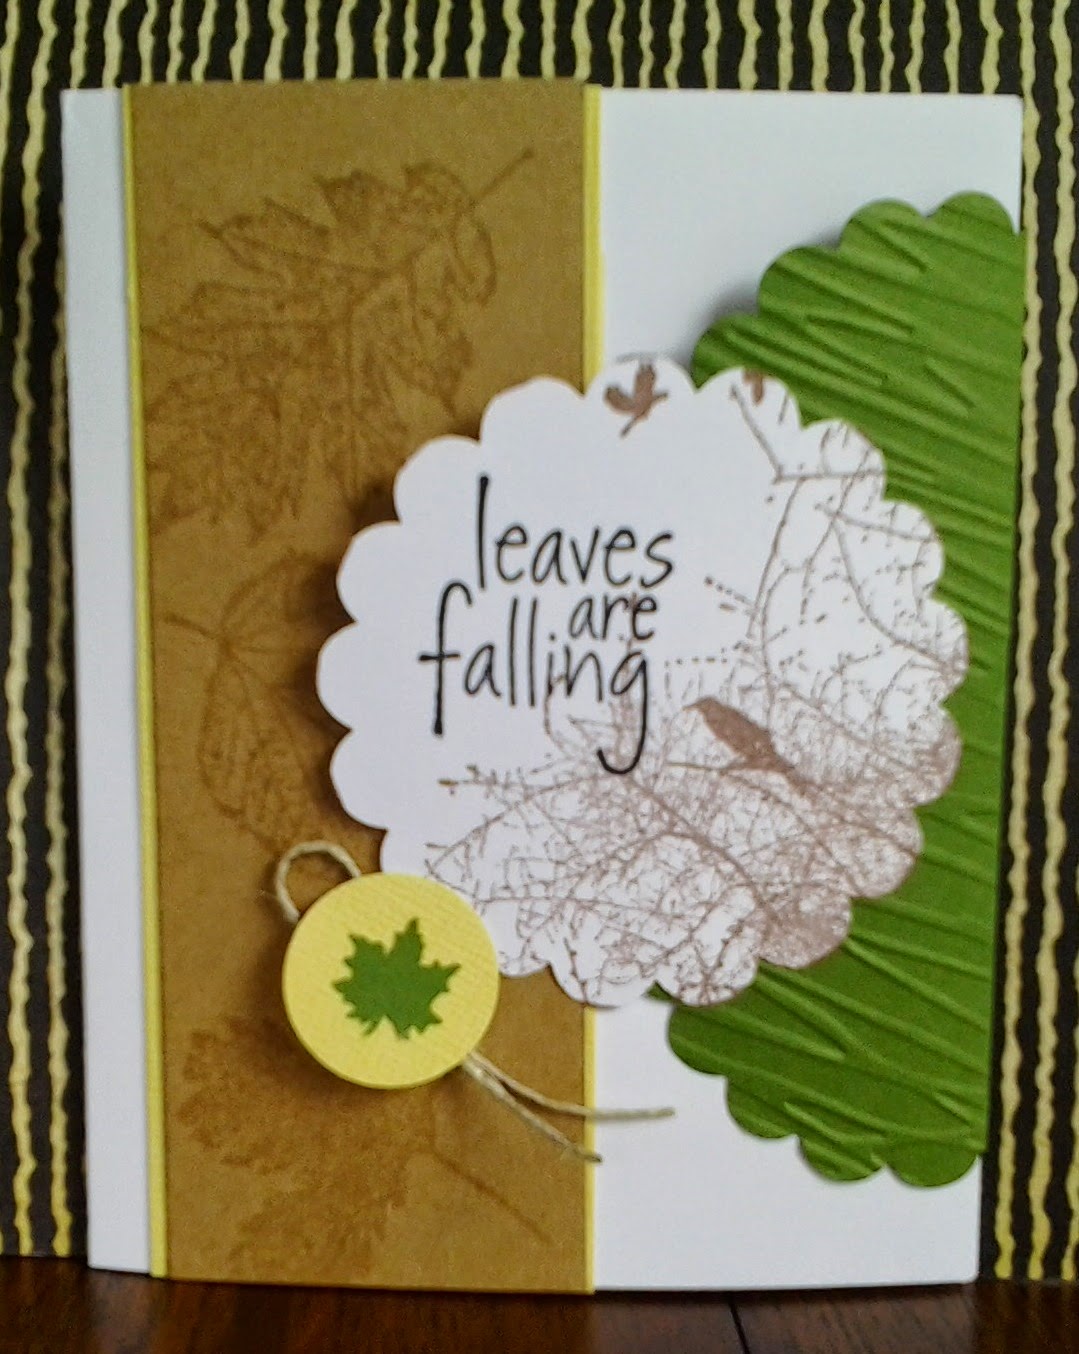
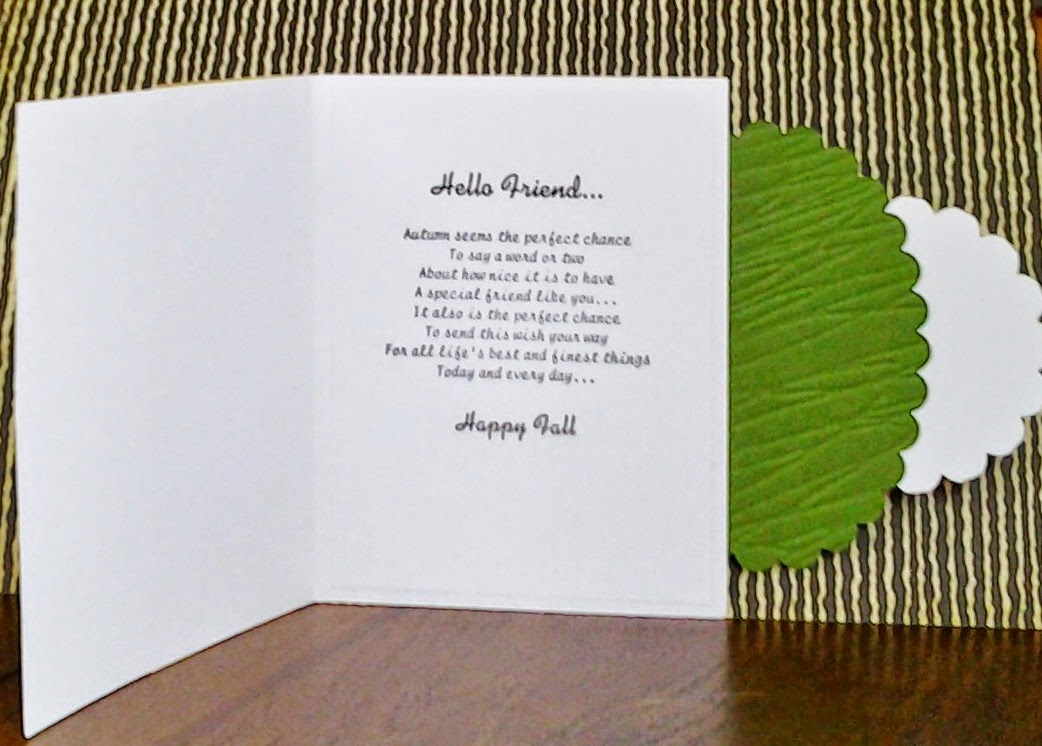
I made this card by watching it done on YouTube.  There are several things that I did differently: (1) used leaf stamps and Versa Mark ink to stamp on the brown panel, which is layered onto a yellow panel, (2) embossed the scalloped oval diagonally with the Branches embossing folder; and (3)  used a small punched leaf for the closure holder instead of a brad.  The card closes from the left, but it also has a flap on the right that folds over the closed card.  The little leaf layered onto a the yellow circle holds the flap in place.  Rather than trying to explain it here, I think you'll get a better idea of how it works if you watch the video - and I don't do videos - yet.  This link will take you to the video: https://www.youtube.com/watch?    v=Px5L63LdPIA


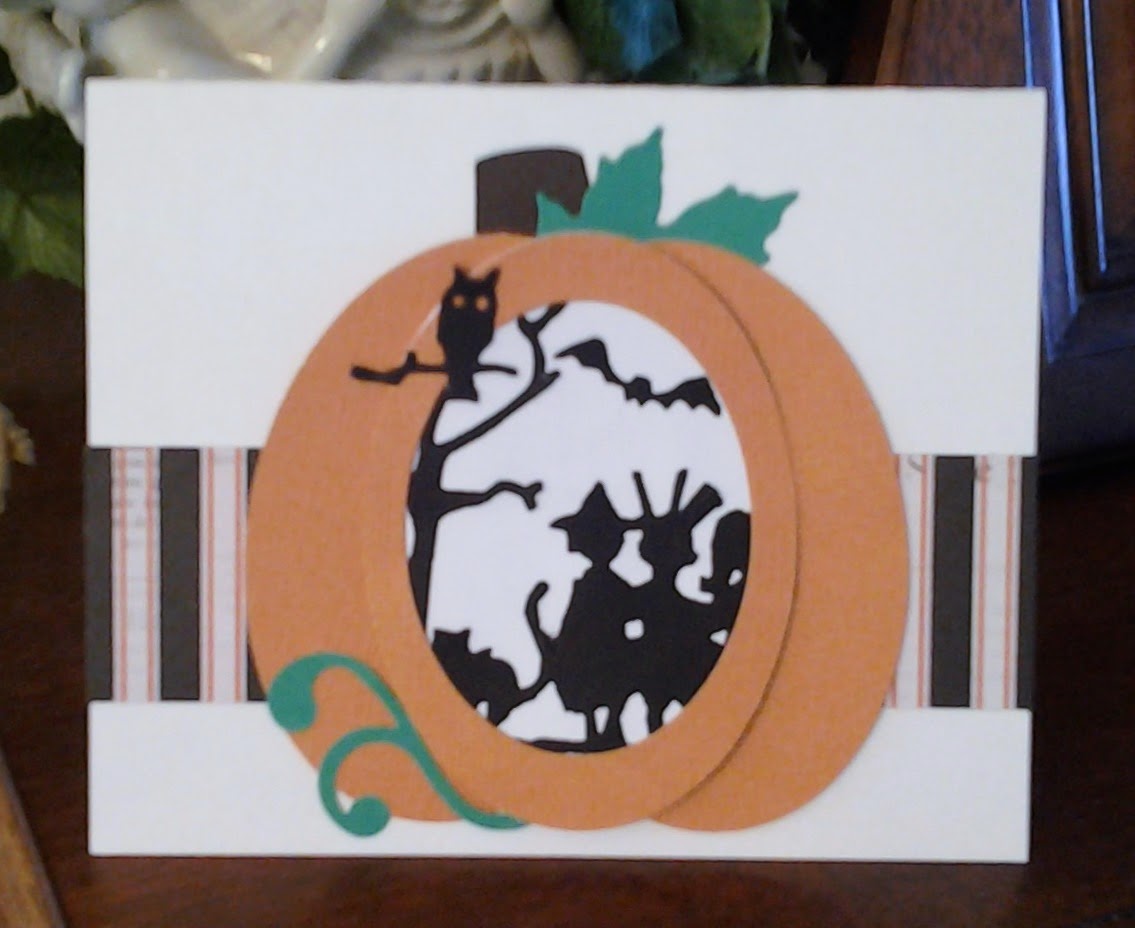
Halloween is not my "thing" but still it's a special day to me because my youngest sister was born on Halloween and also my niece.  So when I saw the Tim Holtz Alterations die called Halloween Shadows,  I really wanted to use it for birthday cards but also for my card class.  On Pinterest I saw a card that had a haunted house in the middle of a pumpkin and decided that idea would be a perfect way to use the Halloween Shadows die.  Part of the die strip has a Trick & Treat sentiment design, so that is what is used for the inside of the card for my class.  For the birthday cards, I'll use birthday sentiments instead. Spellbinders Nestabilities Classic Ovals Small are the dies I used to make the pumpkin.  The pumpkin stem was made by using a small flower pot punch, turned it upside down, and then glued in place.  Perfect!  The leaf was cut with a Cuttlebug die set called Leaves, but any leaf die or punch will work.  
  
Also for my card class, I decided to do a Halloween Flip-its card.  The die is by Sizzix and called Card, Circle Flip-its #2.  The first pic is the front of the card and the second pic is the inside.  Decorative elements are a few sequins and some orange and white twine for the bow on the inside.  I was so surprised to find out how easily this die set works.  I am now hooked on it!  Here is a YouTube link so you can see how to use the die with your Big Shot:  https://www.youtube.com/watch?v=sUdikwhBDqk

 
Well that's it for my September card class.  I hope you've seen something you'd like to try.  It's been fun sharing with you.  Thanks for stopping by and check back soon for some more ideas.
May your creative juices keep flowing and may your days be blessed.
Annie


Monday, September 22, 2014

Fall Has Come Upon Us!

How beautifully summer has turned into fall.  I am thankful that I live in a place that shows the splendor of all four seasons.  Our Creator paints a new picture every day and I'm always excited to jump out of bed in the morning just to see His newest work of art.  Really!  I climb out of bed and the first thing I do is pull back the curtain and look outside.  Psalm 118:24 (NKJV) tells us,

"This is the day the Lord has made;
We will rejoice and be glad in it."

A changing season also means that it is time to change my church library display.  I've been busily working up a design and die cutting leaves with my Big Shot.  Truly, the Lord has blessed me by calling me to be our church librarian because I get to do three things that are a passion with me:  I love reading books, I love being creative, and I love making available materials that will help others grow in their spiritual life and for good wholesome entertainment. 


As I mentioned above, all the leaves were die cut.  I found a picture of a basket on the internet, enlarged and printed it, cut it out, and glued it on the poster sideways so the leaves would look like they are falling from the basket.  Several years ago I made the scarecrow.  Joann's had material with a scarecrow pattern, so all I had to do was cut out the pieces, sew them together, stuff, and embellish.  Mr. Scarecrow has been in many displays over the years.  The straw bale came from Joann's too, at a good price - only $1.  The sunflowers and the vines came from the Dollar Store.  Being creative can also be a lesson in good stewardship.  I think the display is colorful and cheerful and I hope it puts a smile on the face of viewers.

I pray you are experiencing the blessings of the fall season.  Enjoy!
Annie

Friday, November 4, 2011

Fall is in the Air, Beautiful leaves everywhere!

Blazing color right outside my window, brilliant sunshine everywhere, and here I sit by the fireplace, thanking God for His beautiful artistry and blessings.  Uhmmm, what a life!  Speaking of artistry, I have a whole array of fall leaves cards to show you.  I recently hosted a swap with 8 stamp artists and they have created some really wonderful cards.  God places a talent within each of us and it's always exciting to see how that talent expresses itself.  So enjoy and hopefully get some inspiration.

Ann - Washington


Claudette - Illinois


Dawn - Georgia


Gloria - South Dakota


Helen - Georgia


Monica - Ohio


Teresa - California


Tracy - Oregon

Saturday, September 17, 2011

A New Card Folding Technique

A while ago I saw some really gorgeous patterned card stock from My Mind's Eye and I thought to myself, it's just too pretty to cut up into pieces, and what could I do to use the whole sheet.  I must have spent a half hour or 45 minutes  looking at the different patterns and trying to figure this out.  Finally, the light bulb clicked on (pardon the cliche), and this is what I came up with.  It's really fun to experiment with the different patterns.  If you decide to try it, I'd  love it if you emailed a picture to me. 


Front of card (card closed with flaps folded in).  The finished card measures 6x6.

Start with a 12x12 patterned piece of card stock, best when the pattern looks right side up when you also turn the card stock completely around.  Fold in half in both directions.  Cut and remove the top left portion.  Cut 1/3 rounded slice from the top right portion - on the inside (left).  Stamp a variety of leaves and glue around the cut out.   I used Stampin' Up set 106346 called Gently Falling.

Card with the top flap folded up.  When you stamp a sentiment on the inside flap, be sure to have the top flap closed so that you will have the right placement for when the card is closed up.  Here  I used Autumn Blessings from Rubbermoon.

Inside of card with right flap open.  I used the cut out portion on the inside and glued on a few stamped leaves to finish it off.
 Well, that it, friends.  Hope my directions make sense.  Shoot me an email if you have a question.
Autumn blessings to everyone, Annie


Saturday, October 3, 2009

Pumpkins, Pumpkins, Everywhere

There's another way to tell that autumn is coming on besides the leaves turning the beautiful fall colors and the crispness of the morning air. Pumpkins suddenly come to life -- appearing on front porches and steps, nestled among a dining room table decoration, and stacked in front of grocery stores displayed in their blazing coats of orange. Autumn also means that I get to play with my pumpkin stamps. So yesterday I browsed through the drawer where they had been hibernating until their season came around again. And that reminded me how blessed I am to live in a place in God's world where the seasons are uniquely and distinctly different from each other -- each with a glory of its own. What a gift!

So I set about, pulling out stamps, papers, inks and got busy. Here's a couple of cards that resulted from the flowing creative juices yesterday. Sometimes I like to do something special on the inside of the card also.

Sizzix Big Kick dies and Stampin' Up punches were used for all the different shapes.

These teeny pumpkins are set out every autumn. They're made using little clay pots and are only a bit over one inch tall. A sparkly cord comes out at the top and they have tiny punched leaves on their head. I never fail to chuckle when they once again make their appearance.
For those of you who love carving pumpkins, here's a PUMPKIN PRAYER for you to use for yourself, or with children or grandchildren.
(Remove the top of the pumpkin and pray:) "Lord, open my mind so I can learn new things about you."
(Pull out the seeds and pray:) "Remove the things in my life that don't please you. Forgive the wrong things I do and help me to forgive others."
(Remove the eyes and pray:) "Open my eyes to see the beauty you've made in the world around me."
(Take out the nose and pray:) "I'm sorry for the times I've turned up my nose for the good food that you have provided."
(Remove the mouth and pray:) "Let everything I say please you."
(Place a candle inside, light it, and pray:) "Lord, help me show your light to others through the things I do."
One final thought, we can be close to God in whatever we do -- even when carving pumpkins. May you be blessed in a special way this autumn season.
Annie