Hello again!
Are you ready to try something different? Let me share with you some of the fun things that have been going on around here.
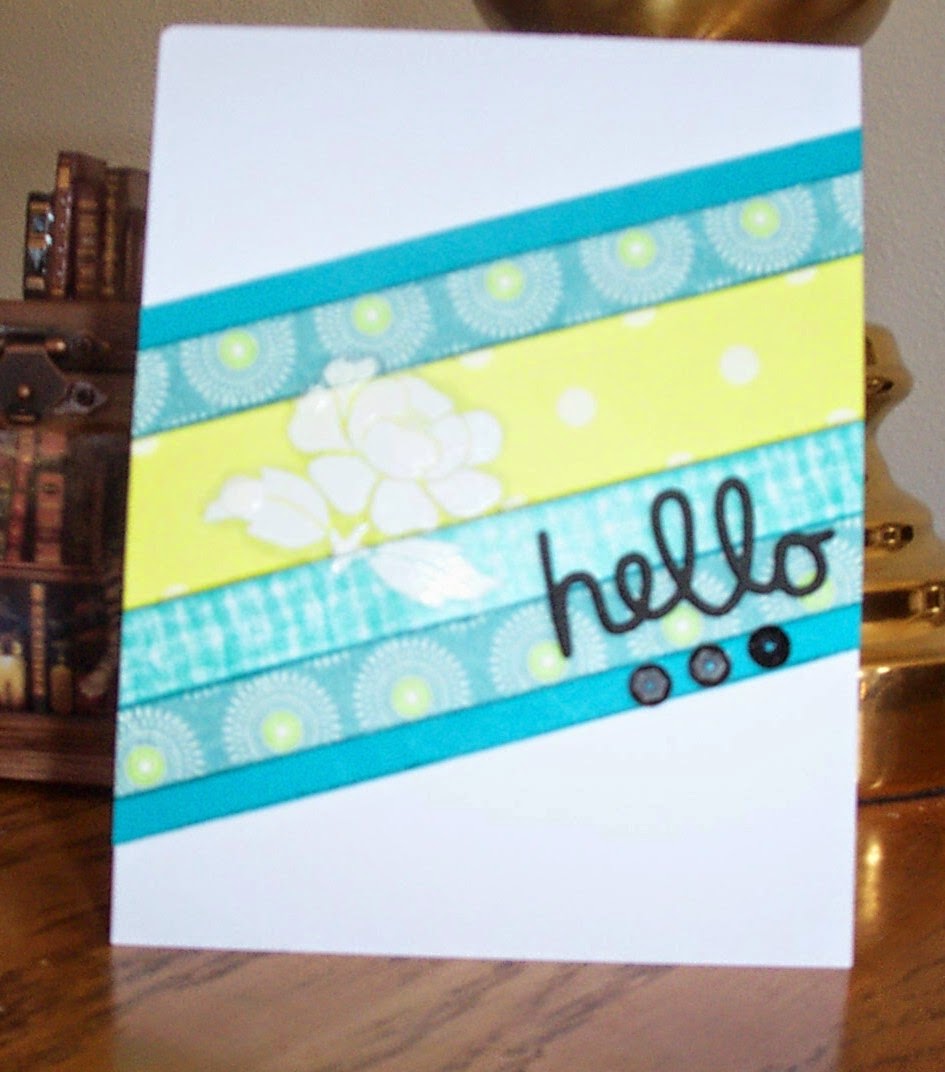
During card making with some of my friends this afternoon, the card pictured is one of the cards we made. I cased the basic idea from Jennifer McQuire, but made a few changes in the layout. Three tips that I learned from Jennifer are: (1) to distress both edges of each strip; (2) emboss an image on patterned card stock; and (3) to outline the embossed image with a grey Copic marker which made the white image stand out a bit more.
While browsing at Craft Warehouse last week, I discovered foam sheets with a self-adhesive backing. How cool is that! I die cut the "hello" from a black sheet of it. Just loved the result! Now it's my new favorite thing. The foam cuts very nicely and provided a nice dimensional word. Now it's your turn and all the information you need is included below. Have fun!
Finished Card Size: 4 ¼ x 5 ½ top folded.
Cut: white card stock for card - 11 x 4 ¼
small piece of white card stock - 5 ½ x 32 solid color strips – 5 ½ x ¼
1 patterned card stock - 5 ½ x ½
2 strips - use different patterned card stock for each one- 5½ x ½
1 strip with pattern different from first 2 – 5 ½ x 1
All strips should be of
coordinating colors.
1.
Score and fold
your card, and set aside.
2.
Use distress ink
on the sides of all strips. For the
colors of the card stock that I chose, I used Tim Holtz Peacock Feathers and Shabby Shutters.
3.
Now we will work on the strip of white card
stock. Use adhesive along all sides and
then several times on the body of the strip.
4.
Begin layering
the strips according to the card sample or make your own design.
5.
Be sure to
snuggle them up tight against one another.
6.
Using adhesive,
diagonally layer the striped piece to the card
7.
Trim the excess
off both sides of the card.
8.
The next step is
to emboss the flower stamp over the patterned strips.
9.
Be sure to use an Embossing Buddy first in order to keep excess embossing powder from
sticking to the card stock.
10.
After embossing
with white embossing powder, use a tiny brush to remove any powder that may be
left on the piece.
11.
To make the white
flower stand out a little more, lightly trace around it using a grey Copic marker. I used #N1,
neutral grey.
12.
Last step – peel
the backing off the word and stick onto the striped piece, then glue 3 black sequins under the word. (Doodlebug Designs sequins pack)
No comments:
Post a Comment