Annie’s Ink-Lings
Hello friends,
I just learned this new fold and am excited to share it with you. Some call it the Daisy Corner Pop-Up Card and others call it the Daisy Corner Flip-Down Card. You can choose which name you like best. 😊 The directions seem a bit lengthy but the card is quite easy to make and really doesn't take that long to assemble once you get all the pieces cut. I hope you will give it a try as it is definitely a fun fold.
The card base is 8” x 8” white card stock.
Score on two sides at 4”
On the upper right quadrant pencil in the words “Inside of
Card.”
Fold the card base both ways at the 4” score lines, using a
bone folder.
On the lower right quadrant, score from the bottom point to
the center of the card.
At ¼” on the left side of the score line, cut away the rest
of that section.
Fold the ¼” strip upward and use bone folder
* * *
Cut a 3 ¾” by 3 ¾”
decorative paper panel. On the back of
the panel, use the tape runner on all four sides plus across the middle three
of times. Adhere to the card base over
the “X.”
* * *
Place a 2 ¾” circle die in the center of the decorative
paper panel. Hold in place with a piece
of Washi Tape.
* * *
In order for you to use your Big Shot, fold the left portion of
the card base over the die and decorative paper panel of the card base. Run through a Big Shot. Don’t be concerned about the indentation that
shows on the opposite side as it will be covered up.
* * *
Cut two more 3 ¾” x 3 ¾” decorative paper panels; one like
the front panel and one that coordinates with it. Adhere those in place.
* * *
* * *
With the inside of the card facing up, fold the lower half of the card up. Add strong tape to the ¼” diagonal strip and remove the protective strip. While holding the right side steady, fold the left side of the card over the right side, making sure that the ¼” strip is securely adhered.
* * *
When you open the card, the flip panel will slide down.
* * *
Using the original circle die and another that is just a bit larger, cut out a round frame from white card stock. Adhere the circle frame to the front of the card around the round cut out.
* * *
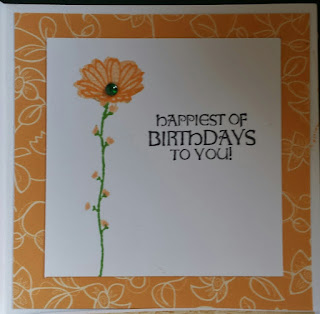
Stamp two Daisies from the Stampin’ Up Daisy Delight stamp set using Carved Pumpkin. Lightly
color the Daisies with a Fantastix Coloring Brush using the Dried
Marigold. Punch them out using the Stampin’ Up Daisy punch. Slightly mold the petals of both
Daisies. Use mounting tape to adhere
them together. Glue the assembled Daisy
to the card, centering it in the circle.
Add a jewel on the center of the punched daisy and one on the small
stamped Daisy for the finishing touch.
If you need help with the directions, please let me know.
Blessings,
Annie


No comments:
Post a Comment