Saturday, April 25, 2015

The Magic of Re-Inkers

Good morning to you!  Thank you for stopping by to see what's new on my blog.  Since it is a cool, windy morning, now is a good time to enter a new post. 

These cards are the product of a swap challenge making a watercolor background using re-inkers.  See directions here: http://www.microsofttranslator.com/bv.aspx?ref=IE8Activity&from=&to=en&a=http%3a%2f%2fstampinbackart.blogspot.nl%2f2013%2f08%2fwater-color.html

I used Ranger Adirondack re-inkers Denim, Terra Cotta, and Espresso.  Choosing these colors was a challenge in itself, but I wanted to get away from my "comfortable" colors.  It was a good learning experience, and here's a couple of tips:  a drop or two of each color is sufficient and be sure to wear craft gloves.  LOL

It was a fun technique and I had a great time experimenting.  I hope you'll give it a try, and be sure to use some colors outside your comfort zone.


Thanks again for joining me.  May you enjoy the blessings of this beautiful spring day.
Annie

Monday, April 6, 2015

The Blessing of Baptism

Hello friends, I hope you all had a beautiful Easter celebration.  Bob and I didn't get to spend time with family, but worshiping with my church family was a blessing.

Besides being a special day yesterday because it was Easter Sunday, it was special because my friend Kathy was baptized, following becoming a born-again follower of Christ.  How wonderful is that!  I made a special card for her and wanted to share it and the good news with you.

 
The sentiment inside is:
 
On your Baptism -
 A prayer that God will guide you
in His way.


Congratulations Kathy, with prayers and love!
Annie

Friday, April 3, 2015

The Blessing of Easter - Jesus Is Risen

I love Easter because it reminds me that Jesus is risen, but that He died to give me eternal life.  There is no greater gift than this.  I created only one design for Easter cards this year, the simplicity of an empty cross.  But that empty cross has such a deep meaning - that we believers will be resurrected just as Jesus was. 
As you worship on Easter Sunday, I pray that you experience the full blessings that are waiting for you.
Happy Easter Celebration!
Annie

Wednesday, February 25, 2015

Bokeh Technique - 3 Ways


I've totally fallen in love with the Bokeh Technique.  It's popping up everywhere so I had to join the fun.  First of all, a definition.  Bokeh  BOH-kay — also sometimes pronounced as BOH-kÉ™.  The term comes from the Japanese word boke, which means "blur" or "haze."

These backgrounds can be done with dye, pigment, and distress inks, and also watercolor.  I've made 3 cards doing the Bokeh background in 3 different ways.  Now let's get started!

Make a Template
Punch 4 different size circles from any kind of transparency sheet.  Approximately 1 3/4" circle, 1 1/4", 1", and ½".

Leaf  Card - Bokeh Background with Distress Inks
1.  With sponges layer and blend ink over the white panel with Distress Inks:  Dried Marigold, Spiced Marmelade, and Pine Needles.
2.   With the white ink, start with the largest circle on your template and work down in size, going from lighter to darker shade of white, using a sponge dauber to randomly pounce/rub the ink in the circle.  Lay it aside for a bit.  
2.  From the larger white panel, die cut the biggest leaf die from the package of Large Leaves #2 (Cheerylynn Designs).
3.  Attach the leaf panel over the Bokeh background, layer onto green panel, & mount on card base at the upper left.
4.  Embellish with 3 Dew Drops vertically on the lower right side of the mounted panels.
5.  Stamp sentiment at bottom right and on the inside.


Bokeh Background – Pink & White
1.  Emboss small cream panel with QuicKutz Retro Diamonds embossing folder.
2.  Start the Bokeh background applying white pigment or dye ink using the circles template.
3.  Nest, make a few circles using Memories Baby Pink dye ink and then a few more circles using Memories Blush dye ink (or whatever you have that is similar).
4.   Layer Bokeh panel onto the light pink panel, and then onto the card base.
5.  Glue on the Bluebells die cut (Spellbinders Die D-Lites Blue Bells and Lily of the Valley).
6.  Finish with a pink bow.


Birds Card - this one is a very simple style of Bokeh.


1.  Make Bokeh background using only white pigment or dye ink.
2.  Wrap twine around background panel and tie double knot.
3.  Trim branch die cut (Memory Box Grand Oak Tree)  to fit and glue on.4.  Glue 2 red birds (CheeryLynn Designs Birds of Earth and Sky) onto the branch and 1 red bird to inside of card.
5.  Stamp and punch sentiment; layer the 3 label punches and glue at twine knot.
6.  Attach panel to card base using dimensional tape.

Well that's it!  Hope you find these instructions helpful.  Let me know if you have a question.

Blessings,
Annie


Monday, February 9, 2015

Celebrating Love


With our 30th wedding anniversary today on the 9th and Valentine's Day on the 14th, love certainly needs to be celebrated!  This card to my dear hubby is the perfect celebration combination.  I used the new Stampin' Up Hearts border punch and Spellbinders Nestabilities Classic Hearts to make the brown panel to layer over the red card base.  Then I glued onto the red heart some of the brown hearts from punching with the border punch.  The stamps I used are Lawn Faun Banner stamp set and Happy Anniversary by Annette Watkins stamps.  The banner was mounted using Pop-Dots.  I can hardly wait until he gets home from work so I can give it to him.  He's going to love it!

Thanking God for His wonderful blessing.  And thanking you for stopping by today.
Annie

Tuesday, January 20, 2015

Book Review - The Patmos Deception


Davis Bunn is one of my favorite authors of Christian fiction.  When I learned about his new book, “The Patmos Deception,” I could hardly wait for my copy to arrive and get busy reading.  And as expected, I was not disappointed.  After all, Patmos, a part of the Greek islands, is where the Apostle John was exiled in AD 95 and where he had his Apocalypse vision and wrote the book of Revelation.  It was fascinating to read a story that took place on an island that has so much biblical history.

Nick Hennessy, an investigative reporter, is secretly hired by the assistant director of an organization called World Heritage Sites, to investigate the disappearance of historical and artistic icons from the Greek islands.  Needing an expert in Grecian antiquities, Nick hires Carey Mathers, a forensic archaeologist who is also a long-time friend.

The third main character is Dimitri Rubinos, who lives on the island of Patmos, owner of a charter boat business that is about to go under, as most of the other businesses on Patmos already had, due to the economic crisis in Greece.  Desperate to earn enough money to support his aging father and grandmother and to save his business, Dimitri agrees to use his boat to pick up and deliver cargo for an extremely wealthy English man.  At the time, Dimitri thought that what the cargo actually was made little difference to him.  By accident, he discovered that it made a great deal of difference because this cargo made him a smuggler.  What could he do to make good come of this?  He didn’t know, but he would figure it out; he would make a plan.  Then, Dimitri discovers that the investigation by Nick and Carey has led them to him!

Davis Bunn is a real storyteller.  I really like how this story starts out with mystery, then danger creeps in, and then the level of suspense grows and grows with every turn of a page.  I got so caught up in the story that I just could not put the book down until I knew the ending!  I would recommend it to anyone.  Also, it is appropriate for church libraries.

Bethany House Publishers provided this book to me for free in exchange for an honest review.

Saturday, January 10, 2015

Thank You! - One Sheet Wonder Mini Pocket Folder

I am one happy gal and excited about how this little project turned out!  While I was brainstorming for an idea to make an unusual thank you card, this little folder is what came together. 
I used the “one sheet wonder” pattern (https://www.youtube.com/watch?v=7uGGdpT_vG0) which gave me 8 pockets to fill and decorate. 
The first 6 pockets are individually lettered from the word “THANKS. 
Each of these 6 pockets holds a tag that has the matching letter at the top over a Bible verse that starts with that letter.  The 7th pocket holds a tag on which to write a message and sign my name.  The 8th pocket holds a gift card.   I used a border/edger punch on the tops of all the tags. 
The front of the folder has a stamped and layered sentiment attached over the length of ribbon, which holds the ribbon in place.  So fun - I hope you will give it a try!  Let me know if you would like to have the Bible verses I used and I will email them to you.
Blessings,
Annie
Supplies
12 x 12” double sided decorative paper (card stock weight)
3 or 4 sheets of coordinating decorative paper (card stock weight)
1 solid color sheet of coordinating card stock
1 sheet of white card stock
2 feet of coordinating ribbon
1 package of coordinating flower stickers
Tim Holtz Alterations – Vintage Alphabet 656623
Sizzix Die – Tickets 657569
Spellbinders Nestabilities  Decorative Elements – Romantic Rectangles S5-090
A Border/Edger Punch

Friday, January 2, 2015

A Story About Ezra

Keepers of the Covenant, by Lynn Austin
Absolutely wonderful – I love this story.  Lynn Austin has written several series of books, which include Gods and Kings and Refiner’s Fire.  This is the second book in the Restoration Chronicles.  In her series books, each book is its own story and stands alone, and does not have to be read in any order.  I really like that! 
Keepers of the Covenant is a Biblical fiction story about Ezra, a brilliant Jewish scholar who lived in Babylon during the rein of Persian King Xerxes.  Although this is a work of fiction, it holds many truths straight from the Old Testament.  As I read this book, I also did daily reading and Bible study on the books of Ezra and Nehemiah.  This was a special time of blessings as I delved deeper into the wonderful history in the Old Testament and of spiritual growth as I read of God’s everlasting faithfulness to His people and to all who trust and believe in Him.
In the opening of the story, the exiled Jews receive a decree from King Xerxes that all Jews would be annihilated on the thirteenth day of Adar in that year.  The King had been deceived by Haman, his most trusted advisor and second in command, into believing that the Jews were plotting against him and planned an uprising.  Out of this devastating decree, God raises up Ezra to be a leader of his people, and eventually Ezra is able to lead his people out of exile and to return to Jerusalem. 
Through the lives of Ezra's family and two other families, we see that they faced the same struggles “of faith and doubt, love and loss” as we do today.  As the story develops, the lives of the three families intersect and shows us how God amazingly works His purpose in each of us.  Ezra faithfully studied the Torah to learn as much as possible about God’s ways.  He became an outstanding leader of his people and was greatly loved, not just in this book, but in reality – in the Bible.
Bethany House Publishers provided this book to me for free in exchange for an honest review.
Happy New Year to one and all. 
Annie

Sunday, December 28, 2014

Four More of My Favorite Christmas Cards for 2014

It's been great fun making Christmas cards for family and friends and I'm kind of sad that it's time to put away all the Christmasy supplies and move on.  But before I do that, I want to share with you a few more of my favorite Christmas cards for 2014.

The Magi


Glittery Christmas Tree 


 Evergreen Trees


 Tangle Tinsel


 Wishing you lots of happy days of stamping and papercrafting in the new year of 2015!

Blessings,
Annie

Thursday, November 20, 2014

Cats and Christmas Card - a Sweet Combination

Anyone that knows me, knows that cats are an important part of my life.  When I hold KoKo's sweet little warm body to my chest and listen to the soft purring and feel the little rubbing against my neck,  I know that I am holding a precious gift that the Lord has put in my care.  A little gift that quiets my mind and brings on relaxation, and gives me unrestrained love.  I think KoKo must have learned those things from God!
So when I saw a card on the Kittie Kraft blog with a cat on it, I knew that I had to make one also.  This is my version:
 
 
I couldn't resist placing a little cat peeking from behind the wall of the staircase.  So adorable!  Because of all the little pieces, it does take a good bit of time to assemble it all.  But it is well worth the effort and just plain fun!  Following are some directions that should make it easier for you if you decide to take it on. 
 
Enjoy - and blessings to you,
Annie


Staircase & Christmas Tree Card
Card Base:  10” x 5”  (makes a 5x5 square card)
Panel:  2 ¾ “ x 5”
Decorative Paper:  2 pieces  5” x 5” and 5 ¼” x 2 7/8”

1.  Glue tops of little Christmas stockings and wheels on train set.  Set aside.

2.  Trace around the inside of the die cut window onto decorative wallpaper.  Cut it out so that no pencil marks show and no wallpaper shows when the window is placed over it.

3.  Using a finger dauber make a sky effect on the small white panel and attach it behind the cutout in the wallpaper.

4.  Adhere the wallpaper to the card base. 

5.  Trim and adhere the baseboard to the bottom of the wall.  Set aside.

6.  On the decorative paper staircase die cut, trim off the banister.  Adhere it to the white staircase die cut, leaving a small amount of white showing at each step.  Trim away excess wallpaper and mount to card base wall.

7.  Attach the two smaller trees to the back of the window frame and then mount over the window opening.

8.  On the large tree, cut off about half of the trunk and mount it to the staircase panel.

9.  Glue the star onto the treetop. 

10.  Trim and glue on the baseboard at the bottom of the staircase panel.

11.  Add light string trim to the tree.

12. Add stockings to windowsill.

13. Use finger dauber to color the cats’ ears and tail.  Glue one on the windowsill and one peeking from behind the staircase.

14.  Add flowers and leaves on banister and one at the corner of the window, lower right side.

15.  Use black ink to stamp the gift image onto white cardstock.  Color with color pencils, cut out, and glue under the tree.

16.  Add Crystal Stickles to the center of each flower and onto the top of the stockings.

17.  Add Pink Stickles to the tree lights and the star.

Memory Box Dies:  Classic Staircase, Festive Lights, Tiny Stockings, Train Set
Impression Obsession Dies:  Fir Trees, Window with Shutter
Cheery Lynn Designs Die:  City Girl Edger

Friday, November 14, 2014

The Reason for Christmas - Worship the King

Brrrr, it's cold outside!  What's a better time to stay cozy and warm inside and carry on with card making. I especially love making nativity Christmas cards and this die from Die-Namites is just perfect because I wanted only Baby Jesus, Joseph, and Mary in the scene.  The palm trees are so cool.  Looking at them brings back memories of when I visited Israel a few years ago.  They grow in many areas there.
The front of the card is a white panel embossed with the Cuttlebug Three Kings folder.  I like the idea of having the Wisemen on the front of the card because they are searching for the Savior.  Open the card and surprise - there He is!  LOL!  Are you  getting the idea that I like to tell a story with some of my cards.  Well, after all, I'm our church librarian - reading is wonderful and helps the mind be creative and imaginative!   Ok, back to the card.  Here's a picture of the card front.  The embossing doesn't show up very good in the pic, and it's really much prettier in person.
Directions
1.  Outside card base – fold in half
2.  Decorative paper panel – fold in half and put DS tape to only the sides of the decorative panel.  Adhere the sides to the inside of the card base, trying to get the center folds to fit as closely as possible.  Be sure to leave the center loose.  Lay it aside.
3.  Inside card base – score at 3½,  5½, and 7½ - Fold the card base so that you have one mountain fold, two valley folds.
4.  Die cut in the center of the panel.
5.  Score manger scene from the right side of the star and between the manger and Mary.
6.  Adhere the bottom only of the manger scene behind the die cut frame.
7.  Put DS tape all around both end panels of the inside card base.
8.  Adhere to the outside card base.
9.  Stamp the inside sentiment on a white panel, round the corners, and adhere to the right inside panel of the card.
10.  Front of card – round corners of the white embossed panel and the light teal panel.
11.  Layer them and then adhere them to the card front.
12. Use finger dauber to add a bit of ink to hi-light the embossed image.
13.  Round the corners of the small white piece and the dark teal piece. Stamp sentiment onto the white, layer it onto teal, and then mount it to the left bottom of the card.
Supplies
Card Base 11 x 4¼  (2 pieces) teal card stock
Light teal panel 5¼ x4
White front panel 5 1/8 x 3 7/8 (emboss on this one)
Outside sentiment panel:  teal 2 x 7/8 and white 1 7/8 x ¾
Inside sentiment panel 2¾ x 1¾
Decorative Paper background panel 5¼ x 4¼
Cuttlebug Embossing folder - Three King
Die-namites die - Nativity Scene
Spellbinders Nestabilities - Labels One
Thanks for stopping by today.
Blessings,
Annie


Thursday, November 13, 2014

Christ is our Lamppost, Lighting the Way

Out of all the lamppost dies on the market, this big one by Tim Holtz is my favorite.  It was as though it spoke to me the first time I saw it, but I didn't understand the message.  As I was typing this post, I started singing and humming "Oh Little Town of Bethlehem."  Remember the first verse,            
"O little town of Bethlehem
How still we see thee lie
Above thy deep and dreamless sleep
The silent stars go by
Yet in thy dark streets shineth
The everlasting Light

The hopes and fears of all the years
Are met in thee tonight."


Now I know why I was so happy making this card.  It made me think about how the Lord is our bright shining light and that all of us can have that light within us!  Oh my goodness!  Ok, back to how to make this card.

Directions:
1.  Card base – 9 x 5 3/4:  fold in half
2.  Front panel – 5 ½  x 4 ¼   emboss with embossing folder, layer onto card front.
3.  Die cut 2 ovals – one from music paper and one from red card stock.  Lightly distress the edge of the music piece and stamp a small sentiment in the center using a black ink pad.
4.  Layer the music oval onto the red oval, slightly offset to the left.  Center and layer onto embossed panel, but leave a bit of room on the left edge so that you can tuck the top ends of the streamers underneath.
5.  Die cut lamppost from black card stock.  Use a piece of light gold shimmer paper to back the lamp globe.  Layer the lamppost onto the right side of the oval die cuts.
6.  Adhere the holly and the berries to the lamppost.
7.  Add the cat next to the lamppost and embellish with a small red flower.
8.  On the left side of the ovals, adhere the streamers and bow.
9.  Hi-light the berries and the flowers with Stickles – red or Stardust.

 Supplies:
Crushed Olive Distress Ink
Memories Black Dye Ink
Tim Holtz Alterations die Holiday Lamppost
Spellbinders Nestabilities Labels Ten
Memory Box die Precious Butterflies (used just the small bow section)
Memory Box die Chesapeake Circle (used sections to make streamers)
Impression Obsession die Cats
Darice Embossing Folder Scrolls

I'll be back with another card tomorrow.  Until then, happy stamping!

Blessings,
Annie


Saturday, November 8, 2014

Celebrating Thanksgiving!

Hi Card Makers,

Do you love Thanksgiving as much as I do?  I remember to be thankful all through the year, but in November it's especially fun because I get to make Thanksgiving cards and send them out.  Actually I started making these particular cards in October so I would have them ready for my card class.  I have several more designs I want to try and time is flying by!


Ribbon Leaf Card
This card idea came from Pinterest, although mine looks a little different as I used an embossing folder and leaf die that I had on hand.  So don't be concerned if you don't have exactly what I used.  Happily, you can use whatever you have and it will still look great, including the ink pad colors!  For a different effect, you could use Washi tape or strips of several colors of card stock.

Craft Card Base:  8 1/2 x 5 1/2", top folded
Craft Panel:  5 1/4 x 4"
Various colors and widths of Ribbon
Sizzix Textured Impressions Embossing Folder - Dots
Cheery Lynn Designs Die - Large Leaves #2
Fresco Chalk Ink Pad - Tuscan Earth
Brilliance Ink Pad - Moonlight White

Die cut the leaf in the lower right side of the panel.  Emboss, then lightly sponge with Moonlight White.  Distress edges with Tuscan Earth.

Turn panel over and run a tape runner around the leaf cutout.  Lay pieces of ribbon across the cutout, alternating colors and widths.  About 1" from the top of the panel, adhere the ends of a piece of red ribbon to the backside of the panel.  Adhere the panel to the card base.

Make a small tag and stamp with a sentiment.  Punch a 1/8" hole at the top of the tag and tie it to the left center of the red ribbon with Bakers Twine.  Make a red ribbon bow and use a glue dot to glue the bow onto the ribbon.  Stamp a sentiment inside.

Apple Wreath Card
Here is a card using the Apple Wreath stamp set from Our Daily Bread Designs.  I stamped it once on green card stock and then stamped the apple section onto red card stock.  Both the wreath and the apples were hi-lighted with color pencils and then cut out.  The wreath is layered onto the polka dot panel but I used mounting tape for the apples.  This card is also a top folded card, 4 1/4 x 5 1/2.


The  cute little pumpkin on this card is stamped, colored, cut out, and then mounted over the ribbon and embossed background which has been distressed with a light grade of sandpaper.  I really like the writing of the Happy Thanksgiving stamp.

Pumpkin - PSX Stamps
Happy Thanksgiving - Rubber Soul
Tim Holtz Alterations Embossing Folder - Thanksgiving Background 


I was not successful in getting the background to show on the white panel on this card.  I used the Tim Holtz Alterations Hardwood Embossing Folder.  I wish you could see how great it looks.  If you have one of your own, then you know what I'm talking about it.  The leaf stamp is one of my favorites in my leaves collection.  It was made by The Rubbernecker Stamp Co.  I love how the red stands out on the white background.  I used dimensionals to make the leaf stand out even more. 
Among the many things I'm thankful for, I'm thankful for those of you who take the time to look at my blog and I'm thankful to be able to share with you.  Thanksgiving Day is only a couple of weeks away.  Remember this line from an old hymn, "Count your blessings, name them one by one . . . .)  I pray that your day is special and full of blessings.
Annie

Sunday, October 26, 2014

"If God is Good" Book Review


If God is Good, Faith in the Midst of Suffering and Evil, by Randy Alcorn


With so much turmoil in the world today, along with many family members, friends, and acquaintances experiencing traumatic situations, debilitating health issues, and sufferings of all kinds, it seems as though evil is gaining ground.  However, I believe in my heart that God is still the One and Only who is in control and that one day evil will be no more. Despite my unwavering faith, I felt I needed to learn more about God’s character and purpose regarding suffering and evil as they are revealed and taught in the Bible.

For these reasons I chose to read a book by Randy Alcorn called, “If God is Good, Faith in the Midst of Suffering and Evil.”  I found this book extremely helpful in locating a lot of scripture dealing with this subject.  Mr. Alcorn’s views and commentary seem to be right on and insightful.  He has broken up his writing by using many subject headings to organize his thoughts and progressively build his case on the reasons for pain and suffering.  This writing style makes it very easy to read and to better understand, from a biblical point of view, the answer to why there is suffering and evil.

I appreciate that Mr. Alcorn spent time pointing out that whether a person is a true believer of God’s sovereignty will determine if one has a spiritual view or a world view of suffering and evil.   

You may find that this book requires a real interest in reading it because it is a thick one.  Although it is easy reading, it is not one that you will want to breeze through as it offers plenty to pause and think about it.  It is a great piece of writing that will help you to minister to those who need help in dealing with any kind of suffering.  I have no hesitation in recommending this book to others.

I received this book for free from WaterBrook Multnomah Publishing Group for this review.
May the Lord bless and keep you,
Annie

Friday, September 26, 2014

Every Leaf Speaks Bliss to Me . . .


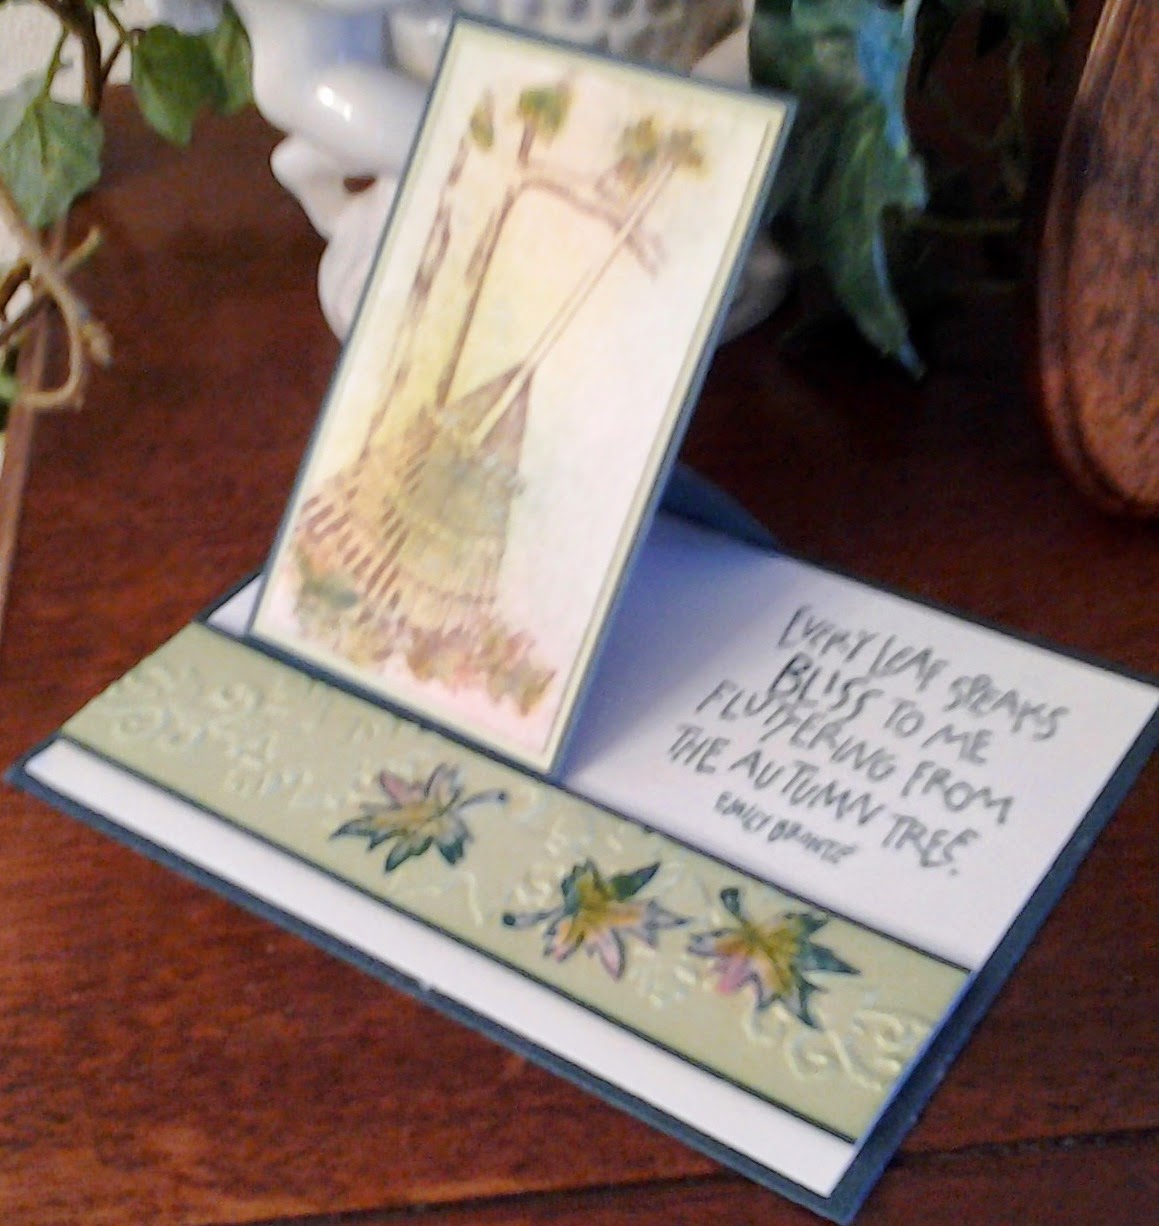
. . . awe, yes, such a beautiful poem by Emile Bronte.  And a perfect sentiment for this card, which by the way, is my first time making a One Flap Easel card.  I used the stippling technique to color the image and the cut out leaves.  Stippling is done by using a thick stiff bristle paint (or stencil) brush, tapping directly onto the ink pad, then tapping it onto the card stock.  Very easy to do and it's a fun technique so I hope you'll give it a try.

1. Card Base:
       4-1/4" x 5-1/2" Dark Green CS
       4" x 5-1/4" Olive Green CS
                      
2. Flap:    
       2-3/8" x 4-1/2" scored at 1/2"
and 2 1/2",  Dark Green CS
       2-1/4" x 3-7/8" Olive Green CS
       2-3/8” x 4-1/8” Dark Green CS
       2-1/8" x 3-3/4" Cream CS

3. Stamp the rake design (Serendipity Stamps) on Cream card stock in Memories Chestnut dye ink.  Color using stipple brushes and inkpads:  Fresco Sicilian Spice, Distress Pine Needles, and Distress Crushed Olive.  Layer onto the Olive Green card stock, then layer onto the smaller, un-scored Dark Green panel.

4. Stamp the sentiment Every Leaf Speaks Bliss to Me from Inkadinkado onto the right side of the Cream card stock using Distress Pine Needles ink.  Make sure that there is enough room for your flap. Place adhesive on the back of the 1/2" Dark Green tab and attach it to the back of the Cream piece.  Layer the stamped assembly onto the Dark Green strip, be sure to apply adhesive only to the portion below the score line.

5. Embossed Panel:  
            1-1/4” x 5-1/4” Dark Green CS
            1-1/8” x 5- ¼ “ Olive Green CS

6.  Emboss Olive Green strip with Leaf Garland from the Sizzix Thankful Background  Borders set.  Layer and center it onto the Dark Green strip and then attach it 1/4” from the bottom of the Cream panel.

7.  On a Cream scrap, stamp with the small leaf from the Hero Arts Real Leaves stamp set three times using Distress Pine Needles inkpad.  Color the leaves by stippling from the three ink pads- Fresco Sicilian Spice, Distress Pine Needles, and Distress Olive; cut out; distress the edges with Distress Pine Needles; glue onto the embossed panel.  And there you have it!  I love doing all that stippling and it provides a really great background.


Here, we have another fall card - a Circle Framelit Closure Card. 

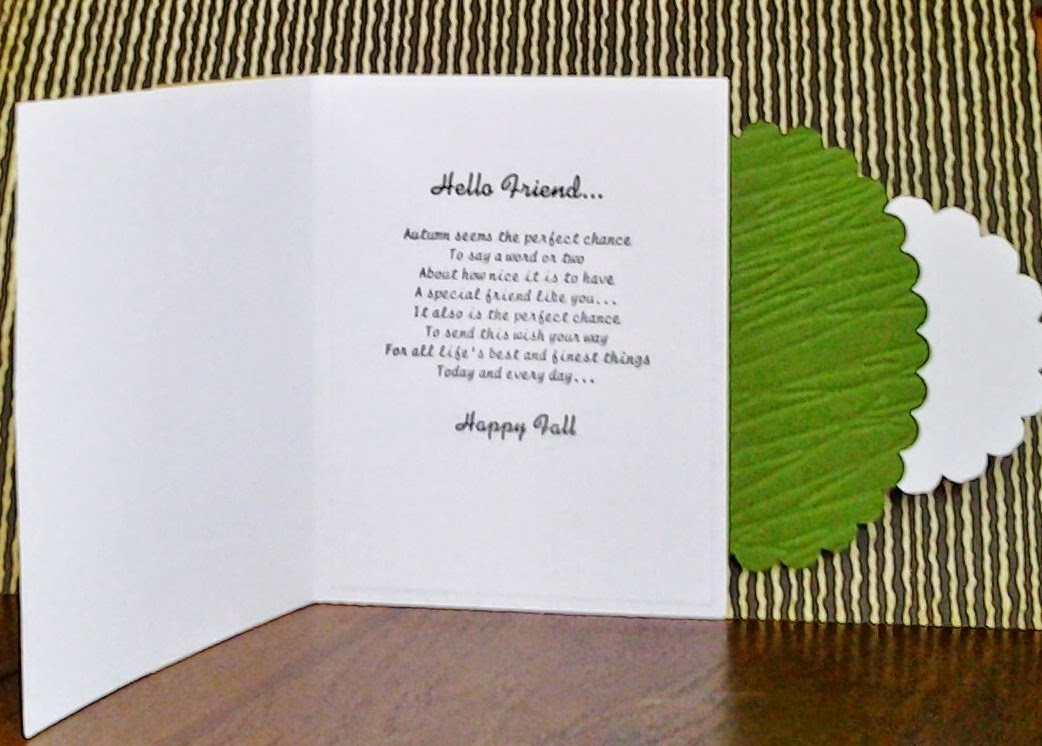
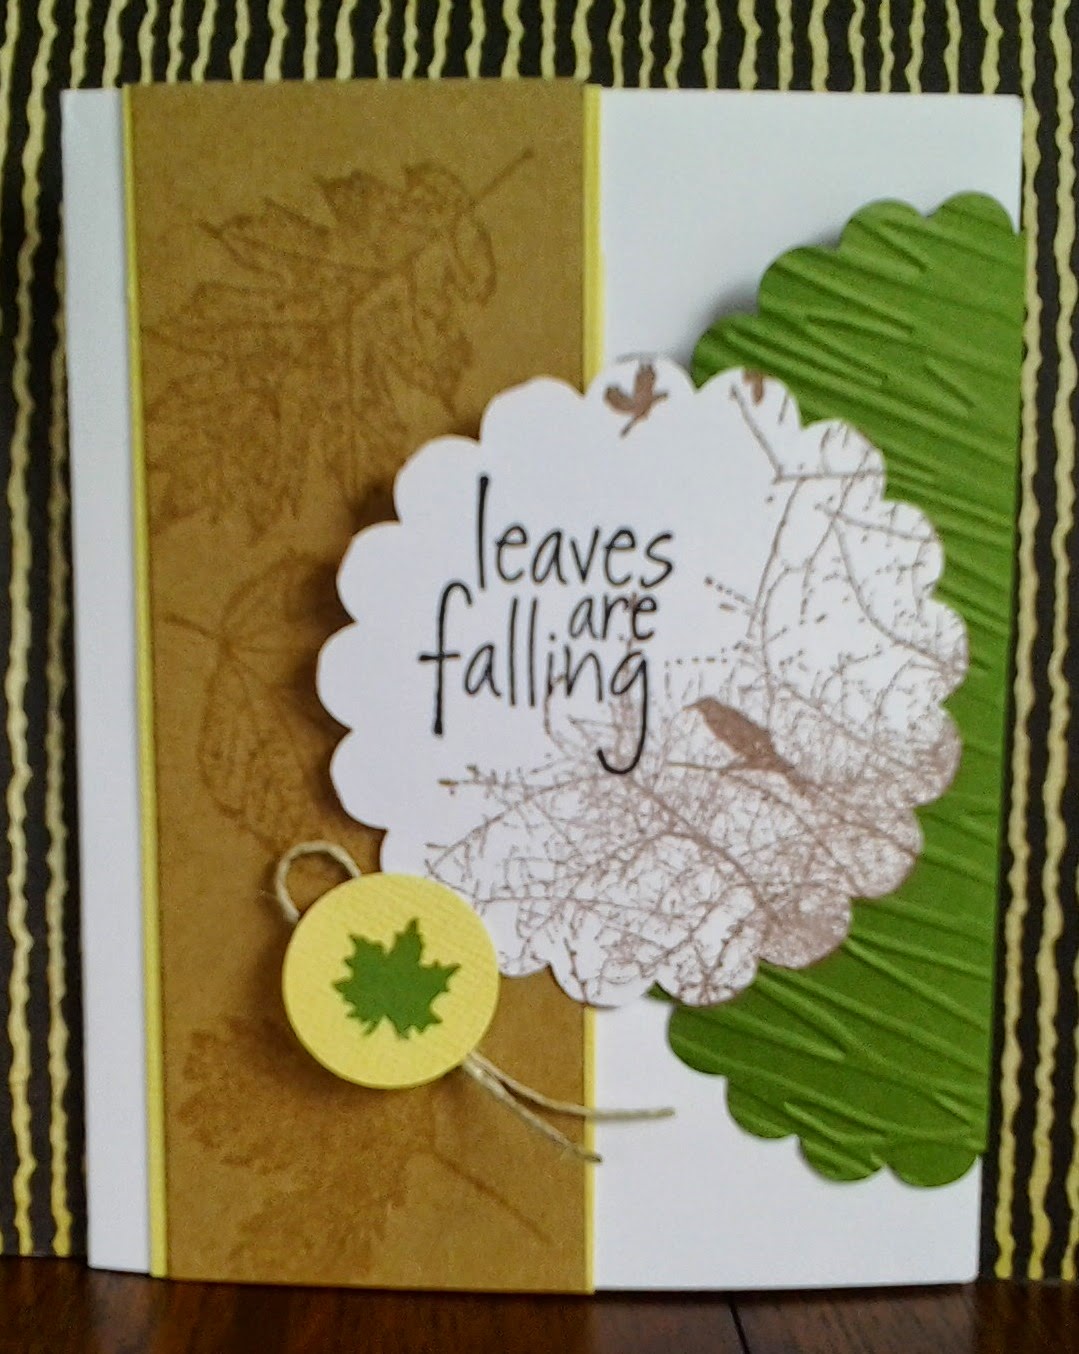
I made this card by watching it done on YouTube.  There are several things that I did differently: (1) used leaf stamps and Versa Mark ink to stamp on the brown panel, which is layered onto a yellow panel, (2) embossed the scalloped oval diagonally with the Branches embossing folder; and (3)  used a small punched leaf for the closure holder instead of a brad.  The card closes from the left, but it also has a flap on the right that folds over the closed card.  The little leaf layered onto a the yellow circle holds the flap in place.  Rather than trying to explain it here, I think you'll get a better idea of how it works if you watch the video - and I don't do videos - yet.  This link will take you to the video: https://www.youtube.com/watch?    v=Px5L63LdPIA


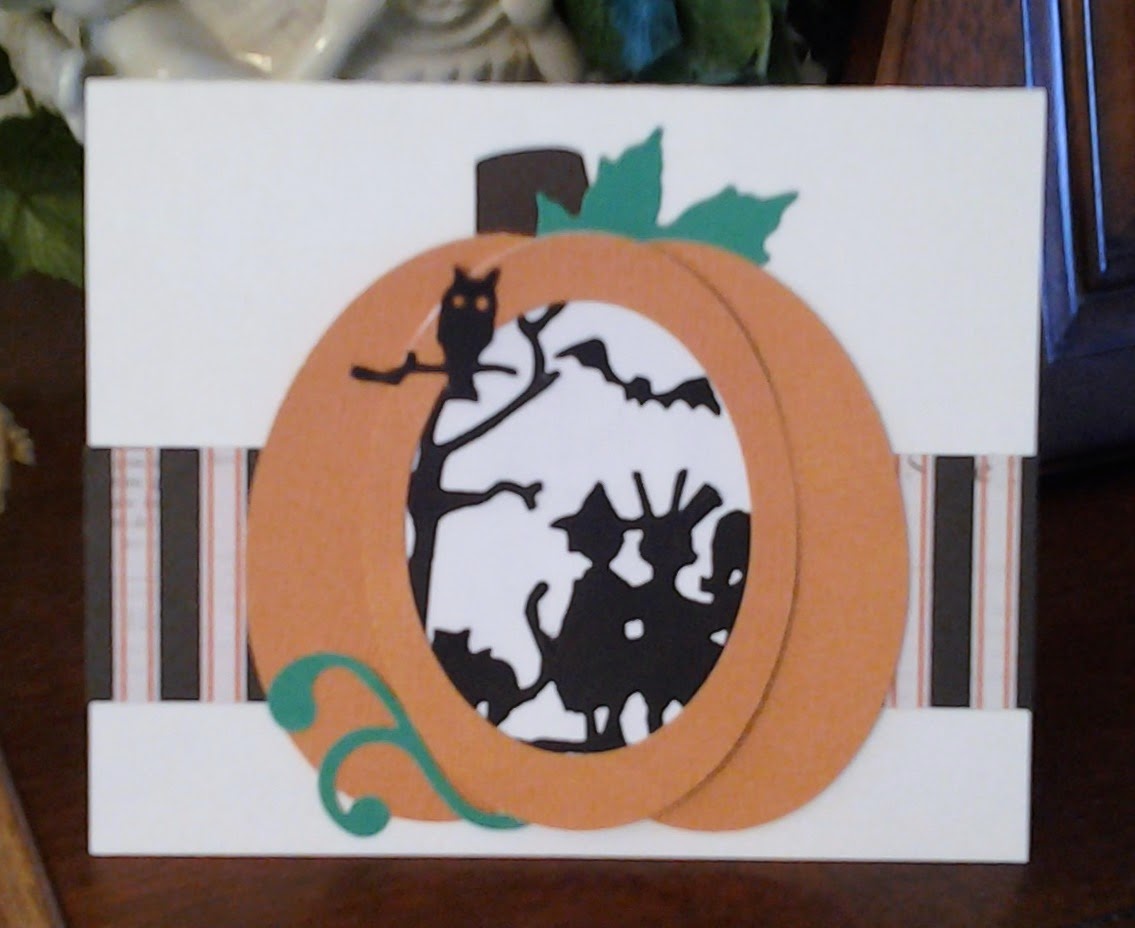
Halloween is not my "thing" but still it's a special day to me because my youngest sister was born on Halloween and also my niece.  So when I saw the Tim Holtz Alterations die called Halloween Shadows,  I really wanted to use it for birthday cards but also for my card class.  On Pinterest I saw a card that had a haunted house in the middle of a pumpkin and decided that idea would be a perfect way to use the Halloween Shadows die.  Part of the die strip has a Trick & Treat sentiment design, so that is what is used for the inside of the card for my class.  For the birthday cards, I'll use birthday sentiments instead. Spellbinders Nestabilities Classic Ovals Small are the dies I used to make the pumpkin.  The pumpkin stem was made by using a small flower pot punch, turned it upside down, and then glued in place.  Perfect!  The leaf was cut with a Cuttlebug die set called Leaves, but any leaf die or punch will work.  
  
Also for my card class, I decided to do a Halloween Flip-its card.  The die is by Sizzix and called Card, Circle Flip-its #2.  The first pic is the front of the card and the second pic is the inside.  Decorative elements are a few sequins and some orange and white twine for the bow on the inside.  I was so surprised to find out how easily this die set works.  I am now hooked on it!  Here is a YouTube link so you can see how to use the die with your Big Shot:  https://www.youtube.com/watch?v=sUdikwhBDqk

 
Well that's it for my September card class.  I hope you've seen something you'd like to try.  It's been fun sharing with you.  Thanks for stopping by and check back soon for some more ideas.
May your creative juices keep flowing and may your days be blessed.
Annie


Monday, September 22, 2014

Fall Has Come Upon Us!

How beautifully summer has turned into fall.  I am thankful that I live in a place that shows the splendor of all four seasons.  Our Creator paints a new picture every day and I'm always excited to jump out of bed in the morning just to see His newest work of art.  Really!  I climb out of bed and the first thing I do is pull back the curtain and look outside.  Psalm 118:24 (NKJV) tells us,

"This is the day the Lord has made;
We will rejoice and be glad in it."

A changing season also means that it is time to change my church library display.  I've been busily working up a design and die cutting leaves with my Big Shot.  Truly, the Lord has blessed me by calling me to be our church librarian because I get to do three things that are a passion with me:  I love reading books, I love being creative, and I love making available materials that will help others grow in their spiritual life and for good wholesome entertainment. 


As I mentioned above, all the leaves were die cut.  I found a picture of a basket on the internet, enlarged and printed it, cut it out, and glued it on the poster sideways so the leaves would look like they are falling from the basket.  Several years ago I made the scarecrow.  Joann's had material with a scarecrow pattern, so all I had to do was cut out the pieces, sew them together, stuff, and embellish.  Mr. Scarecrow has been in many displays over the years.  The straw bale came from Joann's too, at a good price - only $1.  The sunflowers and the vines came from the Dollar Store.  Being creative can also be a lesson in good stewardship.  I think the display is colorful and cheerful and I hope it puts a smile on the face of viewers.

I pray you are experiencing the blessings of the fall season.  Enjoy!
Annie
Monday, September 15, 2014

The Last Summer Flowers

Good morning paper crafters,

Summer is sliding into fall and we are having a beautiful Indian Summer here in Wenatchee.  Before I turn my card making toward the next season, here are a couple of flower cards to say goodbye to summer.  This color combination has been around for a long time, but I just never get tired of it.  Isn't it amazing that brown can be so bright and cheerful!
 
This card is a top fold.
 
And this one is a side fold.

 
The flowers were made with punches from Stampin' Up:  Blossom, Pansy, Petite Petals, and the Blossom Petals Builder was used for the leaves.  The final touch was to add some jewels to make the flower centers pop.  The ribbon and the paper is also from Stampin' Up.

Thank you for stopping by.  May a wonderful blessing touch you today.
Ann


Monday, September 1, 2014

Murder at the Mikado by Julianna Deering


 Since I love a good old-fashioned murder mystery, I really enjoyed reading this story.  It was well written, taking lots of twists and turns, with dark secrets being revealed throughout the investigation.  Except for the three main characters, practically everyone else was a possible suspect.  Julianna Deering was an unknown author to me until my reading of Murder at the Mikado.  I’m glad she was brought to my attention and I plan to read more of her murder mysteries.

The story takes place in the 1930’s in a small English town and at the country estate of  Drew Farthering.  Whenever there is a mystery to be solved, Drew somehow ends up in the middle of the investigation.  This time Drew becomes involved at the request from the beautiful wife of one of his employees.  To make matters worse, the wife turns out to be a former girlfriend and this does not sit well with Drew’s fiancĂ©e.  The wife is the first suspect in the murder of a celebrated actor with whom she had had an affair.  I say the first suspect because as the investigation progresses, four or five others are rooted out as possible suspects and they all have a motive for murder.  Just when Drew thinks he might be close to discovering the truth, the story takes another turn and he is hard put to find any solid facts.  

Both the main characters are Christians with good moral character.  The story is without profanity and sexuality – just a good, clean “who done it” murder mystery.  I recommend it to all mystery lovers and plan to donate the book to my church library.

Bethany House Publishers provided this book to me for free in exchange for an honest review.