Wednesday, December 26, 2018

Happy New Deer Standing Box Card

Annie’s Ink-Lings

Hello again,

I decided to take a break from Christmas and make one of another category.  Today's card is a happy new year card.  I can't recall ever making one before and I certainly don't know why.  Maybe because it is so close after Christmas.  Anyway, I bought this stamp a couple of years ago and I've never used it.  Actually, I have a number of things that I've purchased and haven't yet used.  The sad truth comes out!

For this card I decided to used the Standing Box Card fold again.  I made one about a month or two ago and posted it on my blog.

It was fun to make and I think it looks like a happy little card.  Just love the little deer.


First Section
Red Card Base  4 x 11 inches (on 11 inch side score @ ½, 2, 4, 5 ½ inches)
Tan Card Stock  3 ¾ x 5 ¼ inches
DSP  3 ½ x 5 inches

Second Section
Tan Card Stock  2 ¾ x 5 ½ inches (score @ ½, and 2 inches on long side)
Red Card Stock  2 ½ x 3 ¼ inches
DSP  2 ¼ x 3 inches

Top of Box Pieces
Red Card Stock  1 ¼ x 2 ½ inches
DSP 1 x 2 ¼ inches

Sentiment
Scrap of Tan Card Stock
Black Ink Pad
Happy New Deer by Inky Antics D3-0021-D
Stampin’ Up Small Scallop Oval Punch

Embellishments
EK Punch – Deer Head with Antlers
Impression Obsession Small Deer #DIE117-C
11 inches of Red Twine

Assemble First Section
1.  Score the long red panel and adhere the two layers to the 5 ½ inch section of the scored panel.  This is the top of the card.

2.  Fold up each of the scored sections and adhere the ½ inch section to the card front.

Assemble Section Section
3.  Score the tan panel, fold and adhere the two layers for each of the larger sections.  Adhere the strip to the red box and to the card front.

4.  Stamp sentiment on tan scrap piece and punch out.  Stick on a little red jewel.

5.  Either tie the red twine around one antler and make a bow or tie the bow and glue on to the antler.  Mount the antler and glue the sentiment piece to the front of the box section.

6.  Adhere the small deer die cuts to the top of the card a little to the right.

Wishing you many blessings in the new year,
Annie

Thursday, December 20, 2018

Go Tell It on the Mountain . . .

Hello fellow card makers!

I really like to make window cards.  Sometimes I wish I could put all the ideas in my head into one design.  I think that that will never happen, however.  It would have to be a huge card.  That thought makes me chuckle!  Well, I finally decided on the design, the paper, and all the dies that I would use.  Wow!  I used a bunch of dies for this one, but it was fun.  Here is my finished card.


Card Base 9 1/4 x 6 inches white card stock

Dies
Spellbinders Shapeabilities:  Layer Poinsettia
Penny Black: Mountain
Impression Obsession:  Tiny Flowers
Impression Obsession:  Leaves and Stems
Impression Obsession:  Foliage
Heartfelt Creations:  Window Box Elements
Poppystamps:  Grand Madison Window
Sizzix/Tim Holtz:  Funky Festive

Stamp
Penny Black:  He is Born

Computer Generated
The Christmas Tree and the Wall Clock, printed on card stock and fussy cut.

Additional Items
Black Enamel Accents for the blue flower centers
Buttermilk Nuvo Crystal Drops for the poinsettia
Star Dust Stickles for the Christmas Tree

Thanks for reading my post.

Blessings,
Ann

Saturday, December 15, 2018

Tangled Tinsel

Hello on this sunny afternoon!

It has been warm enough for a couple of days to melt the snow and today it almost looks like spring.  I'm really surprised to see flowers still blooming out in the flower beds.  I'm still working on my Christmas cards for this year.  Just finished up this cute little card using a stamp that I've had for ages.  I hope it brings a smile to your face.


The stamp is by Stampendous called Delightful Christmas UM005.  The sentiment is Tinsel in a Tangle #IB-JS-161 by Unity Stamp Co.  I used a Christmas tree die from the set by Cottage Cutz called Rustic Sign & Trees CC4x6-039.  PrismaColor pencils for all the coloring.  What fun making this card and now three more of them to do.

May your day be blessed,
Annie

Friday, December 14, 2018

The Traveling Wise Men

Annie’s Ink-Lings


Greetings,

Even though the three Magi didn't find Jesus until after He had grown to several years old, many Christmas songs depicted them to have arrived at the manger where He was born.  So I find it really hard to get that picture out of my mind.  How about you?  LOL  However, the Magi (who really weren't kings) did find the house where Joseph, Mary, and Jesus were living in Bethlehem.  I guess that is why I like this die so much -- it shows them on their way to Bethlehem, following the beautiful star that had appeared in the sky on the night of the birth of Jesus.  What a glorious night that was!  What a joy to make this card.


White Card Base 8 1/2 x 5 1/2 inches
Star Decorative Paper 5 3/5 x 4 1/8 inches
Teal Strip 5 3/8 x 3/4 inches
White Sparkle Paper

Tim Holtz Wise Men Die #663127 (which includes the star die)
Stampin' Up Label Punches
Rubber Stampede "Merry Christmas" Stamp

I hope you like it and want to make one.

Blessings,
Annie


Thursday, December 13, 2018

Peace Love Joy at Christmas

Annie’s Ink-Lings


Hi to all,

This afternoon I'm sharing the second Christmas card from one of my classes.  Another quick and easy one that features a couple of dies that I really like -- the Sizzix Swirling Stars and Penny Black Peace, Love, Joy.  I also used a scalloped frame from the Die-namics My Favorite Things.  I see all three of these die sets as being really versatile, and not for Christmas only.  See what you think!

Card Base 8 1/2 x 5 1/2 inches
Red Panel 5 3/8 x 4 1/8 inches
White panel 5 1/4 x 4 inches

Red Frame 2 5/8 inch square
White Panel 2 1/4 inch square

Finished off with a sparkling jewel in the middle of the large star.

I wish you all a peaceful, joyful Christmas with lots of love!

Blessings,
Annie

Wednesday, December 12, 2018

Worship the King


Annie’s Ink-Lings

Hi there fellow card makers,

I haven't posted anything for a while because I've been so busy preparing for two card making classes.  Now that they are over with, I can share some of what we have been making.  The stamp I used on this Christmas card is one of my very favorite Christmas stamps.  Even though it is of the wise men seeking Jesus thousands of years ago, it reminds me of how we are still seeking Him today.  I am so very thankful that God called me and then I found Jesus and He lives in my heart.  Every Christmas is a joyful Christmas because of Him!

Measurements and directions are below the picture.


1.  Red card base (8 1/2 x 5 1/2) folded.

2. Adhere a black panel 5 1/4 x 4 1/8 inches onto the card front.

3.  Emboss a 5 1/4 x 4 inch panel using the Cuttlebug Kitchen Weave embossing folder.  

4.  Cut a 5 inch piece of ribbon and a 4 inch piece of ribbon.  Tape the ends of the 5 inch ribbon to the back of the embossed panel, and adhere it to the black panel.

5.  Stamp the wise men (Inkadinkado #99624-DD) on the upper half of a 3 1/2 x 2 1/4 inch white panel that has been die cut with smallest frame of the Penny Black Elegant Stitching Frame set.

6.  Stamp the "Worship the King" sentiment on the lower left side, and then layer it to 3 5/8 x 2 3/8 inch red panel

7.  Using 3-D tape, mount this assembly over the ribbon toward the lower left side of the card.

8.  Taking the 4 inch piece of ribbon, slide it under the vertical piece of ribbon at the top of this small panel and then tie one knot.  Trim ends of ribbon.  You can use a bit of glue or a glue dot below the knot to hold the ribbon in place.

9.  Add 3 red jewels to the right side of the mounted panel.

10.  Stamp the inside sentiment on a 5 1/4 x 4 inch white panel and adhere inside of the card.

Happy stamping and may God bless you,Annie 


Monday, October 15, 2018

Fall Fancy Fold - Standing Box Card


Annie’s Ink-Lings


Hello everyone,

I've been wanting to make this fancy fold card for a long time.  This morning I decided today is the day!  I was surprised at how quickly it came together once I had decided on colors, designer paper, etc.  It's a fun and quick little card that takes hardly any supplies.  Actually, if you keep your scraps like I do, it would be a great card for using them up.  If you give it a try, send me a picture of your creation.  Would love to see it.

Measurements


  • Blue Card Base: 4 x 11″ 
  • On 11″ side score @ 1/2, 2, 4, 5-1/2 

  • Green Layers: 3-3/4 x 5-1/4″ (you need 2 of these, one for the back of the card)
  • Designer Paper Layer: 3-1/2 x 5″ (you need 2 of these, one for the back of the card)

  • Green Front Panel: 2-3/4 x 5-1/2″ scored @ 1/2, 2″ on long side
  • Blue Layer: 2-1/2 x 3-1/4″ 
  • Designer Paper Layer: 2-1/4 x 3″
  • White Layer:   1-3/4 x 2"
  • Green Strips:  1/4 x 4" (you need 2 of these)
I used Copic markers to color the pumpkin.  Let me know if you have questions.

Blessings,
Annie

Thursday, October 11, 2018

Fall-Themed Thanksgiving Card


Annie’s Ink-Lings


Hi friends,

Back again with the third and last fall themed card, but with the sentiment of "Give Thanks."  My idea is to use it as a Thanksgiving greeting card.  For some unknown reason, I've been drawn to wreaths lately, so once again a wreath die was used for the focal point of the card.  I really like how the wreath shows up on the background image.  It was made using the Stampin' Up Hardwood stamp with Walnut Stain Distress Ink on red card stock.  The gold foil berries and the red foil bow give just the right amount of shine to the card.  I hope you like it, too.


1.  Stamp red panel with Walnut Stain Distress Ink and dry with heat gun.
2.  Trim panel to 4” x 5 ¼”.
3.  At the bottom of the panel on the right, stamp the “Give Thanks” sentiment and adhere the panel to card base.
4.  Trim the dark brown acorn so there is only the top portion left.  With the light brown acorn trim off the stem.  Glue the 2 pieces together.
5.  Glue wreath to center of red panel and arrange the elements as follows:  pine branch, fern pieces, gold berries, acorn, and bow.

Card Stock
White Card Base 8 ½ x 5 ½ inches
Red Panel 5 ¼ x 4 inches
Tan, Brown, Dark Brown, and Two Shades of Green
Red and Gold Foil Card Stock

Stamps
Stampin’ Up Hardwood
Impression Obsession Give Thanks (Count Your Blessings Set)

Dies
Cheery Lynn Designs Acorn (Large Leaves #2 set)
Impression Obsession Pine Branch DIE021-N
Memory Box Winterberry Sprig
Stampin’ Up Swirly Scribbles
Tim Holtz Alterations Funky Festive

Ink
Tim Holtz Distress Ink Walnut Stain

Thanks for stopping by again today.
Blessings,
Annie

Tuesday, October 9, 2018

Fall Stitched Alphabet Card


Annie’s Ink-Lings


Hi there card makers, 

Here's the second card from my fall card class.  When I saw the stitched alphabet die, I knew right off it was a must have.  I just love it and look forward to using it over and over for all occasions.  The background paper is from Hobby Lobby.  It caught my eye because of the great color combination.  If you are looking for a quick and easy fall card, then this one is for you.  It can be made in about 15 to 20 minutes even though it looks like it might take longer.  I was thrilled when I found that I had twine in the perfect matching colors.  So read on, and then get started!


Measurements:
Card Base:      5 ½” x 8 ½”
White Panel:   4 1/8” x 5 3/8”
DP Panel:        4” x 5 ¼”
Card Stock:     Four coordinating shades of fall colors for wreath, leaves, and letters
Twine:             Two colors – 12” each – for a bow

Dies
Cottage Cutz Stitched Alphabet #CC-398

Cottage Cutz Build-a-Grapevine Wreath #CCE-064

Assemble:
1.  Adhere the white panel to the card base, followed by the DP panel.
2.  Using 3-D tape, adhere the fall letters to the bottom of the card.
3.  Adhere the wreath centering it between the top of the DP panel and the wreath.
4.  Mold the Leaves and glue to the top of the wreath.
5.  Tie a bow with the two pieces of twine and glue to the top of the wreath.
6.  Glue two tiny acorns on the inside of the card at bottom left.

Stay tuned - the third card is coming up on Thursday.\

Blessings,
Annie


Saturday, October 6, 2018

Mocha Cup Happy Fall Card


Annie’s Ink-Lings


Hello Stampers,

Today's card features my favorite drink - a hot mocha!  I'm thinking I just might have one after I finish this post.  Oh, and a red, white, and blue scone would be delicious to go with it.  If you haven't yet had one of these scones, you don't know what you're missing - raspberries, blue berries, and white chocolate chips - yummy!  Well, back to the subject at hand.  This is a fun little card for fall, but it could easily be used as a fall-themed birthday card, too.  A great idea since I need two birthday cards for October and both people are latte drinkers.  So here's the card - enjoy!


1.  With Walnut Stain Distress Ink stamp mocha cup on brown CS and cut out.  Also stamp
            “happy fall” on light green CS, punch out using SU Classic Label punch.  Cut off the point on
            the left side of the label and punch a 1/8” hole.

2.  String twine through the hole, wrap it around the cup at the top and tie a bow on the right side of 
            the cup.  Glue the twine in place and put a dab of glue on the twine knot.

3.  On the back side of the small decorative piece of CS trace the sleeve template.  Run it through the
            crimping tool then adhere it to the cup.

4.  Adhere the flowers and leaf stems to the cup, and set aside.

5.  Adhere the green panel to the card base and then add the 2 decorative strips at the bottom of the card.  And finally mount the cup onto the card and add sequins.

Card Base:      5 ½” x 8 ½”
Panel:              4” x 5 ¼”
2 DP Strips:    ½” x 4”
Ink:                  Tim Holtz Walnut Distress
 Stamps:           Hero Arts Cup of Coffee K5332; Memory Box Happy Fall B946
Punches:          Stampin' Up Classic Label Punch and a small leafy stem punch

Thanks for visiting my blog today.
Blessings,
Annie

Friday, September 7, 2018

All in White Wedding Card


Annie’s Ink-Lings

Hi there, Card Makers,

I was recently asked to make a wedding card for a friend whose daughter is getting married.  Since I've only made a few wedding cards, I really had to put on my creative thinking cap to design a special card.  This is why card making is so addictive for me - I just love the creative process.  Here is the result.


I used bright white for the card base and Star Dream shimmery paper for the embossed layer which is just a bit off-white.  The sentiment on the front and inside were created with my computer and then printed on white card stock, and cut to size.


In an all-white card, it's kind of hard to see the dimensional aspect of the card.  To give a 3D effect, I glued two wing die cuts together before gluing onto the birds.  The bottom bird is glued to the card, but I used mounting tape to add the top bird.  Then finished it off by adding pearls for the eyes.  I'm pleased with the result and just hope my friend is too.


Measurements and Supplies

White Card Stock
            1. For Card Base 5 ½” x 8 ½” (side fold) and
            2. Computer Generated Sentiments
Star Dream Sparkly Paper 4” x  4 7/8”  Panel for Embossing
Sizzix Embossing Folder:  Lattice #661450
Spellbinders Nestabilities Majestic Elements Frames #S5-160
Stampin’ Up Bird Builder Punch
            1. Punch 2 Birds
            2. Punch 4 Wings to be Glued Together to Make Two Sets of Wings
            3. Punch 4 of the Stem and Leaves
Pearl Embellishments
Glue
Mounting Tape

Wishing you lots of fun for the upcoming weekend.
Blessings,
Annie


Tuesday, September 4, 2018

Smile, You're On Camera!


Annie’s Ink-Lings


Happy Tuesday!

It's a beautiful day again and I plan to be out there as soon as I finish this post.  But first I want to share with you a card I made for a friend of mine who is a "shutterbug" and volunteers taking pictures of our church activities.  He's really a camera expert, so I thought it appropriate and had fun using this little camera stamp on a slide mount frame.  It's such a cute old-fashioned camera.  My friend should really get a kick out it.


The camera embossing folder made a perfect background.


I've had this sentiment stamp in my stash for a long time just waiting for the right opportunity.  I like it so much that I'm going to have to find more ways to use it.

This is a quick and easy card to make so you can pretty much just follow the pictures.  Supplies and measurements are listed below if you are inspired to make one.

Measurements
Grey Card Base  5 ½” x 8 ½”
Burgundy Panel 4” x 5 ¼”
White Strip 1” x 4”
Grey Strip 1 ¼” x 4”
White Panel for Inside Card 4” x 5 ¼”

Supplies
Amy Tangerine:  Duplicate Embossing Folder (Camera) #366741
Verses Rubber Stamps:  Take Another Shot, MC0663-F
Make an Impress:  It’s Birthday Time
Penny Black:  You Make Me Smile #3637B
Stampin’ Up:  Camera stamp
Ephemera:  Slide Frame
Black Dye Ink

Thanks for checking in today.  Hope you like the card.
Blessings
Annie

Tuesday, August 21, 2018

A Heavenly Gate Fold Shutter Card

Annie’s Ink-Lings


Welcome to my blog today,

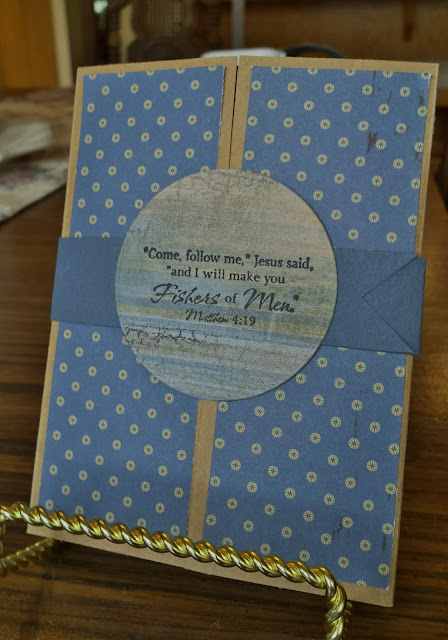
Don't you just love to make cards using fun fold ideas!  I can't get enough of them and am constantly searching for new ideas.  But today I returned to the Gate Fold Shutter Card, which has been around for quite a while.  I had a hankering to use some of my Our Daily Bread Designs stamps and thought this fold would work well with the two sentiments I chose.  So take a look at the pictures and let's get started.

This view shows the card closed with the belly band in place.  It easily slips off the card either up or down.


Here you can see the card with the belly band removed and the shutters just a tiny bit open.  As you open the card all the way, the shutter panels are pulled open to reveal the sentiment.

In order to stand up the card I didn't open the card all the way, so that is why a bit of the sentiment is not showing.

I really enjoyed making this card so I made three of them.  And now some more fun - taking a couple of them to the post office for mailing to a couple of special someones!


Gate Fold Shutter Card – 8 ½ x 5 ½ Card Base

1.         Card Base: 
            a.         Score at 2 1/8 & 6 3/8.
            b.         Fold on score lines.

2.         The two outside panels of decorative paper are 5 ¼ x 1 7/8.
            a.         Adhere the two panels to the front of the card.

3.         The inside center panel is:
            a.         Decorative paper (coordinating design) – 4 x 5 ¼.

4.         The inside mounted panel is:
            a.         Colored card stock – 3 x 5 ½
            b.         Decorative paper – 2 ¾ x 5 ¼
            c.         Adhere them together.
            d.         Using a 2 ½ round punch or die, cut a circle in the middle of the panel.
            e.         Lay aside.

5.         The shutter:  2 pieces of colored card stock 3 ½ x 4.
            a.         At one end score at ½.  This will make the scored off section measure 3 ½ x ½ .
            b.         At the opposite 3 ½ end, make a pencil mark on the edge at the center – 1 ¾ .
            c.         Make another mark 2” above the first mark.
            d.         Cut from each corner end to the 2” mark, making a big “V” shape.
            e.         With the “V” shapes facing each other, fold the ½” scored section
                        toward the back on both pieces.

                                                                                         ß  4”  à
                          ­­­­­­­­­__________________
                          |    .                             |
                          |    .                 ß2”à      | á
                          |1/2 .            .________.| 3 ½ “
                          |    .                             | â
                          |    .                             |
                          |_________________        |

         f.          Place Score Tape on the end of the scored sections.
            g.         Place the folded panels just outside the centerfolds of the card, left and right, align the
                        shutter pieces across the top and bottom, then remove tape and adhere in place.
            h.         On the left shutter piece, snip about ¼” off both points.  The left
                        shutter overlaps the right shutter.

6.         On a 2 ½ x 2 ½ piece of coordinating decorative paper or card stock, stamp a very small
            sentiment.  With the card laying open and the shutter flaps overlapping, you can see the size 
            of the space for a sentiment.

7.         Use 4 dimensionals to stick the panel to the center of the card.
            a.         Be sure to place the dimensionals one at each top corner of panel.
            b.         Adhere the panel over the two shutter pieces.
            c.         Adhere an anchor charm to the right bottom of the panel as shown.
           
8.         Two Side panels inside the card:  Colored Card stock 1 ¼ x 5 1/2
                                                                  Decorative paper 1 x 5 ¼

9.         Belly Band – 1 x 11”
            a.         Place the right end of the band at the front of the card at the right edge.
            b.         On the left edge of the card, fold the band around the back and to the front, placing
                        the end underneath the previous piece of the bank.
            c.         Glue or DS tape in place.
            d.         Cut a notch in the showing right end.

10.       Belly Band Embellishment Option 1:
            a.         Punch or die cut a 2 ½” circle from card stock.
            b.         Stamp a sentiment on it and attach to center of belly band.

Stamps:           Our Daily Bread Design The Waves of the Sea
Die:                 Nesting Circles (Lifestyle Crafts, the 2 ½ “ circle) or you can use a 2 ½ “ punch.

11.       Belly Band Embellishment Option 2:
            a.         Cut one each: 
                                    Light colored card stock 1 ¾ x 2 ¼
                                    Coordinating colored card stock 2 x 2 ½
            b.         Stamp the Fish Net image on the 1 ¾ x 2 ¼ card stock (I used Antique Linen Distress 
                        Ink).
            c.         Distress the edges with Memories Midnight Blue.
            d.         Over stamp with the anchor image using Memories Midnight Blue.
            e.         Layer this piece onto the colored card stock piece.
            f.          Adhere it to the center of the bellyband.

Stamps:           Anchor (dragonflylaser.com); Happy Birthday (Stampin’ Up); Fish Net
                        Background (Our Daily Bread)
Die:                 Nesting Circles (Lifestyle Crafts, the 2 ½ “ circle) or you can use a 2 ½ “ punch.

Hopefully the instructions are clear.  However, if you have a problem, please contact me.  I'm more than happy to answer questions.

Blessings,
Annie

Saturday, August 18, 2018

Daisy Corner Pop-Up Card

Annie’s Ink-Lings


Hello friends,

I just learned this new fold and am excited to share it with you.  Some call it the Daisy Corner Pop-Up Card and others call it the Daisy Corner Flip-Down Card.  You can choose which name you like best.  😊  The directions seem a bit lengthy but the card is quite easy to make and really doesn't take that long to assemble once you get all the pieces cut.  I hope you will give it a try as it is definitely a fun fold.


The card base is 8” x 8” white card stock.
Score on two sides at 4”
On the upper right quadrant pencil in the words “Inside of Card.”
Fold the card base both ways at the 4” score lines, using a bone folder.

On the lower right quadrant, score from the bottom point to the center of the card.
At ¼” on the left side of the score line, cut away the rest of that section.
Fold the ¼” strip upward and use bone folder
* * *
                                                                                             
 Turn the card base over and place an “X” in the center of the upper right quadrant.  This is where you adhere the decorative paper panel.
Cut a 3 ¾”  by 3 ¾” decorative paper panel.  On the back of the panel, use the tape runner on all four sides plus across the middle three of times.  Adhere to the card base over the “X.”
* * *


Place a 2 ¾” circle die in the center of the decorative paper panel.  Hold in place with a piece of Washi Tape.  
* * *


In order for you to use your Big Shot, fold the left portion of the card base over the die and decorative paper panel of the card base.  Run through a Big Shot.  Don’t be concerned about the indentation that shows on the opposite side as it will be covered up.
* * *

 
Cut two more 3 ¾” x 3 ¾” decorative paper panels; one like the front panel and one that coordinates with it.  Adhere those in place.
* * *

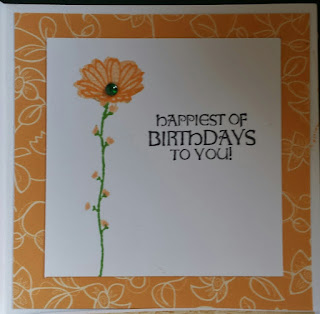
 On a 3” x 3” square of white card stock, stamp a flower and a sentiment.  For the flower, I used the Stampin’ Up set called Daisy Delight and Distress Inks, stamping the flower base with Dried Marigold and the outline stamp with Carved Pumpkin, the stem with Mowed Lawn, the flower buds with Dried Marigold. Use black ink for the sentiment.   Adhere the panel over the decorative paper on the upper right quadrant.
* * *


With the inside of the card facing up, fold the lower half of the card up.  Add strong tape to the ¼” diagonal strip and remove the protective strip.  While holding the right side steady, fold the left side of the card over the right side, making sure that the ¼” strip is securely adhered.  
* * *


When you open the card, the flip panel will slide down.
* * *


Using the original circle die and another that is just a bit larger, cut out  a round frame from white card stock.  Adhere the circle frame to the front of the card around the round cut out.
* * *
Stamp two Daisies from the Stampin’ Up Daisy Delight stamp set using Carved Pumpkin. Lightly color the Daisies with a Fantastix Coloring Brush using the Dried Marigold.  Punch them out using the Stampin’ Up Daisy punch.  Slightly mold the petals of both Daisies.  Use mounting tape to adhere them together.  Glue the assembled Daisy to the card, centering it in the circle.  Add a jewel on the center of the punched daisy and one on the small stamped Daisy for the finishing touch.

If you need help with the directions, please let me know.
Blessings,
Annie