
Friday, July 26, 2019

Pink Poppy Thanks


Annie’s Ink-Lings


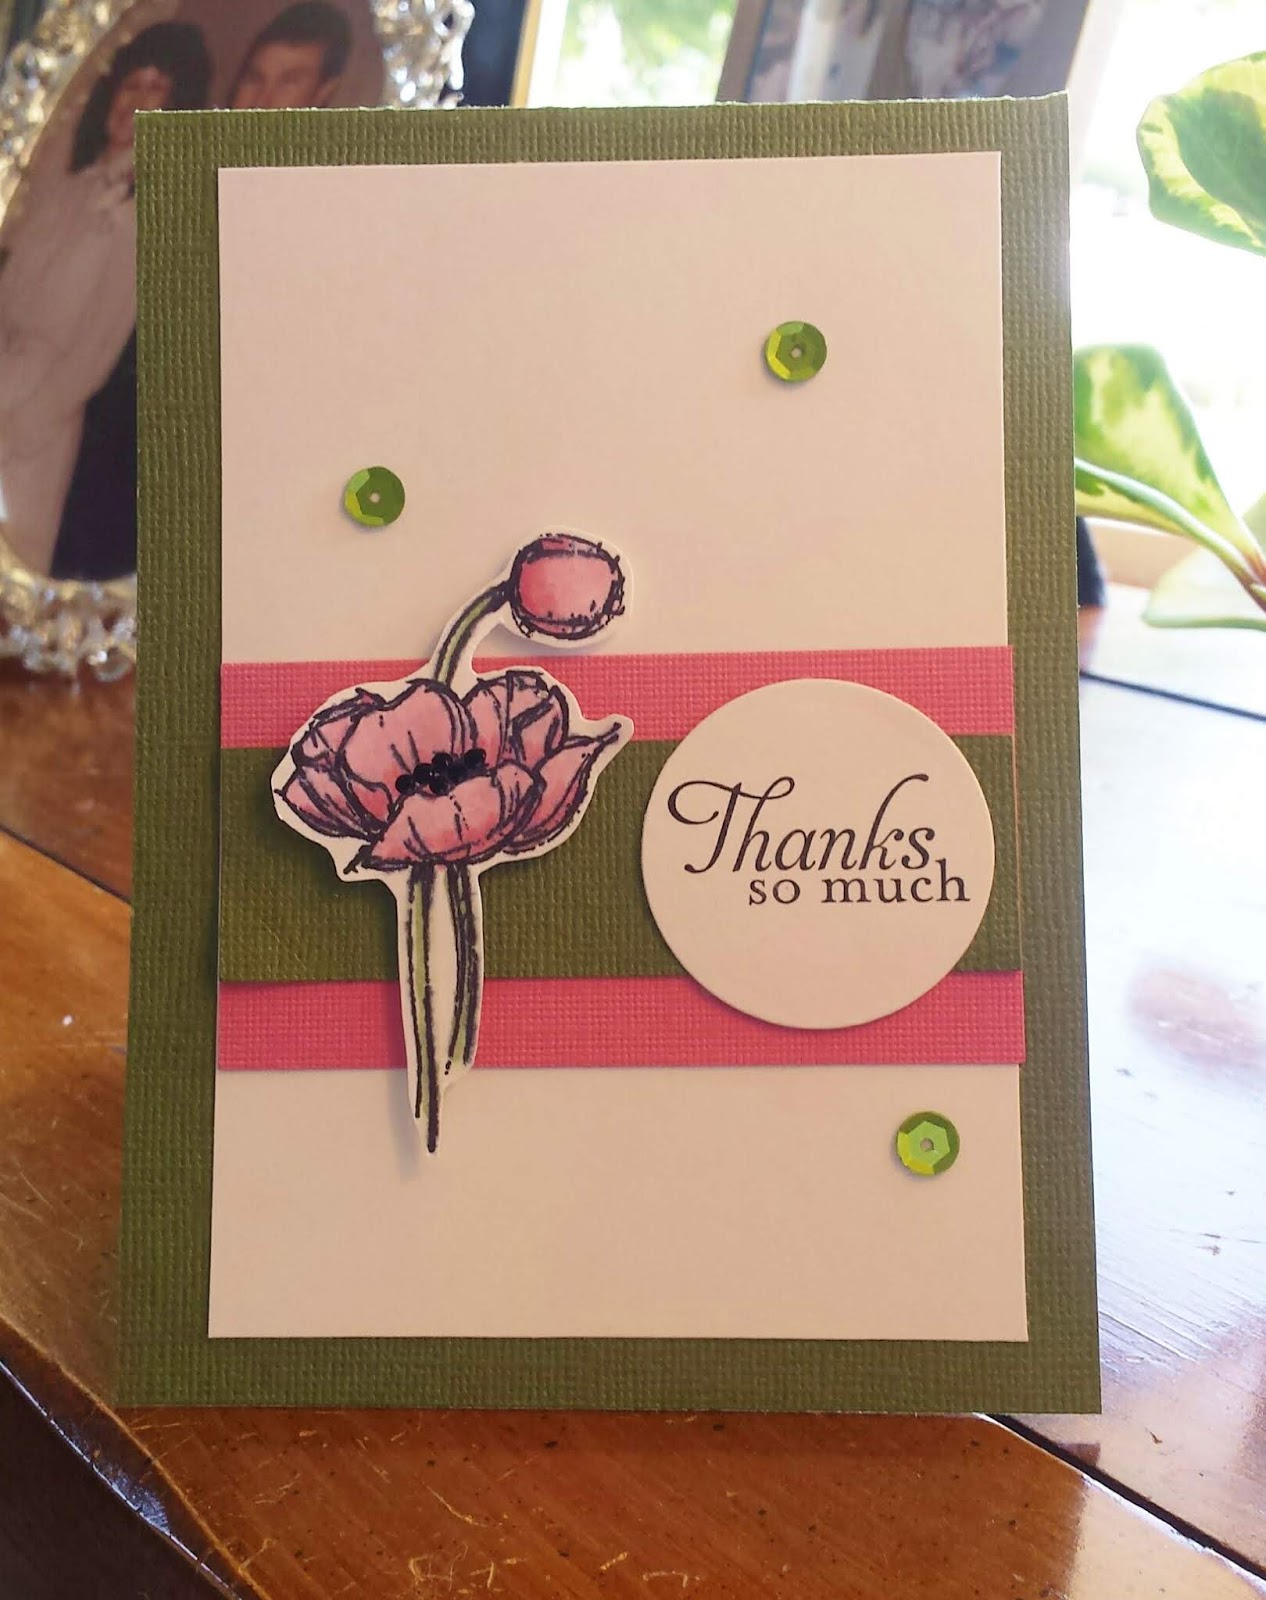
I don't know what it is about poppies, but for some reason when I look at them they give me a "happy heart" boost.  Truly, it is really hard for me to resist purchasing another poppy stamp.  I have a friend who feels the same way about irises.  This sweet poppy is from the Simply Sketched stamp set from Stampin' Up.  After stamping the poppies on white card stock using a Ranger Archieval Ink pad, I heat set the ink to avoid any smearing of the black ink.  I used Copic Sketch Markers to color the poppies and finished the one off by putting small dots of black Enamel Accents in the center.  I fussy cut the image and adhered it to the card with foam tape for the 3-D effect that I like.  A few matching sequins in a somewhat triangular pattern perfectly tied everything together.

Measurements
Top-folding Card Base  11 x 4 inches
White Panel  5 x 3 3/8 inches
Pink Panel 3 3/8 x 1 3/4 inches
Green Panel 3 3/8 x 1 inch

Supplies
Simply Sketched stamp set from Stampin' Up
Ranger Archieval Ink Pad
Copic Sketch Markers #R81 Rose Pink, R85 Rose Red, and G94 Grayish Olive
Ranger Enamel Accents - Black Tie

This is an amazingly quick and easy card.  I'm planning on making one or two more of this style but using different flower stamps.  Thank you for letting me share with you today.

Blessings,
Annie


Wednesday, July 24, 2019

Paper Storage Tip


Annie’s Ink-Lings


I was just cleaning up my work table and putting things back in place, making ready for my next stamping adventure.  The thought came to me to share with you one of the ways that I store my decorative paper and its offcuts. When I have one or two sheets left of some decorative paper plus the offcuts, I slip all of it into a clear sheet protector.  Keeping the offcuts often saves me from having to ruin a whole sheet for just a small panel.  I also do this for 12x12 DP's. I just slip the protector sheet into my paper storage rack.  Since the protector sheet is clear, it is easy to see the design.  


Hope you find this a helpful tip.

Blessings,
Annie

Monday, July 22, 2019

Fish are Jumping Over This Fancy Fold Card


Annie’s Ink-Lings


Are you up for a challenge?  I have to say that this card was a challenge for me, but I'm oh so glad that I didn't pass it by.  I have no idea of the name of the fold, so if anyone has a glue, please fill me in.  Cathy Derouche shared her pattern with me and she didn't have a name for it either.   So, for tracking purposes I'm going to call it a Triple Fold Shutter Card.  Scoring and cutting the base was actually easy.  The challenge was choosing colors, coordinating decorative paper, stamping and die cutting all the images and then coloring them with PrismaColor pencils, creating the fishing scene, and deciding on the layout.  Yes, there are a lot of steps.  But don't let me scare you off - I loved every minute of it.  I adhered the fishing scene panel with  foam tape to give it dimension.   All the other images and the die Happy Birthday were adhered with Aleene's Quick Dry Tacky Glue.  My pastor is a fisherman and I designed this card just for him.  I'm pretty sure he's going to like it.  Let me know what you think.


Here is the scoring and cutting pattern:


Card Stock and Paper Measurements
Blue Card Base 12" x 6", scored at 4" and 8".
Large Black Panel 5 3/4" x 4 3/4"
Designer Paper Panel 5 1/2" x 3 1/2"
Large White Panel 5 1/4" x 3 1/4"
Scene Panel 4" x 2 3/4"

These are the paper sizes for the four rectangle folds:
   Black 3 3/4" x 1 1/4"
   Designer Paper 3 3/4" x 1 1/8"

Supplies
Ink Pads:  Waterproof Black Ink, Memories Midnight Blue Dye Ink, Salty Ocean Distress Ink
PrismaColor Pencils:  PC923 Scarlet Lake,PC904 Light Ceruean Blue, PC940 Sable, PC951
          Metalic Copper, PC949 Metalic Silver
Aleene's Quick Dry Tacky Glue
Tape Runner
3-D Foam Tape
Stampin' Up Best Catch Stamp set and dies
Stampin' Up High Tide Stamp set - just the water stamp
Die-Versions Happy Birthday Die
Sizzix (Doodlebug Design/Hampton Art) Stamp & Die-cut - the small frame

I would love to see your card if you take the challenge, so please share.

Blessings,
Annie

Sunday, July 21, 2019

Bible Journaling & Illustrating - 1 Thessalonians 5:24

Annie’s Ink-Lings


Journaling has been around for a long time, but for some reason it didn't appeal to me.  It seemed to me that it was like keeping a diary and I was never any good at that.  However, when I discovered bible illustrating, it opened up a whole new avenue of using my creativity and my love of studying the bible.  I found that it was a new way to study my bible and connect with God.  It naturally followed that I wanted to search out the true meaning of the bible verses that I was illustrating, plus the context, the background, the customs of the times.  Likewise, it naturally followed that I wanted to write down what I was learning from my studies and, of course, this led to journaling.  I very much would like to share with you my faith and creative journey.  I will be posting pages from both my Inspire Bible and pages that I create and keep in a 3-ring binder.   If you are inspired to take up bible illustrating and journaling, these are just a few of the benefits that will be yours.

                                              1.  Worship and praise God in a new way
                                              2.  Be encouraged to read your bible
                                              3.  Learn and share the truths of scripture
                                              4.  Helps you to memorize scripture
                                              5.  For spiritual growth
                                              6.  Gives pause for meditation
                                              7.  For fun and relaxation

For this week's bible verse study, I'm sharing a verse that I  did in November 2018.

I Thessalonians 5:24


 Our sanctification depends on God and He has promised to sanctify His followers.  If He has begun a work of grace in our hearts, we may depend on His faithfulness to complete it.  His faithfulness binds Him to fulfill His promises; therefore He will do it.

I am thankful that I can always count on God's word - it is true and unchanging - just like Him.

Blessings,
Annie


Wednesday, July 17, 2019

Only the River Runs Free - Christian Book Review

Annie’s Ink-Lings


Only the River Runs Free, Book 1 of 4 of The Galway Chronicles
by Bodie and Brock Thoene

I am a big fan of  the authors Bodie and Brock Thoene's (pronounced Tay-Nee) a Christian husband-wife team. Previously, I have read the Zion Chronicles and Zion Covenant, both of which are in our church library.  I recently began reading The Galway Chronicles, which is also in our library. The Thoenes are known to be accurate in the historical content of their books and are amazingly gifted in bringing forth characters and developing them.   The Galway Chronicles is an awesome series of four books about the persecution of the Irish by the British.  In an endeavor to eliminate all influences of Irish heritage, the English forced an intellectual and spiritual bondage on Ireland as well as a bitter physical bondage of servitude.  Freedom had become so rare that the Irish coined a saying, "In Ireland only the rivers run free."

And, of course, it was this clash of Protestantism and Catholicism, English and Irish, that has become Ireland's story.

This is a review of the first book of the series. 

The setting for the series is Ballynockanor, Ireland, in 1841, under the rule of the British.  Queen Victoria was on the throne in England.  Some of the Irish turned on their own during this time to avoid the wrath of the British.  The story is woven with mystery and intrigue, love and romance, sin and forgiveness, and much Irish history, scenery, and folklore.

Only the River Runs Free is aptly titled, for no one, not even the land of Ireland itself, is free in this book. Joseph Connor Burke is a lost man.  Cheated out of his inheritance as the Burke after his father was murdered, he has lived a silent, hidden life apart from his native Ballynockanor.  As would be expected, Joseph has also been waiting for an opportunity to right old wrongs, to free himself from his past, and to step into the role he was destined to fill.

The Donovans are a proud, Irish family.  A tragic fire had taken the life of Mrs. Donovan, her youngest child, and the young husband of her oldest child Kate.  Mr. Donovan, still heartbroken over the deaths of his wife and youngest child, is bound to the bottle, while Kate, scarred from the fire, which still holds her heart in bondage, believes her beauty has been marred and she will never be loved again.  She is still beautiful, however, to Joseph, who is beginning to question his call to the priesthood.

This is more than Joseph's and Kate's story, however, and the other Donovans are just as engaging. The setting is well done and almost a character in itself. You will smell the green of Ireland. You will feel the land kick against English suppression. The Thoenes do a great job of meshing the political and religious issues into the plot without overwhelming the reader with details. While the characters are finding their way to freedom, so are the Irish people.

Only the River Runs Free is a highly recommended series by me!

Blessings,
Annie


Friday, July 12, 2019

Coming Up Roses on a Tri-Fold Pocket Card

Annie’s Ink-Lings


Hello Paper Crafters,

I'm sure you have had this experience a time or two.  I went to Hobby Lobby with the intent of purchasing one, I say again one, item that I needed.  With the sought-after item in hand, I found myself strolling down the scrapbook paper isle.  Imagine that!  My eyes caught sight of a paper with a  beautiful rose pattern and sitting enticingly next to it was a perfectly coordinating burlap paper.  Sometimes my mind seems to have a mind of its own, and in this case it told me that these papers were absolutely perfect for a Tri-Fold Pocket card that I wanted to make.  The soft rose paper is so feminine and I love the colors.  


Once home in my studio, happily I found that I had a 3-step rose stamp that matched the roses on the paper quite well.  I used a small panel of vellum as an overlay on the scrapbook paper on the front of the card and placed a few pink butterflies above the rose.  The pocket is trimmed with a lovely border and accented with pearls.  


Tri-Fold Pocket Card ­

Pale Pink Card Base 12” x 5 ½”, scored at 4” and 8”

First Panel
            Pink Card Stock 3 ¾ ” x 5 ¼”
            Designer Paper 3 ½ ” x 5”
            Velum Sheet 2 7/8 x 4 ¼”

Second Panel
            Light Burlap Designer Paper 3 3/4” x 5 ¼”; adhere and cover entire second panel
            Pale Pink Card Stock 4” x 2 ½” – for pocket; adhere 3 sides to bottom of second panel
            Light Burlap Designer Paper 3 3/4 x 2 ¼”; adhere to pocket layer

Third Panel
            Pink Card Stock 3 ¾” x 5 ¼”
            Designer Paper 3 5/8” x 5”

Insert Panel
  3 ¼” x 4 ¼“
                                                   
Pink Scalloped Border
¾” x  3 3/4" 


I hope you have enjoyed today's post.  I know I have certainly enjoyed sharing with you.

Blessings,
Annie

Thursday, July 11, 2019

Lady in Red

Annie’s Ink-Lings


I've dreamed of visiting Venice, but the reality is that the closest I'll ever get is with the Venice background stamp I've used for my Lady in Red card.  I love how her bright red dress and umbrella just pop on that background.   I saw a similar card on Pinterest and decided that this was exactly what I needed to make for one of my friends at church who was having a health issue.  She was a bit discouraged and I thought perhaps this would be an encouragement to her that better days were to come.  This is a clean and simple card with just a bit of fussy cutting.  The design can be used for an assortment of occasions just by changing the sentiment.  So take a look and then give it a go.


Measurements and Directions

White Card Base  8 ½ x 5 ½, folded
Black Panels  5 ¼ x 4
                         3 ¾ x 3 ¼
White Panels  5 x 3 ¾
                        3 ½ x 3
White Scrap

1.  Stamp background:  ink background stamp with black ink, lay white panel over image, cover with scrap sheet, use brayer to roll back and forth over image.

2.  Stamp umbrella woman on white panel using black waterproof ink.  Color dress and umbrella with Dark Red Copic marker.  FOR HAIR – just dot a few times using the black Copic marker.    Don’t color in solid!  Fussy cut image.

3.  Stamp sentiment with black ink onto white scrap and punch out with oval punch.

4.  Adhere the first black and white panels to the card base with tape runner.  Adhere the second 
black and white panels together; center and adhere towards the top of the card.

5.  Use 3-D to mount woman with umbrella on the left bottom half of the card.

6.  Glue top half of sentiment oval to bottom right of background image and use a piece of 3-D tape for the bottom half of the oval.

Paper Trimmer
Fussy Cut Scissors
Glue Bottle
Tape Runner
3-D Tape
Archieval Black Ink (waterproof)
Copic Markers - #R89 Dark Red and #100 Black
Embossing Arts Venice Background stamp
Stampin’ Up Beautiful You stamp set

Now it's your turn - happy stamping!

Blessings,
Annie

Wednesday, July 10, 2019

Flower Card with a Slide-Out Panel

Annie’s Ink-Lings


After a long hiatus I'm finally able to get back to posting on my blog.  Today I'm sharing a card I designed for this week's stamping class.  The red, white, and black color combination is quite striking and is very appealing to the eye.   There is a panel that slides completely out of the card - perfect for stamping a sentiment or writing a message.  This is one of those cards that is really easier to make than it looks.


Measurements and Directions

Black Card Base 4” x 12”  (you can get 3 card bases from a 12” x 12” sheet of card stock)
            1.  Score at 3 ¼”  and 8 ¾”
            2.  Make a pencil mark at 2” along the 4” side, at both ends.
            3.  Make a diagonal cut from the 2” pencil mark to the score line. Repeat on the other side and
                        at the other end.
            4.  Fold on the score lines. 
            5.  Apply a little adhesive to one of the points.
            6.  Fold and secure over the other end.  The points will overlap and lay flat.

Card Front
            1.  Red card stock 3” x 3 ½”
            2.  White card stock 2 ¾” x 3 ¼”
            3.  Stamp sentiment with black ink on the white card panel in the upper left-hand corner.
            4.  Layer it onto the small red panel, center and adhere the assembly to the card base.

Inner Card Panel
            1.  Black card stock 4” x 5 3/8”         )
            2.  Red card stock 3 ¾” x 5 3/16”      )  Layer the panels.
            3.  White card stock 3 ½” x 5”           )

Flower
            1.  Stamp flower with black ink pad onto red card stock, cut out, sponge petals with
                        Memories Port Red ink pad, and curl the petal tips.
            2.  Layer with 3-D tape.
            3.  Fill center of flower with yellow Flower Soft.
            4.  Using 3-D tape, adhere the flower to the bottom right side of the white card front.

Leaves
            1.  Stamp 3 leaves with Distress Ink Peeled Paint ink pad onto lighter shade of olive green card
                        stock, cut out, and scrunch leaves.
            2.  Adhere leaves with glue as shown in sample.

Border
            1.  Cut a ¾” strip from black and white stripe card stock or DP.
            2.  Make a decorative edge using a small scalloped border punch.
            3.  Use Score Tape to attach borders to card front as shown in sample.

Supplies:                                                         Card Stock:
            Paper Trimmer                                               Black
            Large Martha                                                  Red
            Fussy Cut Scissors                                         White
            Pencil and Ruler                                            Light Olive Green
            Glue Bottle                                                     Black and White Stripe
            ¼’ Score Tape
            Tape Runner
            3-D Tape
            Small Scallop Border Punch

I hope you've enjoyed today's card.  Another post will be coming very soon.

Blessings,
Annie


Wednesday, December 26, 2018

Happy New Deer Standing Box Card

Annie’s Ink-Lings

Hello again,

I decided to take a break from Christmas and make one of another category.  Today's card is a happy new year card.  I can't recall ever making one before and I certainly don't know why.  Maybe because it is so close after Christmas.  Anyway, I bought this stamp a couple of years ago and I've never used it.  Actually, I have a number of things that I've purchased and haven't yet used.  The sad truth comes out!

For this card I decided to used the Standing Box Card fold again.  I made one about a month or two ago and posted it on my blog.

It was fun to make and I think it looks like a happy little card.  Just love the little deer.


First Section
Red Card Base  4 x 11 inches (on 11 inch side score @ ½, 2, 4, 5 ½ inches)
Tan Card Stock  3 ¾ x 5 ¼ inches
DSP  3 ½ x 5 inches

Second Section
Tan Card Stock  2 ¾ x 5 ½ inches (score @ ½, and 2 inches on long side)
Red Card Stock  2 ½ x 3 ¼ inches
DSP  2 ¼ x 3 inches

Top of Box Pieces
Red Card Stock  1 ¼ x 2 ½ inches
DSP 1 x 2 ¼ inches

Sentiment
Scrap of Tan Card Stock
Black Ink Pad
Happy New Deer by Inky Antics D3-0021-D
Stampin’ Up Small Scallop Oval Punch

Embellishments
EK Punch – Deer Head with Antlers
Impression Obsession Small Deer #DIE117-C
11 inches of Red Twine

Assemble First Section
1.  Score the long red panel and adhere the two layers to the 5 ½ inch section of the scored panel.  This is the top of the card.

2.  Fold up each of the scored sections and adhere the ½ inch section to the card front.

Assemble Section Section
3.  Score the tan panel, fold and adhere the two layers for each of the larger sections.  Adhere the strip to the red box and to the card front.

4.  Stamp sentiment on tan scrap piece and punch out.  Stick on a little red jewel.

5.  Either tie the red twine around one antler and make a bow or tie the bow and glue on to the antler.  Mount the antler and glue the sentiment piece to the front of the box section.

6.  Adhere the small deer die cuts to the top of the card a little to the right.

Wishing you many blessings in the new year,
Annie

Thursday, December 20, 2018

Go Tell It on the Mountain . . .

Hello fellow card makers!

I really like to make window cards.  Sometimes I wish I could put all the ideas in my head into one design.  I think that that will never happen, however.  It would have to be a huge card.  That thought makes me chuckle!  Well, I finally decided on the design, the paper, and all the dies that I would use.  Wow!  I used a bunch of dies for this one, but it was fun.  Here is my finished card.


Card Base 9 1/4 x 6 inches white card stock

Dies
Spellbinders Shapeabilities:  Layer Poinsettia
Penny Black: Mountain
Impression Obsession:  Tiny Flowers
Impression Obsession:  Leaves and Stems
Impression Obsession:  Foliage
Heartfelt Creations:  Window Box Elements
Poppystamps:  Grand Madison Window
Sizzix/Tim Holtz:  Funky Festive

Stamp
Penny Black:  He is Born

Computer Generated
The Christmas Tree and the Wall Clock, printed on card stock and fussy cut.

Additional Items
Black Enamel Accents for the blue flower centers
Buttermilk Nuvo Crystal Drops for the poinsettia
Star Dust Stickles for the Christmas Tree

Thanks for reading my post.

Blessings,
Ann

Saturday, December 15, 2018

Tangled Tinsel

Hello on this sunny afternoon!

It has been warm enough for a couple of days to melt the snow and today it almost looks like spring.  I'm really surprised to see flowers still blooming out in the flower beds.  I'm still working on my Christmas cards for this year.  Just finished up this cute little card using a stamp that I've had for ages.  I hope it brings a smile to your face.


The stamp is by Stampendous called Delightful Christmas UM005.  The sentiment is Tinsel in a Tangle #IB-JS-161 by Unity Stamp Co.  I used a Christmas tree die from the set by Cottage Cutz called Rustic Sign & Trees CC4x6-039.  PrismaColor pencils for all the coloring.  What fun making this card and now three more of them to do.

May your day be blessed,
Annie

Friday, December 14, 2018

The Traveling Wise Men

Annie’s Ink-Lings


Greetings,

Even though the three Magi didn't find Jesus until after He had grown to several years old, many Christmas songs depicted them to have arrived at the manger where He was born.  So I find it really hard to get that picture out of my mind.  How about you?  LOL  However, the Magi (who really weren't kings) did find the house where Joseph, Mary, and Jesus were living in Bethlehem.  I guess that is why I like this die so much -- it shows them on their way to Bethlehem, following the beautiful star that had appeared in the sky on the night of the birth of Jesus.  What a glorious night that was!  What a joy to make this card.


White Card Base 8 1/2 x 5 1/2 inches
Star Decorative Paper 5 3/5 x 4 1/8 inches
Teal Strip 5 3/8 x 3/4 inches
White Sparkle Paper

Tim Holtz Wise Men Die #663127 (which includes the star die)
Stampin' Up Label Punches
Rubber Stampede "Merry Christmas" Stamp

I hope you like it and want to make one.

Blessings,
Annie


Thursday, December 13, 2018

Peace Love Joy at Christmas

Annie’s Ink-Lings


Hi to all,

This afternoon I'm sharing the second Christmas card from one of my classes.  Another quick and easy one that features a couple of dies that I really like -- the Sizzix Swirling Stars and Penny Black Peace, Love, Joy.  I also used a scalloped frame from the Die-namics My Favorite Things.  I see all three of these die sets as being really versatile, and not for Christmas only.  See what you think!

Card Base 8 1/2 x 5 1/2 inches
Red Panel 5 3/8 x 4 1/8 inches
White panel 5 1/4 x 4 inches

Red Frame 2 5/8 inch square
White Panel 2 1/4 inch square

Finished off with a sparkling jewel in the middle of the large star.

I wish you all a peaceful, joyful Christmas with lots of love!

Blessings,
Annie

Wednesday, December 12, 2018

Worship the King


Annie’s Ink-Lings

Hi there fellow card makers,

I haven't posted anything for a while because I've been so busy preparing for two card making classes.  Now that they are over with, I can share some of what we have been making.  The stamp I used on this Christmas card is one of my very favorite Christmas stamps.  Even though it is of the wise men seeking Jesus thousands of years ago, it reminds me of how we are still seeking Him today.  I am so very thankful that God called me and then I found Jesus and He lives in my heart.  Every Christmas is a joyful Christmas because of Him!

Measurements and directions are below the picture.


1.  Red card base (8 1/2 x 5 1/2) folded.

2. Adhere a black panel 5 1/4 x 4 1/8 inches onto the card front.

3.  Emboss a 5 1/4 x 4 inch panel using the Cuttlebug Kitchen Weave embossing folder.  

4.  Cut a 5 inch piece of ribbon and a 4 inch piece of ribbon.  Tape the ends of the 5 inch ribbon to the back of the embossed panel, and adhere it to the black panel.

5.  Stamp the wise men (Inkadinkado #99624-DD) on the upper half of a 3 1/2 x 2 1/4 inch white panel that has been die cut with smallest frame of the Penny Black Elegant Stitching Frame set.

6.  Stamp the "Worship the King" sentiment on the lower left side, and then layer it to 3 5/8 x 2 3/8 inch red panel. 

7.  Using 3-D tape, mount this assembly over the ribbon toward the lower left side of the card.

8.  Taking the 4 inch piece of ribbon, slide it under the vertical piece of ribbon at the top of this small panel and then tie one knot.  Trim ends of ribbon.  You can use a bit of glue or a glue dot below the knot to hold the ribbon in place.

9.  Add 3 red jewels to the right side of the mounted panel.

10.  Stamp the inside sentiment on a 5 1/4 x 4 inch white panel and adhere inside of the card.

Happy stamping and may God bless you,Annie 


Monday, October 15, 2018

Fall Fancy Fold - Standing Box Card


Annie’s Ink-Lings


Hello everyone,

I've been wanting to make this fancy fold card for a long time.  This morning I decided today is the day!  I was surprised at how quickly it came together once I had decided on colors, designer paper, etc.  It's a fun and quick little card that takes hardly any supplies.  Actually, if you keep your scraps like I do, it would be a great card for using them up.  If you give it a try, send me a picture of your creation.  Would love to see it.

Measurements


  • Blue Card Base: 4 x 11″ 
  • On 11″ side score @ 1/2, 2, 4, 5-1/2 

  • Green Layers: 3-3/4 x 5-1/4″ (you need 2 of these, one for the back of the card)
  • Designer Paper Layer: 3-1/2 x 5″ (you need 2 of these, one for the back of the card)

  • Green Front Panel: 2-3/4 x 5-1/2″ scored @ 1/2, 2″ on long side
  • Blue Layer: 2-1/2 x 3-1/4″ 
  • Designer Paper Layer: 2-1/4 x 3″
  • White Layer:   1-3/4 x 2"
  • Green Strips:  1/4 x 4" (you need 2 of these)
I used Copic markers to color the pumpkin.  Let me know if you have questions.

Blessings,
Annie

Thursday, October 11, 2018

Fall-Themed Thanksgiving Card


Annie’s Ink-Lings


Hi friends,

Back again with the third and last fall themed card, but with the sentiment of "Give Thanks."  My idea is to use it as a Thanksgiving greeting card.  For some unknown reason, I've been drawn to wreaths lately, so once again a wreath die was used for the focal point of the card.  I really like how the wreath shows up on the background image.  It was made using the Stampin' Up Hardwood stamp with Walnut Stain Distress Ink on red card stock.  The gold foil berries and the red foil bow give just the right amount of shine to the card.  I hope you like it, too.


1.  Stamp red panel with Walnut Stain Distress Ink and dry with heat gun.
2.  Trim panel to 4” x 5 ¼”.
3.  At the bottom of the panel on the right, stamp the “Give Thanks” sentiment and adhere the panel to card base.
4.  Trim the dark brown acorn so there is only the top portion left.  With the light brown acorn trim off the stem.  Glue the 2 pieces together.
5.  Glue wreath to center of red panel and arrange the elements as follows:  pine branch, fern pieces, gold berries, acorn, and bow.

Card Stock
White Card Base 8 ½ x 5 ½ inches
Red Panel 5 ¼ x 4 inches
Tan, Brown, Dark Brown, and Two Shades of Green
Red and Gold Foil Card Stock

Stamps
Stampin’ Up Hardwood
Impression Obsession Give Thanks (Count Your Blessings Set)

Dies
Cheery Lynn Designs Acorn (Large Leaves #2 set)
Impression Obsession Pine Branch DIE021-N
Memory Box Winterberry Sprig
Stampin’ Up Swirly Scribbles
Tim Holtz Alterations Funky Festive

Ink
Tim Holtz Distress Ink Walnut Stain

Thanks for stopping by again today.
Blessings,
Annie

Tuesday, October 9, 2018

Fall Stitched Alphabet Card


Annie’s Ink-Lings


Hi there card makers, 

Here's the second card from my fall card class.  When I saw the stitched alphabet die, I knew right off it was a must have.  I just love it and look forward to using it over and over for all occasions.  The background paper is from Hobby Lobby.  It caught my eye because of the great color combination.  If you are looking for a quick and easy fall card, then this one is for you.  It can be made in about 15 to 20 minutes even though it looks like it might take longer.  I was thrilled when I found that I had twine in the perfect matching colors.  So read on, and then get started!


Measurements:
Card Base:      5 ½” x 8 ½”
White Panel:   4 1/8” x 5 3/8”
DP Panel:        4” x 5 ¼”
Card Stock:     Four coordinating shades of fall colors for wreath, leaves, and letters
Twine:             Two colors – 12” each – for a bow

Dies
Cottage Cutz Stitched Alphabet #CC-398

Cottage Cutz Build-a-Grapevine Wreath #CCE-064

Assemble:
1.  Adhere the white panel to the card base, followed by the DP panel.
2.  Using 3-D tape, adhere the fall letters to the bottom of the card.
3.  Adhere the wreath centering it between the top of the DP panel and the wreath.
4.  Mold the Leaves and glue to the top of the wreath.
5.  Tie a bow with the two pieces of twine and glue to the top of the wreath.
6.  Glue two tiny acorns on the inside of the card at bottom left.

Stay tuned - the third card is coming up on Thursday.\

Blessings,
Annie


Saturday, October 6, 2018

Mocha Cup Happy Fall Card


Annie’s Ink-Lings


Hello Stampers,

Today's card features my favorite drink - a hot mocha!  I'm thinking I just might have one after I finish this post.  Oh, and a red, white, and blue scone would be delicious to go with it.  If you haven't yet had one of these scones, you don't know what you're missing - raspberries, blue berries, and white chocolate chips - yummy!  Well, back to the subject at hand.  This is a fun little card for fall, but it could easily be used as a fall-themed birthday card, too.  A great idea since I need two birthday cards for October and both people are latte drinkers.  So here's the card - enjoy!


1.  With Walnut Stain Distress Ink stamp mocha cup on brown CS and cut out.  Also stamp
            “happy fall” on light green CS, punch out using SU Classic Label punch.  Cut off the point on
            the left side of the label and punch a 1/8” hole.

2.  String twine through the hole, wrap it around the cup at the top and tie a bow on the right side of 
            the cup.  Glue the twine in place and put a dab of glue on the twine knot.

3.  On the back side of the small decorative piece of CS trace the sleeve template.  Run it through the
            crimping tool then adhere it to the cup.

4.  Adhere the flowers and leaf stems to the cup, and set aside.

5.  Adhere the green panel to the card base and then add the 2 decorative strips at the bottom of the card.  And finally mount the cup onto the card and add sequins.

Card Base:      5 ½” x 8 ½”
Panel:              4” x 5 ¼”
2 DP Strips:    ½” x 4”
Ink:                  Tim Holtz Walnut Distress
 Stamps:           Hero Arts Cup of Coffee K5332; Memory Box Happy Fall B946
Punches:          Stampin' Up Classic Label Punch and a small leafy stem punch

Thanks for visiting my blog today.
Blessings,
Annie